Let’s See How We Like the Spellbinders Glimmer System
Introduction to the Spellbinders Glimmer System
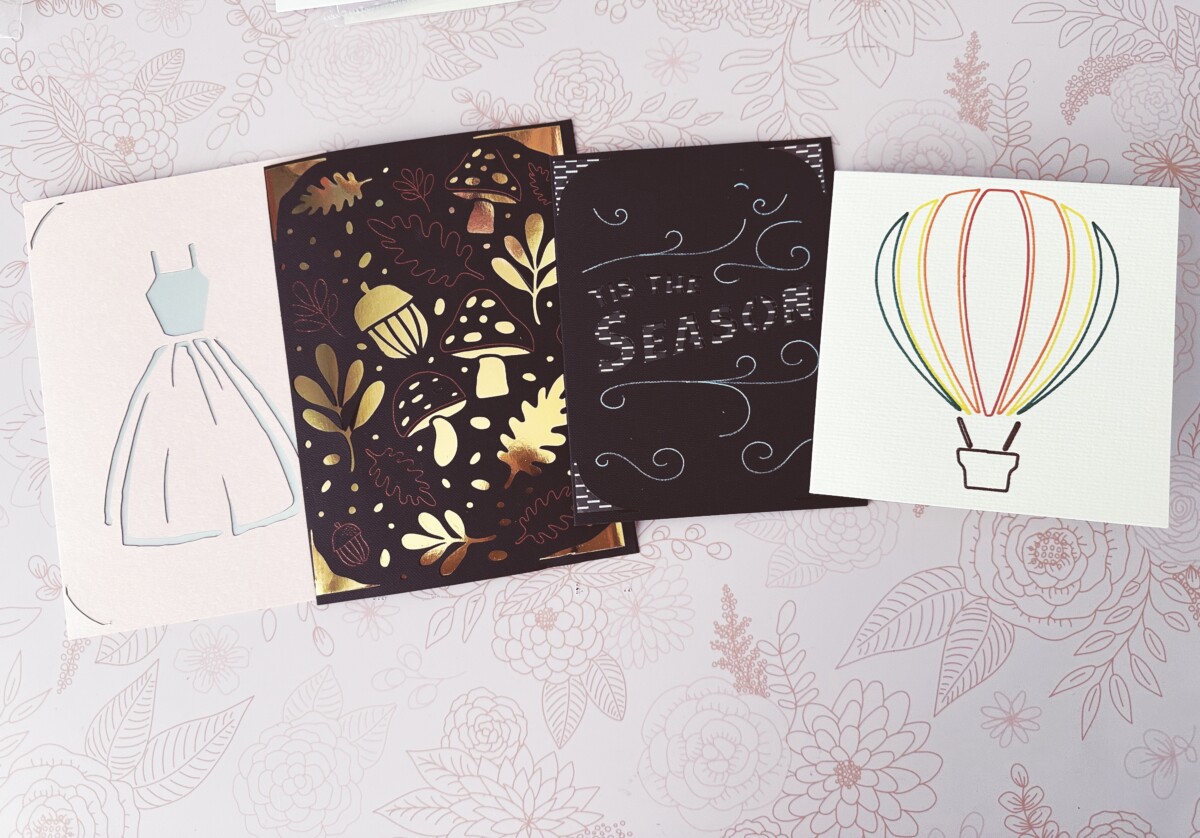
Hello again crafters! Are you ready to start foiling your projects? Maybe you already are foiling, but not with the Spellbinders Glimmer System. For either beginners or veteran ‘foilers’, you will fall in love with this Glimmer System! I fell in love the first time I used it & saw the results I got! In this blog post, we’ll be reviewing features, results, tips & so on.
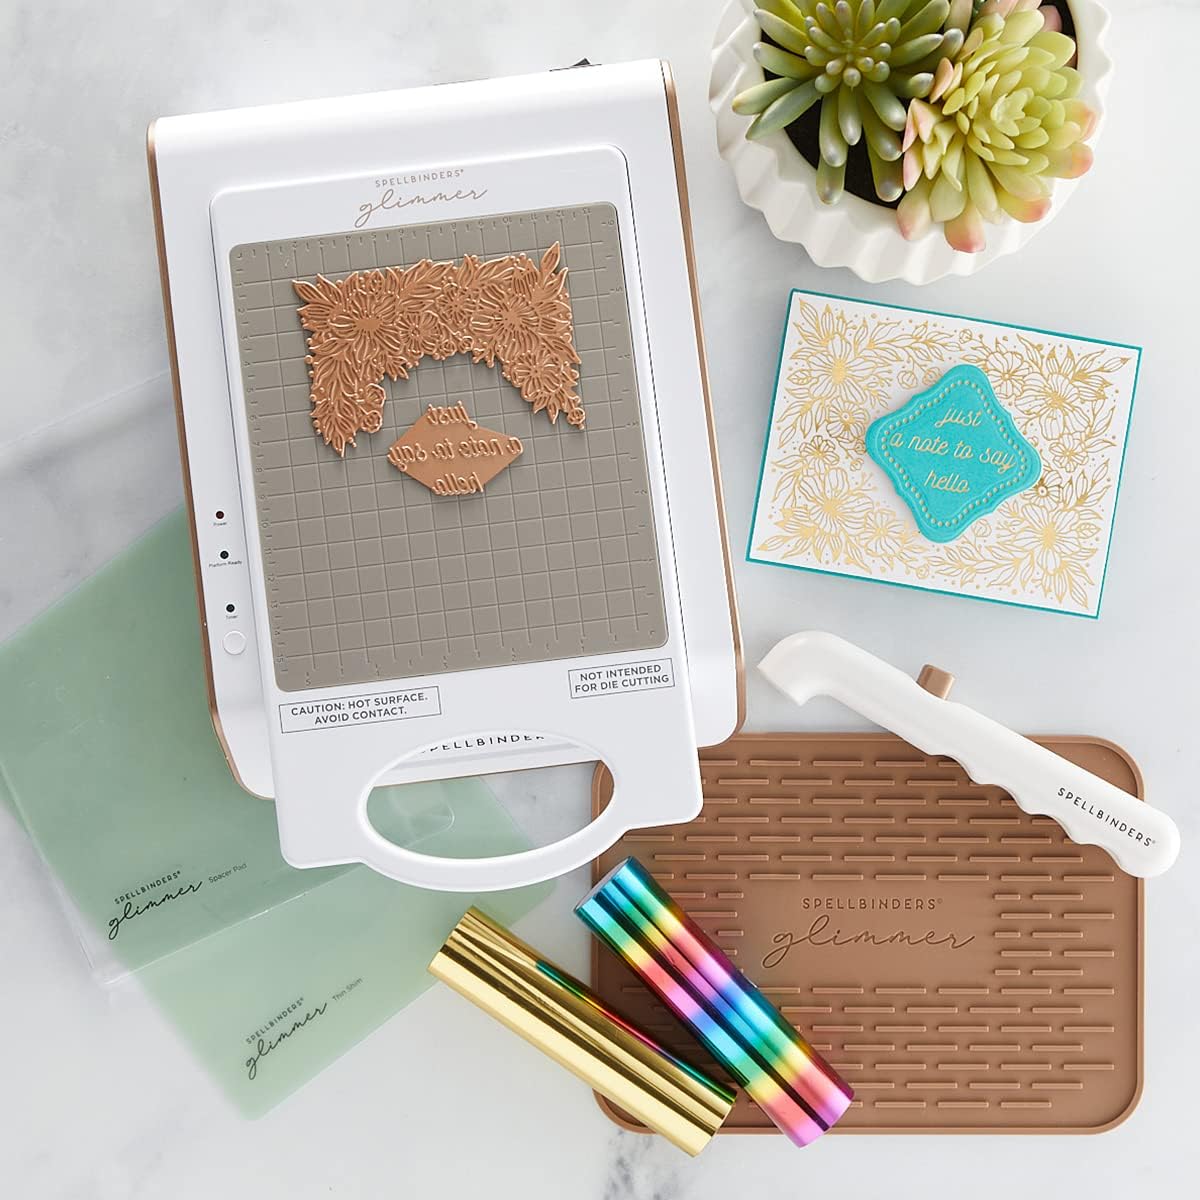
What is Included With the Spellbinders Glimmer System
How Easy is the Glimmer System to Use?
This system is easy to learn with only six (6) steps to foil. I love foiling, but if it’s not easy I’m probably not going to use it much. I love this Glimmer System & love to use it all the time. The results are fantastic! See the six steps to take below.
- Turn power on & wait till the red light turns green. Now it’s ready.
- Place a glimmer plate on platform (flat side of the plate down). Then press the “timer” button. It will blink at first & when the “timer” light stays a solid green that means it’s ready.
- Place your foil (shiny side down) on the hot Glimmer plate.
- Add your cardstock or chosen material on top. Lay your shim & spacer pad on top of the sandwich. (In the directions that are included it will tell you when you don’t need your shim.)
- Remove the whole platform from the base & SLOWLY roll through your manual die-cutting machine. (I do it one time forward & then backward.)
- Carefully remove shim & spacer pad. Put the platform back into the base. Carefully peel foil from material. Gorgeous isn’t it?
Supplies Needed to Use the Glimmer System
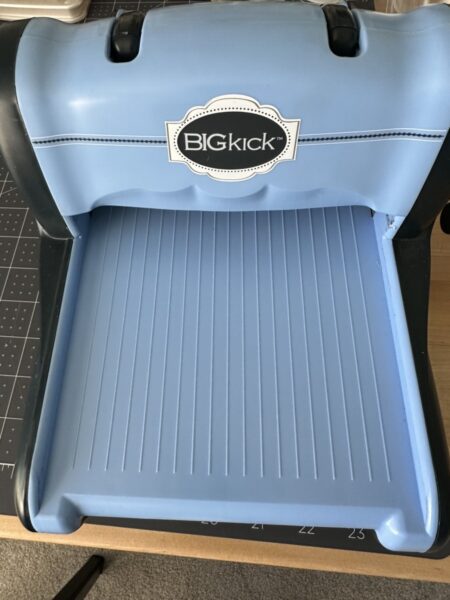
You’ll need a manual die-cutting machine along with everything that comes with the system. You would need your material you’re going to foil onto like cardstock, watercolor cardstock, ribbon, acetate, etc. & the foil itself. Remember when purchasing foil, make sure it says hot foil not toner foil & also it needs to say heat-activated. Note: Not all die-cutting machines are compatible. I use the Sizzix Big Kick & that works. The inside of the base of this die-cutting machine 6-1/4″ & the platform of the Glimmer System is JUST under 6-1/4″. Phew! Below is a list of the machines that are compatible according to Spellbinders:
- Spellbinders Platinum, Platinum 6.
- Deep Sea Die Cutting and Embossing Machine.
- Sizzix BigShot.
- Sizzix BigKick.
- Sizzix Big Shot Plus.
- Sizzix Big Shot Express.
- Tim Holtz Vagabond.
- We R Memory Keepers Evolution.
Other Uses for the Glimmer System
You can use etched/wafer thin dies with this also. Now some of these dies won’t foil well so you’ll have to experiment. You’ll most likely want to use another cardstock shim to your sandwich because the dies are thinner than glimmer plates. I just did another post on the Spellbinders Betterpress System & you can actually use those plates with this system as well, but there is a trick. See that post here to find out how to use them. Let me show you the steps for using dies with the Glimmer System.
- Turn on power & you’ll see the ready light as red. Wait until that turns green to use.
- Place etched/wafer-thin die CUT SIDE UP! This is extremely important because if you put it cut side down it will ruin the Glimmer System’s platform. Then press the “timer” button. It will flash green, but wait until it’s a solid green.
- Place glimmer foil shiny side down on top of the die.
- Add your material, shim & spacer pad. (Here’s where you might need to add another piece of cardstock as a shim.)
- Remove platform from base & SLOWLY run through the die-cutting machine.
- Carefully remove shims, etc. Put platform back in place & peel foil from the material.
You can also use Glimmer plates as a letterpress. For this you are not going to use the heat. To do this, place your plate flat side down on the platform & add ink to top. Add materials, shims, & spacer plate & run through die-cutting machine. Carefully remove the material from the die & there you go. Another great option with this Glimmer system.
Tips & Tricks for the Glimmer System
Summary & Recommendations
In conclusion, we not only went over everything that is included with the Spellbinders Glimmer System, but also talked about the 6 easy steps to use the system, the other uses for this great system & some tips & tricks.
I would absolutely recommend this system to anyone interested in starting foiling or those that have already fallen in love with it. It’s an easy to learn & easy to use system that gives you beautiful results! I believe foiling brings your project up to the next level. You can make more than just cards – you can even foil on leather!
If you are interested in purchasing a Spellbinders Glimmer System, click here & it will take you to it. If you liked this post, please share on social media & I would love it if you followed me while you were there! I would appreciate it so much! Thank you!💕
Note: The above link is an affiliate link which means Redbuds and Ribbons might get a small commission if you purchase, but it won’t cost you any more.