How to Use Printable Heat Transfer Vinyl for Cricut
Well, hello there! Oh my goodness, you guys, I have some great news! At least it’s great news for me! I recently discovered printable HTV. Have you ever tried using printable heat transfer vinyl with your Cricut? I’m so ashamed to admit, but I had NOT until a couple months ago! I can’t believe I hadn’t tried it & when I finally did…I’m obsessed! I hadn’t realized how easy it was & how many options you have! Options…unbelievable!
So, today I thought we’d make a Christmas tee.
You do have to have an inkjet printer, because you can not use a laser printer with this. If you don’t have an inkjet printer there are some that are inexpensive now (see above link).
Use this fun project making a Christmas tee to surprise someone special! This is such a great gift idea!
How to Make a Christmas Tee With Printable Heat Transfer Vinyl – Step by Step Instructions
Ready to make a Christmas tee? This post contains some affiliate links for your convenience! Read my full disclosure policy.
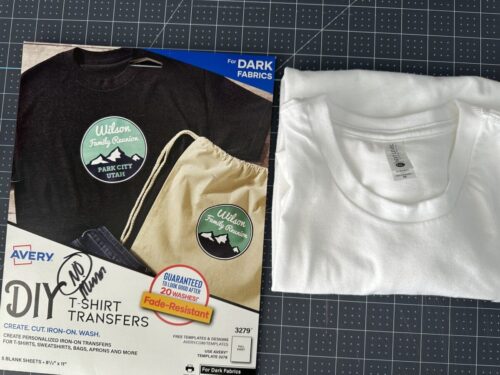
Materials Needed to Make a Christmas Tee With Printable Heat Transfer Vinyl
Step by Step Instructions – Making a Christmas Tee With Printable Heat Transfer Vinyl & Your Cricut
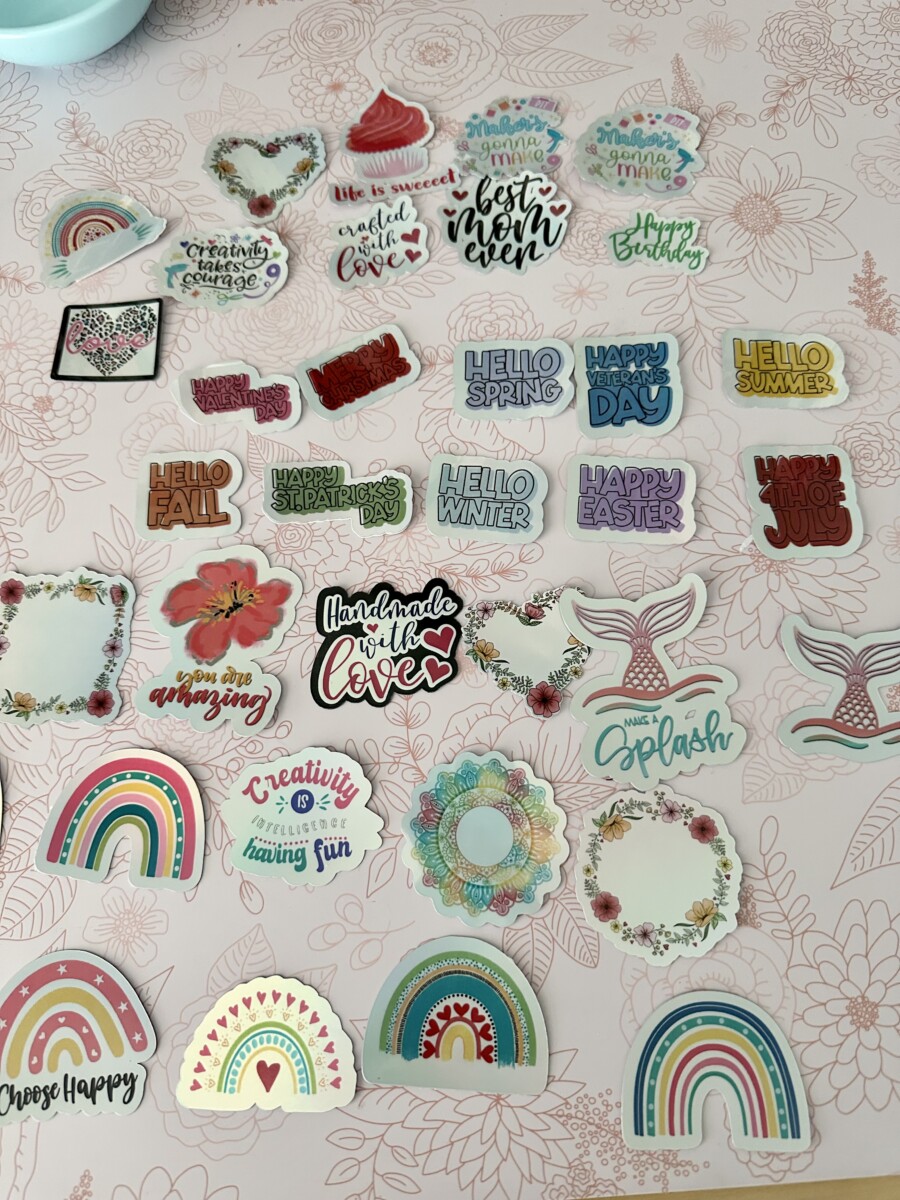
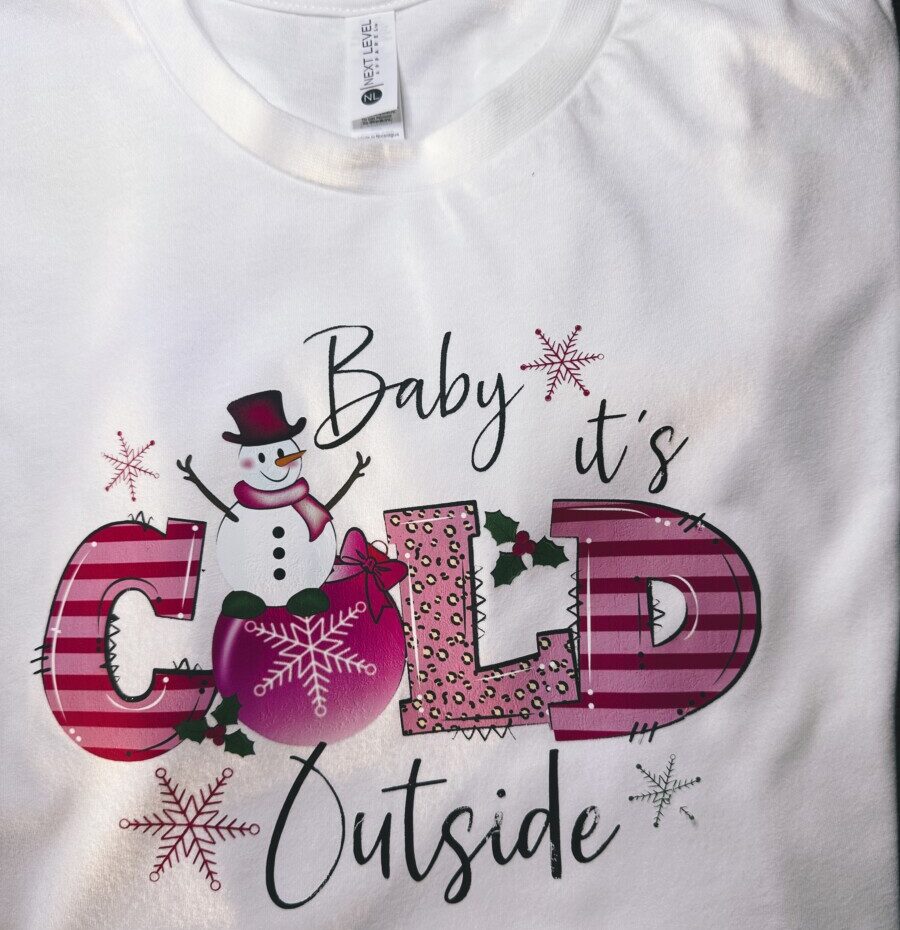
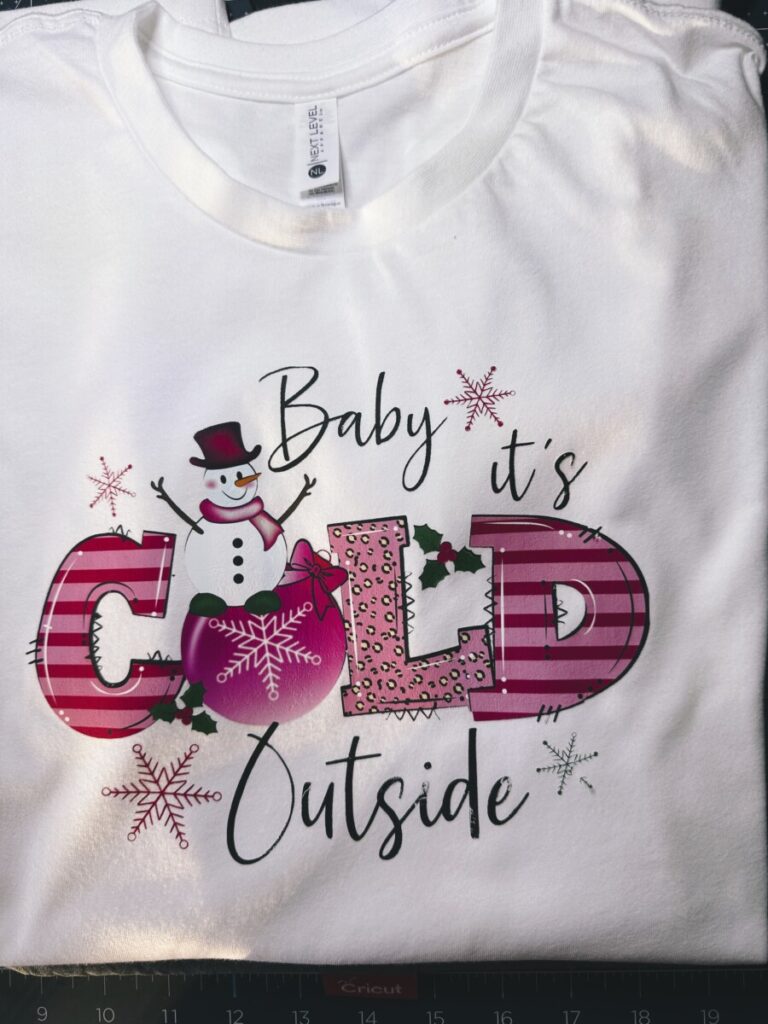
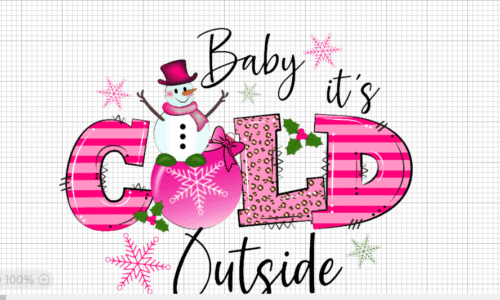
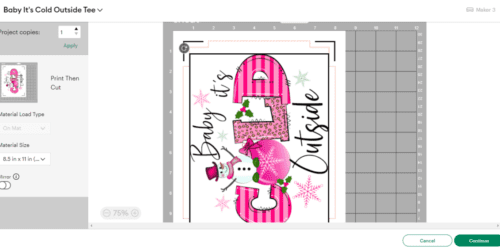
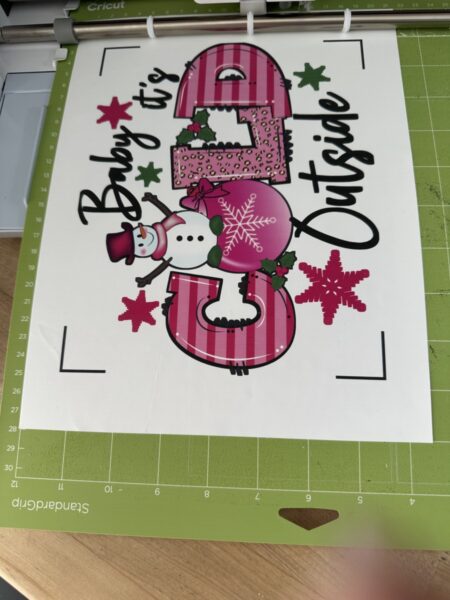
Step 1: Before we start anything, make sure you have recently calibrated your Cricut. If you haven’t, take a minute & do that now before we get started. I didn’t do this, because I didn’t think I needed to since I rarely have a problem, but I made a mess & wasted my vinyl! After that the first thing you need is a PNG file you love to apply to your Christmas tee. I’m getting my PNG file from Creative Fabrica & I’m using this PNG file-one of the files (Baby it’s Cold Outside”)in that bundle. See pic below.
Note: Not sure how to download a PNG file to your computer & upload it to Cricut Design Space, see this post.
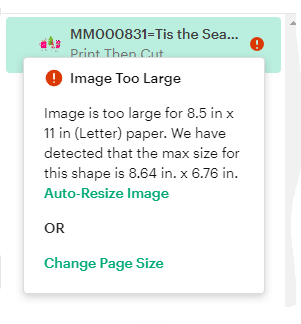
If your file comes in large to Cricut D.S., click on the red exclamation point in the layers panel & then click “auto-resize”. This will automatically resize your file for a print-then-cut project. (Second pic. below.)
Step 2: We need to select our printable heat transfer vinyl, because there are two types. One for light colors & one for dark colors. Wait…hold it! I heard you can use the printable heat transfer vinyl for darks with ANY color! So today I’m trying it with you! I’m using the printable HTV for darks with a white tee! (If you use the printable vinyl for darks you DO NOT need to mirror your image – another thing you don’t have to remember.) 😁I also heard that the vinyl for darks will look fine on a white tee if your colors in your PNG aren’t light or pastel colors. So we’re trying it today!
Step 3: Now that our PNG file is on our canvas in D.S., we need to print to our inkjet printer. (Do not use a laser printer with this.) Click “Make” in D.S. & the next page looks like the pic below. Then click “continue”.
Next you’re going to send it to the printer. (Using your inkjet printer, first do a test using regular paper. If everything looks good then get your heat transfer vinyl ready in the printer.) The below pic is where you need to see if there are any adjustments you can make. Click on “send to printer”.
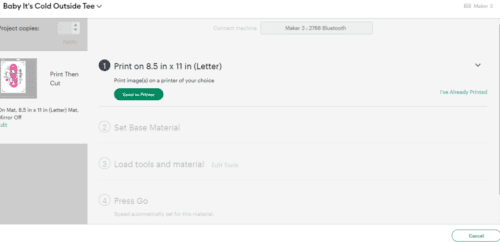
Everyone has a different printer so I can’t tell you what everyone’s preferences are, but I can tell you the things to look for. For example, you want to have “bleed” & “system dialog” on. Click on “print”. Your “system dialog” should pop up. (If it doesn’t, minimize D.S. & it should be there.) Make sure your inkjet printer is selected & then click on “preferences”. If you have “paper type” see if there’s something close to the vinyl. If you have an option for “paper quality” it should be on “best”. Then hit “print” again!
Step 4: We’ve printed out on the printable heat transfer vinyl so we need to now cut it with our Cricut cutting machine.
Step 5: After your Cricut has cut everything out, you’ll now want to weed your design. All the white should come off the design because that will show up on your tee also. Remember your tee will look exactly like the design you see when you are done weeding so if there is something on the design you don’t want you need to weed that piece out.
Step 6: Now to get the design from the mat to the tee we have to use what’s called “mask transfer tape”. It’s just like regular transfer tape we use with adhesive vinyl & you do it the same way. So cut out your piece to cover your design. Once you apply it to your design you need to use your scraper tool & burnish it on. Then slowly lift off your design onto the masking tape. (I had to weed again after I had my design on the masking tape. There were a bunch of little pieces I hadn’t gotten out when I did it the first time.)
Step 7: With this step, we need to use our heat press to adhere the design to our tee. You’ll need to read your printable HTV’s instructions since they’re all different. It should tell you the temperature & how long to press. I’m using the Avery brand & it says 325-375 degrees for 30 secs. so I’m going to put my heat press on 350 degrees.
Summary
Pat yourself on the back you made it! We went through step-by-step on how to make a Christmas tee with printable heat transfer vinyl. I hope you had fun with the process & I hope you can see how many options you now have! If you liked this post, please share on social media & I would love it if you followed me while you were there! I would appreciate it so much! Thank you!💕
Questions for Beginners
Answers to your questions about making a Christmas tee with printable heat transfer vinyl. After reading, if you have other questions, please feel free to ask in the comment section below.
Q: Can you use a laser printer to print on printable HTV?
A: No. You will need to use an inkjet printer. The printable HTV is made for an inkjet printer & would not withstand the heat of the laser printer.
Q: Can you use printable HTV for darks on light colored blanks?
A: Well…I just did! The printable HTV that I used was for darks & as you can see I applied it to a white tee! Remember, you can use the one for darks as long as your design is not all white or pastel colored.
Q: Do you need transfer paper with printable HTV?
A: Kinda- you need to use mask transfer tape with printable HTV for darks. It’s different than regular transfer paper we use with adhesive vinyl. This is how you get your design from the vinyl to your tee or blank you are using.
If you loved this project, you’ll love these projects too:

How to Download PNG Files to Your Computer

How to Make Labels With Your Cricut

An Easy Way to Layer With Glitter HTV
Did you make this craft?
We would love to see what you have created so mention us on Instagram @redbudsandribbons so we can see your creations!