How to Use Digital Papers in Cricut Design Space
How to Add & Use Digital Papers in Cricut Design Space (Step-by-Step Tutorial).
Hi there! Have you ever asked yourself… “What are you supposed to do with those digital papers that are everywhere?”. I used to ask myself that question, too! Today, I’ll show you how to add & use digital papers in Cricut Design Space. They’re so much fun & there are so many uses for them. Not only will I be showing how to use digital papers, I will be giving you (7) free “Christmas Tree” digital papers that I designed myself! See below.
What are Digital Papers & Their Uses?
Digital papers are PNG or JPEG patterned images that are usually designed in a 12 x 12 format. Keep in mind the maximum size of the Cricut Print-Then-Cut is 6.75″ x 9.25″. We’ll address that later. Think of a digital paper as a patterned paper you buy at the craft store. The only difference is “digital” paper needs to be printed from your home printer &/or your Cricut will cut it. You can use digital papers for backgrounds, cards, tags, scrapbooks, & so much more. The best part, in my opinion, is you’re not storing a bunch of 12 x 12 patterned paper in your craft room!
Using Digital Papers in Cricut Design Space
When uploading your digital paper, you could use the “pattern” feature, but for this tutorial I’m going to use the “slice” method instead. I feel this is easier to understand & the whole process is a little easier to be able to place your paper exactly where you want on your image. So let’s get to the step-by-step!
Finding Quality Digital Papers
If you want to look for some really cute, good quality digital papers, Creative Fabrica is such a good place to get them! You guys… I have a subscription with Creative Fabrica & I swear by this place! I’ve been a member for a couple years now & I haven’t paid for a thing (paid only for the subscription)! I can get digital papers, PNG files, SVG’s, fonts, inspiration & so much more. They have so many tools you can use like FontCloud, AI Studio, learning articles, etc. I think I paid like $50 something for a year, & you can get all the above & more for free! If you’re interested or want to check it out, click on the link above in pink! (I sometimes earn a small commission when using my link, but it doesn’t cost you anything.) Thanks!
Along with going to Creative Fabrica, I’d also like to give you free (7) “Christmas tree” digital papers I designed myself, just in time for the holidays! There is a form below to complete & you’ll receive an email with the link to download to your computer. I will explain how to upload them to Cricut Design Space, step-by-step. (If you don’t know how to download the PNG or JPEG files for your digital papers, click on post below.)
Uploading Digital Papers to Cricut Design Space
Now that your files are “extracted” from your Zip file, we want to upload them to Cricut Design Space (CDS). So make sure your CDS is loaded & ready to upload. Note: You must upload your digital papers one at a time.
Steps to Upload
Step 1) Click on “upload” in the panel on the left & then “Image” at the top.
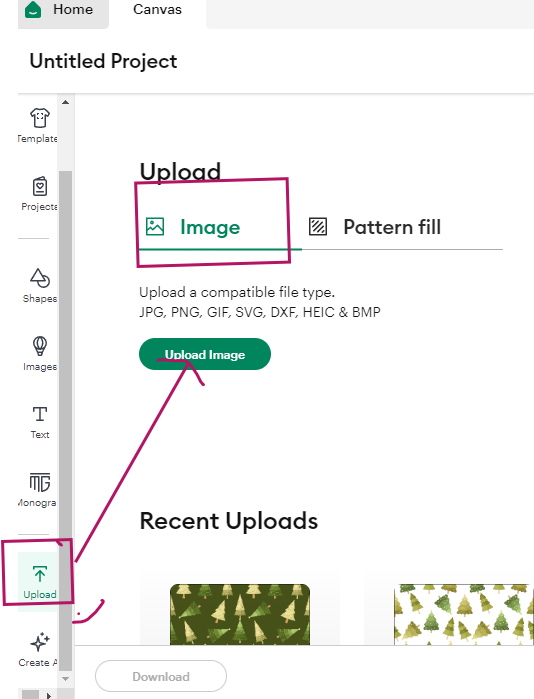
Click on “Upload” then “Image”.
Step 2) Click on “Browse”. You’ll click on “Continue” after you choose your file.
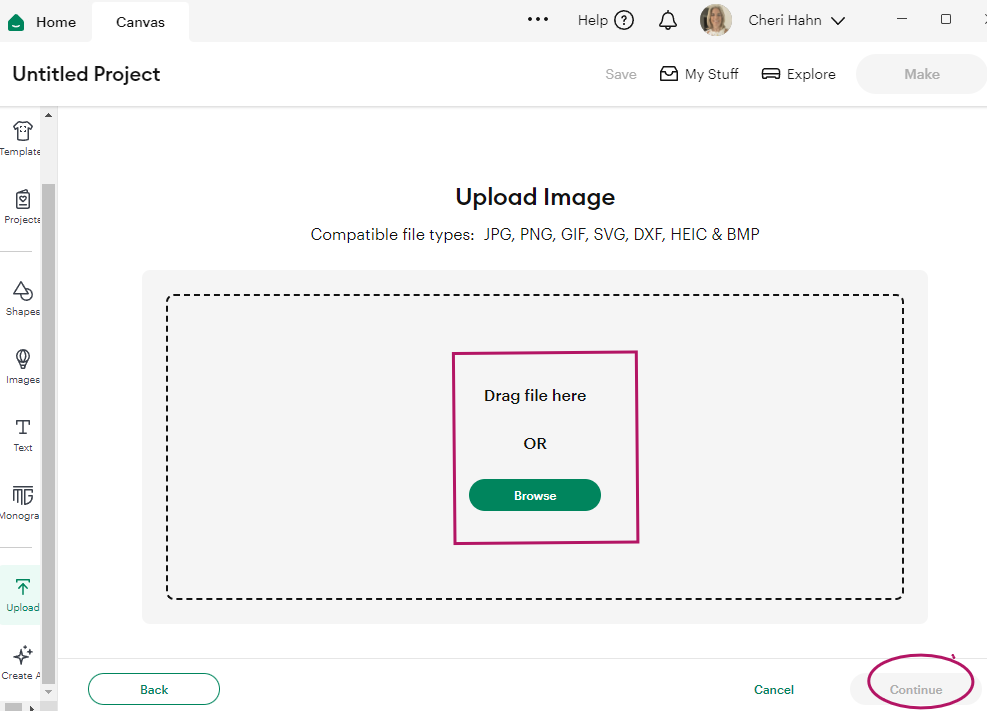
Click on “Browse” & then “Continue”.
Step 3) Choose your file then click “open”.
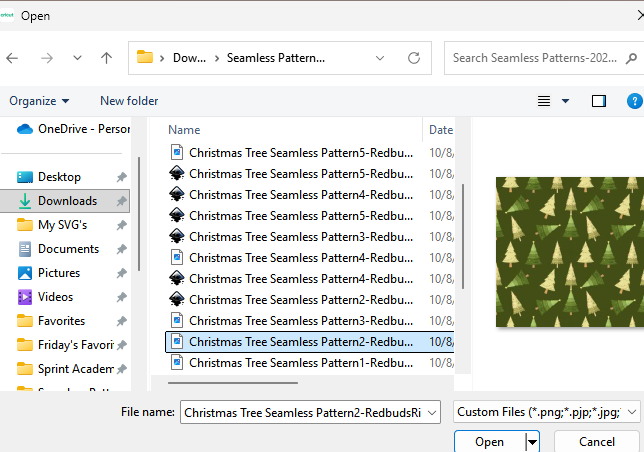
Click on your file name & then click “open”.
Step 4) Once it pulls the file up, click “Continue”.
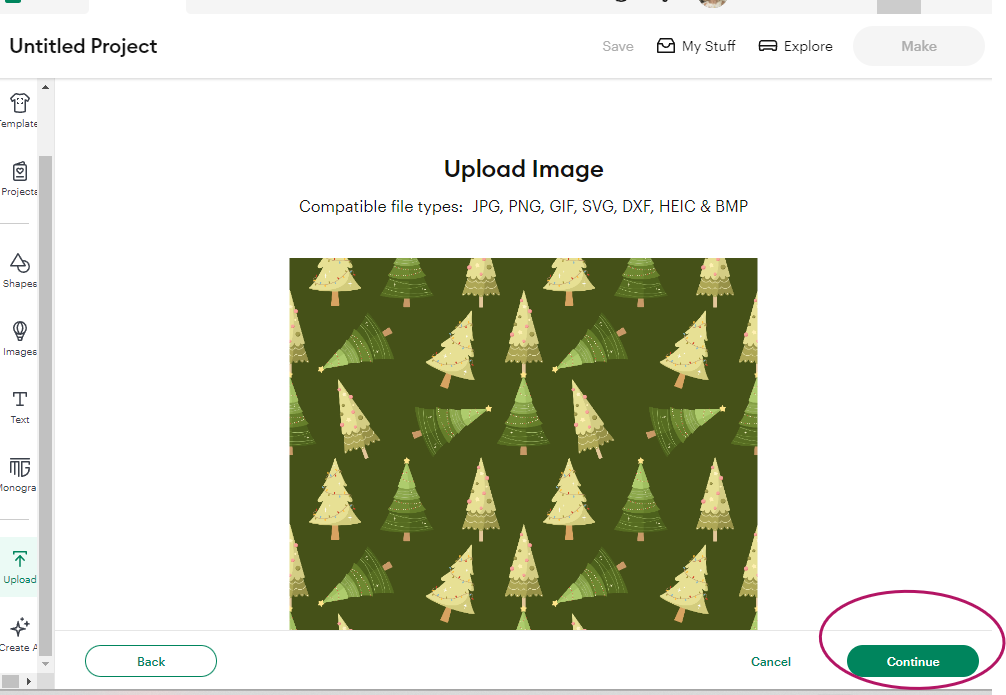
Click “Continue”.
Step 5) Do nothing here except clicking on “Apply” & “Continue”.
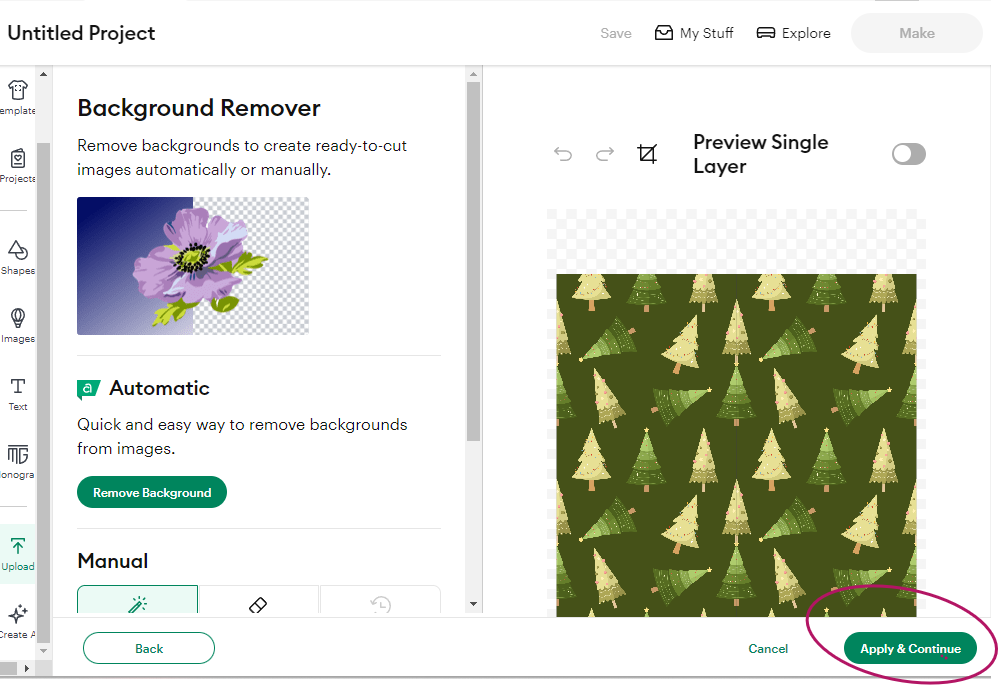
Click on “Apply” & “Continue”.
Step 6) Click on “Flat Graphic” box then “Continue”.
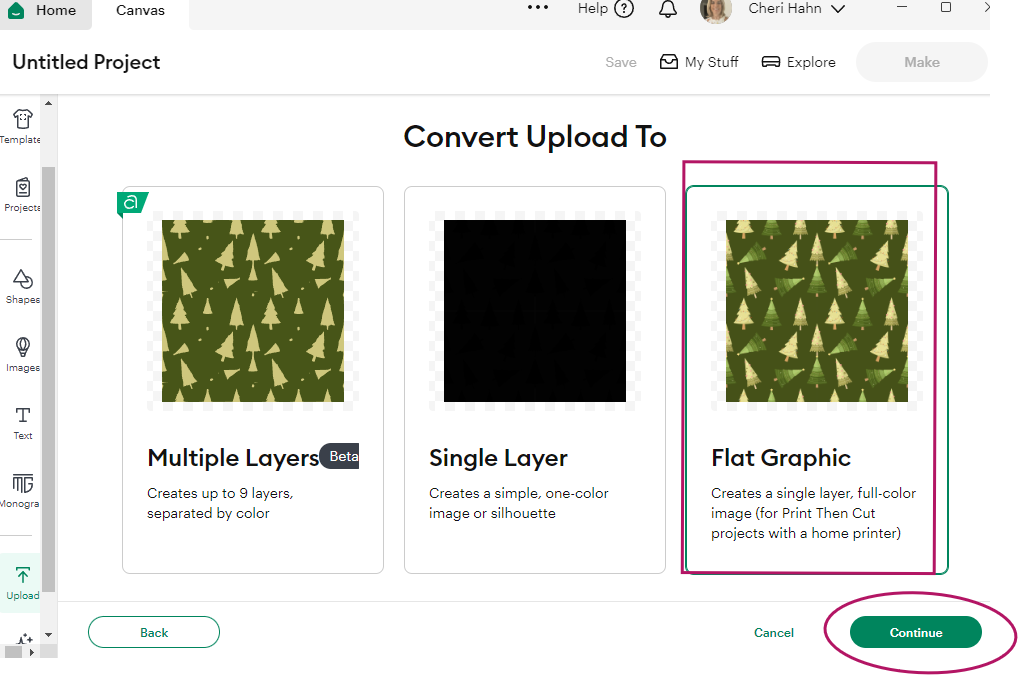
“Flat Graphic” box & “Continue”.
Step 7) If you want to add this file to a “collection” you can do that. Then click “Upload”.
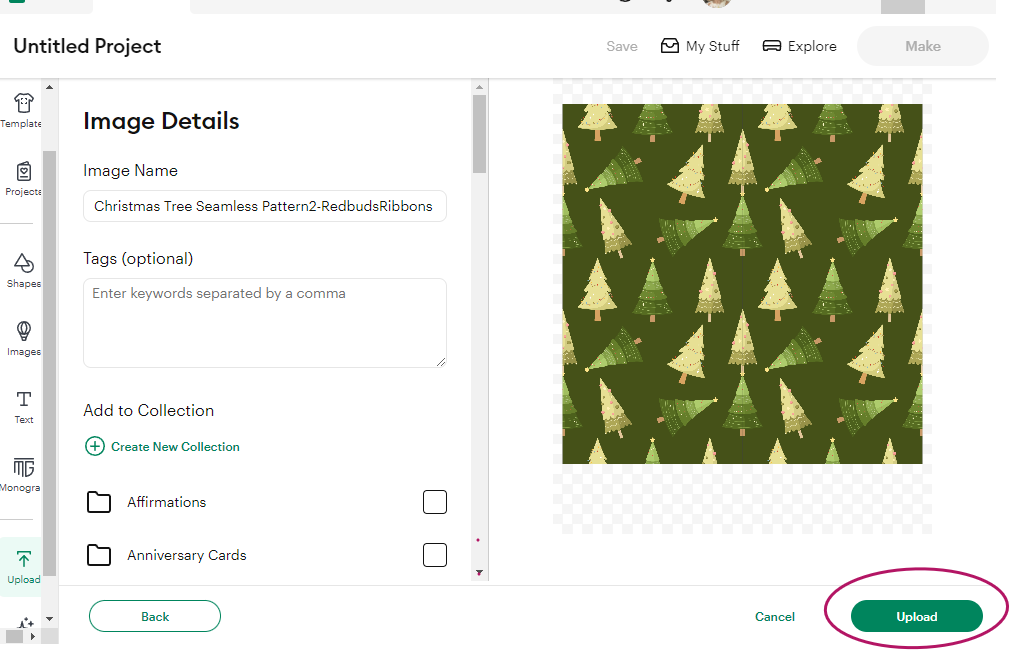
Click on “Upload”.
Steps After Uploading
Step 8) The file is large so it may take a few minutes to load. Then, in the right panel, click on “exclamation point”. Then click on “auto resize image”. This will resize the image to be able to “print then cut”.
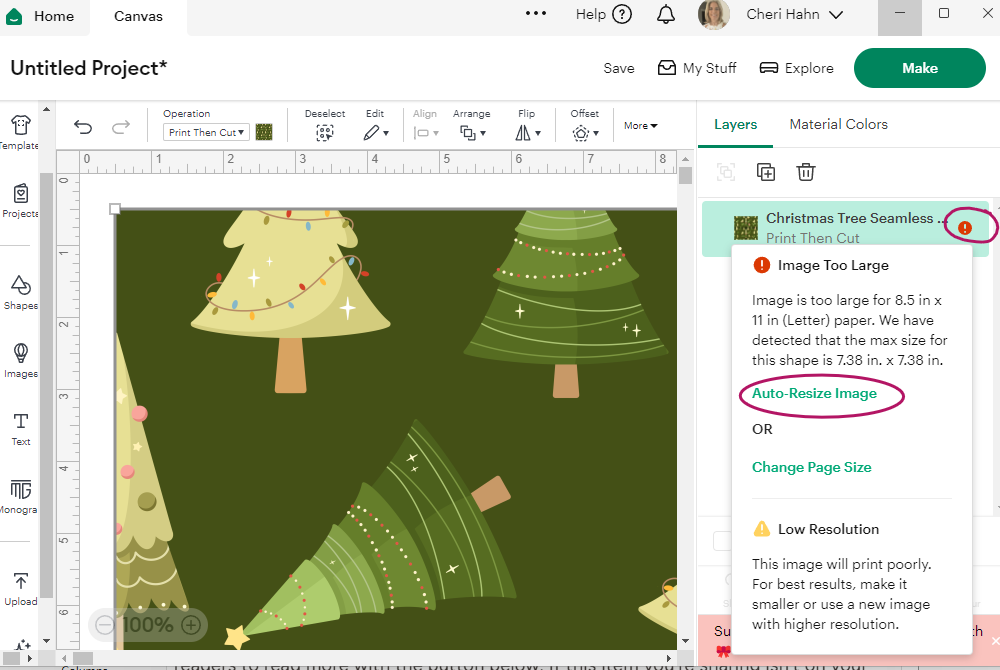
Click on “Exclamation Point” then “Auto-Resize Image”.
Step 9) The paper is still large on your screen so at the bottom click on the “minus” sign by the 100% & take it to 50%.
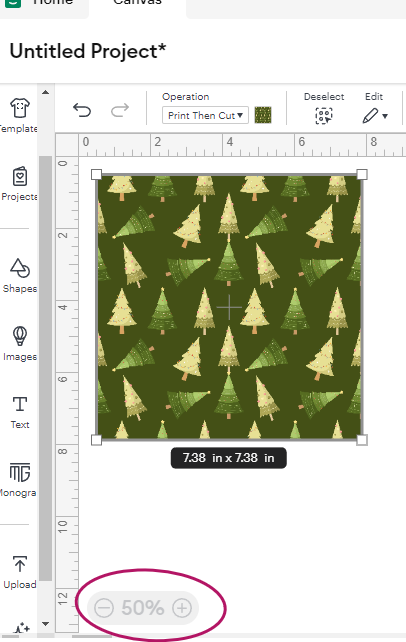
Take to 50%.
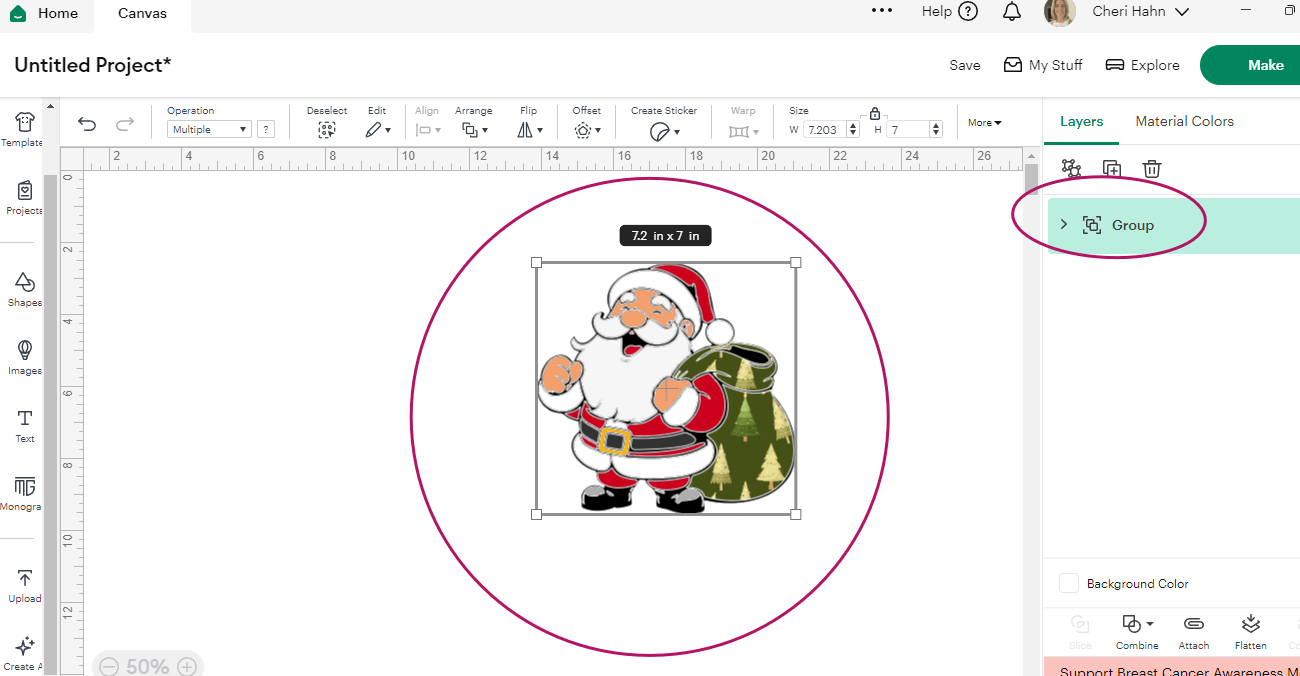
Step 10) On the left panel again, click on “images”. Then in the search box at top, type in “santa”. I’m choosing the one that’s circled, but you can pick any image that has multiple layers. (I do have Cricut Access.) Or maybe you already have a multiple-layer image you want to use & that’s ok too.
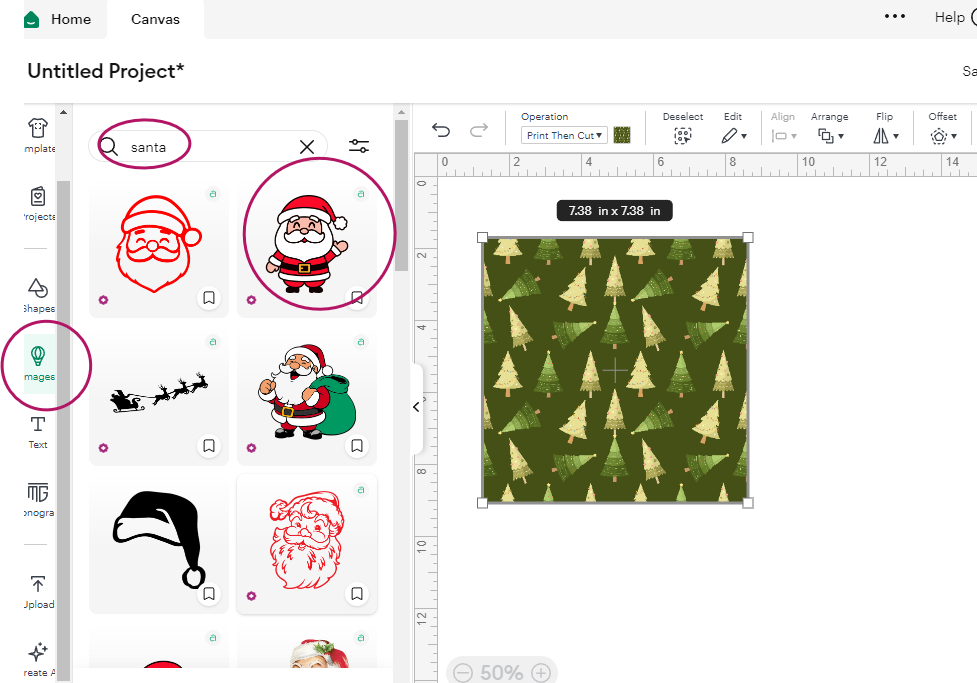
“Images” then go to “search bar” & type in “santa” then pick an image.
Step 11) While your image is selected, click on the “ungroup” icon on the right then the little arrow that should be pointing to the right. Once you click, it should then point down. All the layers should now show. (My goal is to take his bag & make the paper show up on top of his bag.) Don’t worry, I’ll show you!
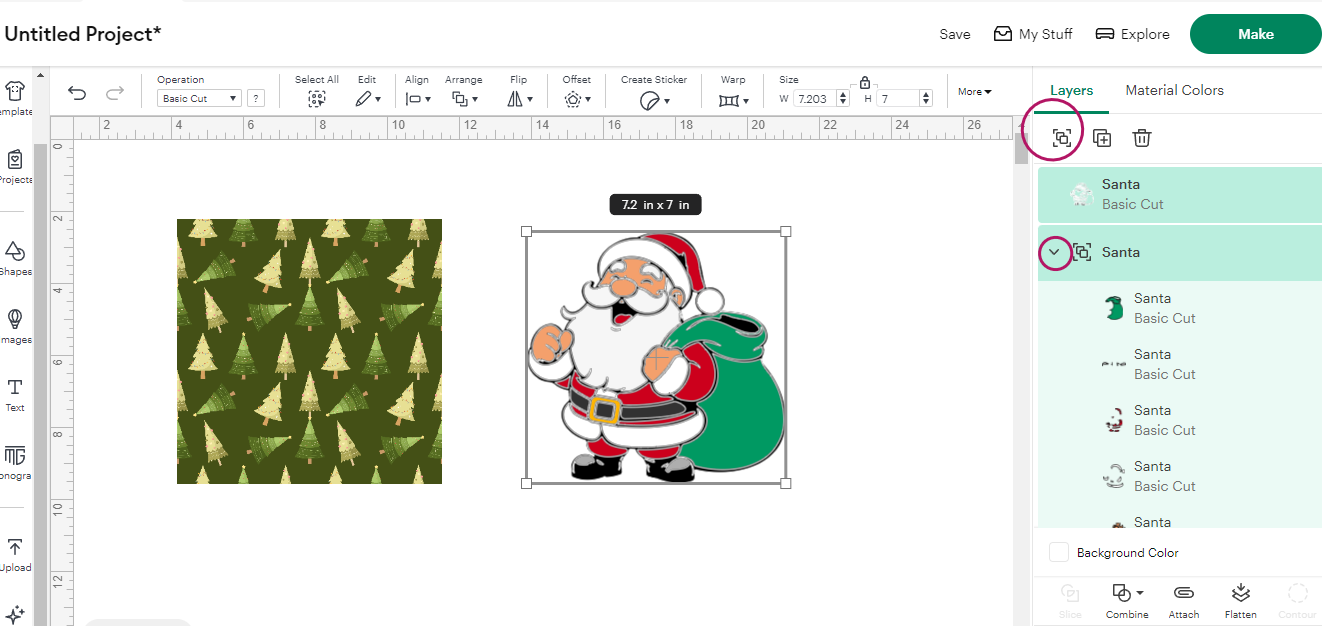
Select the image then click on “ungroup” then the little arrow pointing right.
Step 12) Now I’m going to click on the bag image in the panel then drag it down below the Santa.
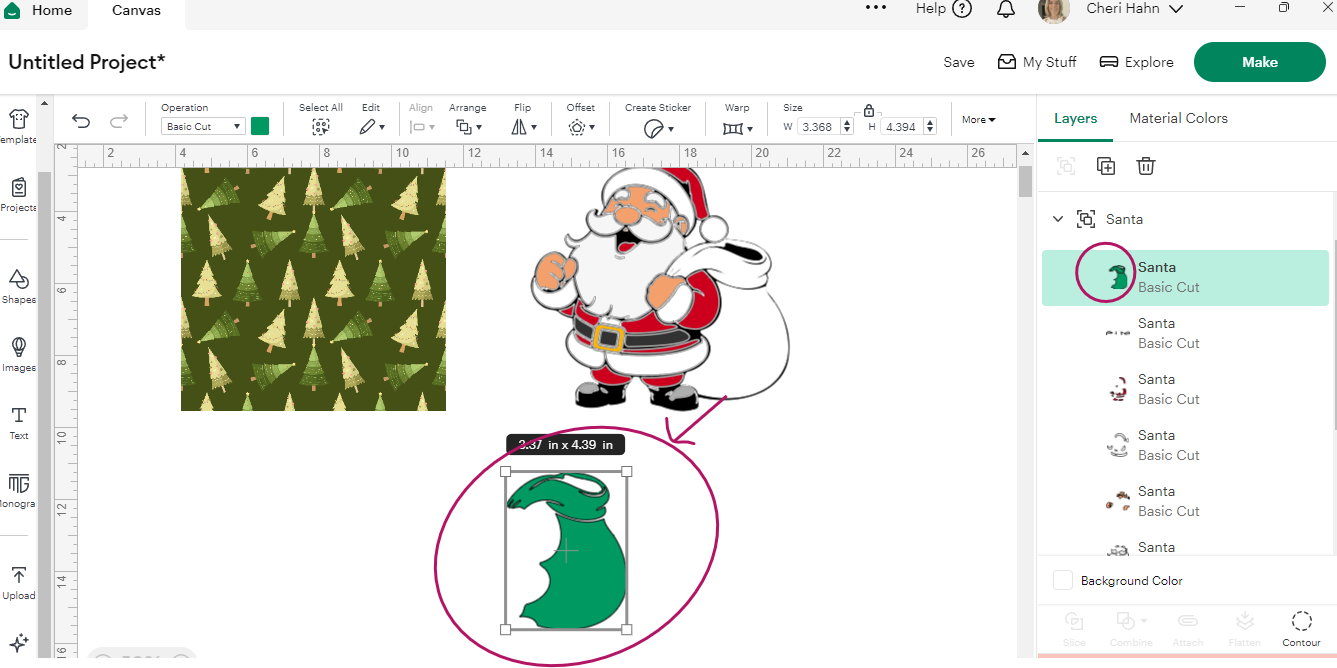
Click on the bag image on the right & it will put a box around it. Now click on the actual bag & drag down below.
Step 13) Take the paper now & drag it over on top of the bag image. It should be on top of the digital paper. If it’s not, click on the paper & go to “arrange” & click “move to back”.
Step 14) Select your image or the bag & go up to “operation” & change it to “pen”. The image will now be transparent. You can change the color of the pen if it helps you see the outline of the image better. You do this by changing the colored box right next to “pen”. Place the image where you want to “slice” from. While the image is still selected, go to “operation” again & change it back to “cut-basic”. Your image should now be solid again.
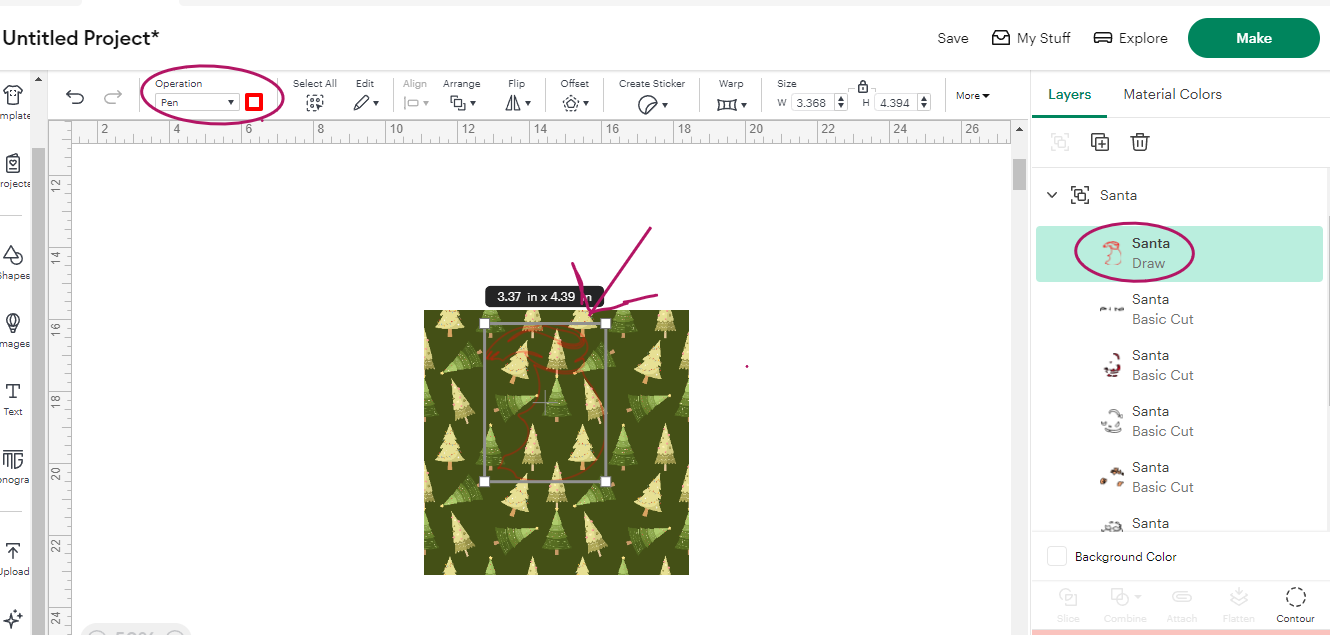
The circled area is where “operation” is. You can see how it’s a little difficult to see the image.
Step 15) Now select both layers (remember the image on top of the paper) & click slice.
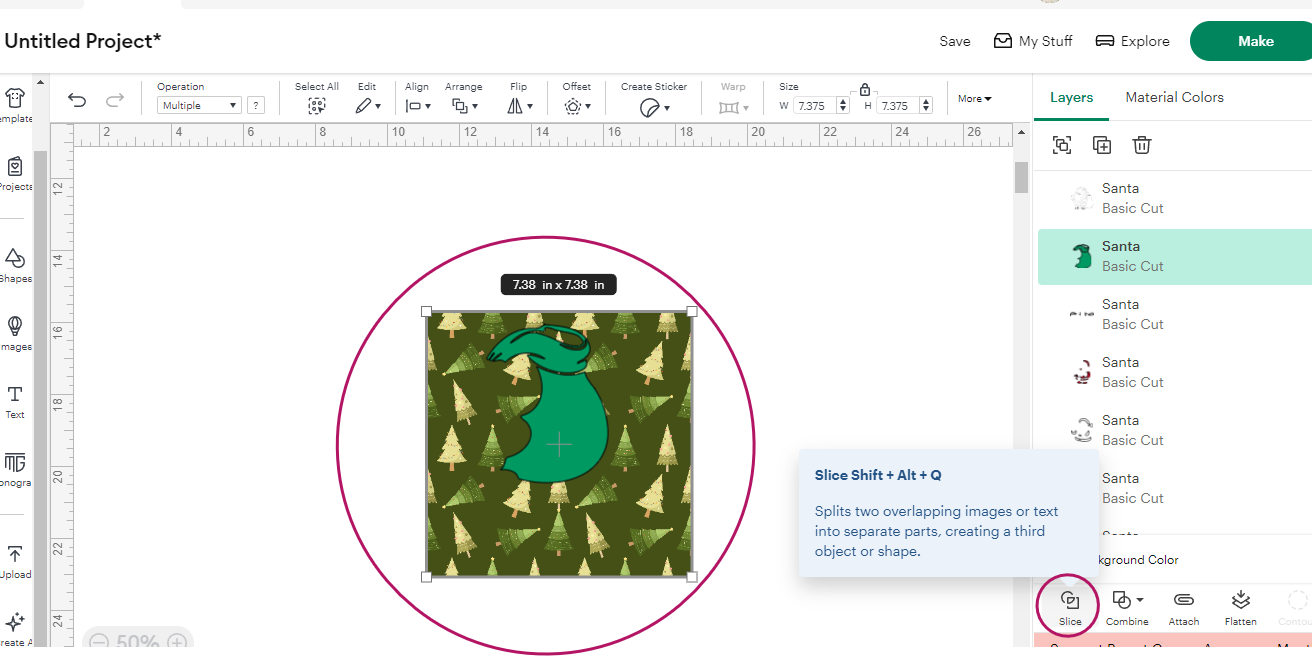
Select both layers & then “slice”.
Step 16) Now drag your layers off to the side so you can see all the layers.
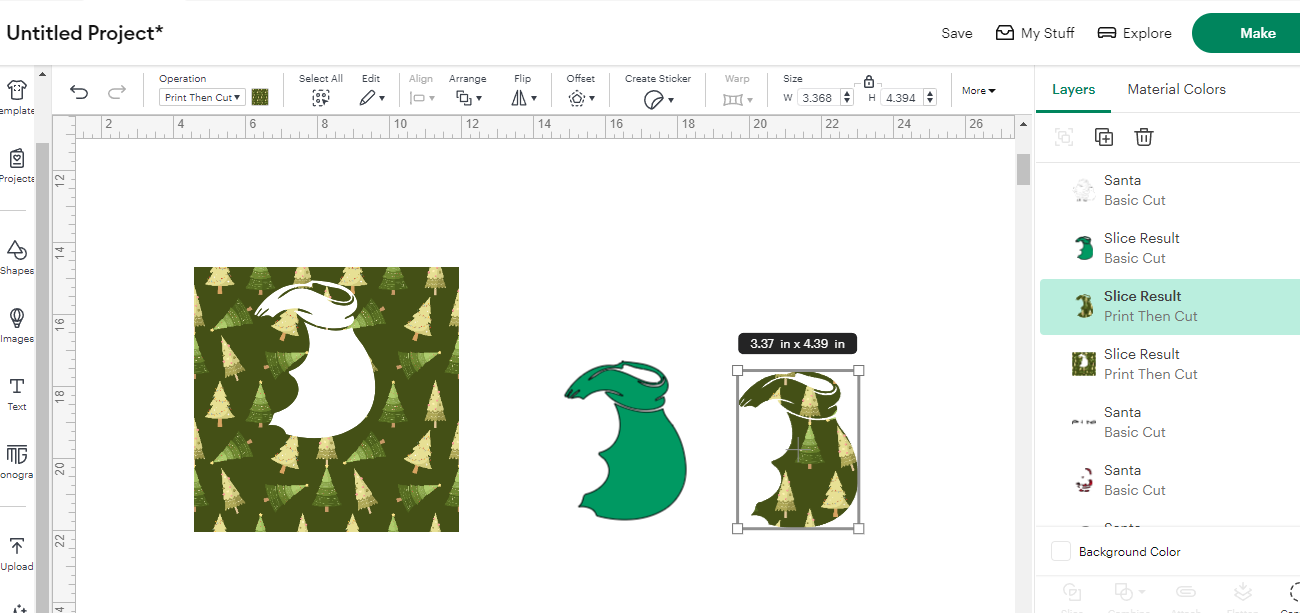
Drag layers apart to see what you have!
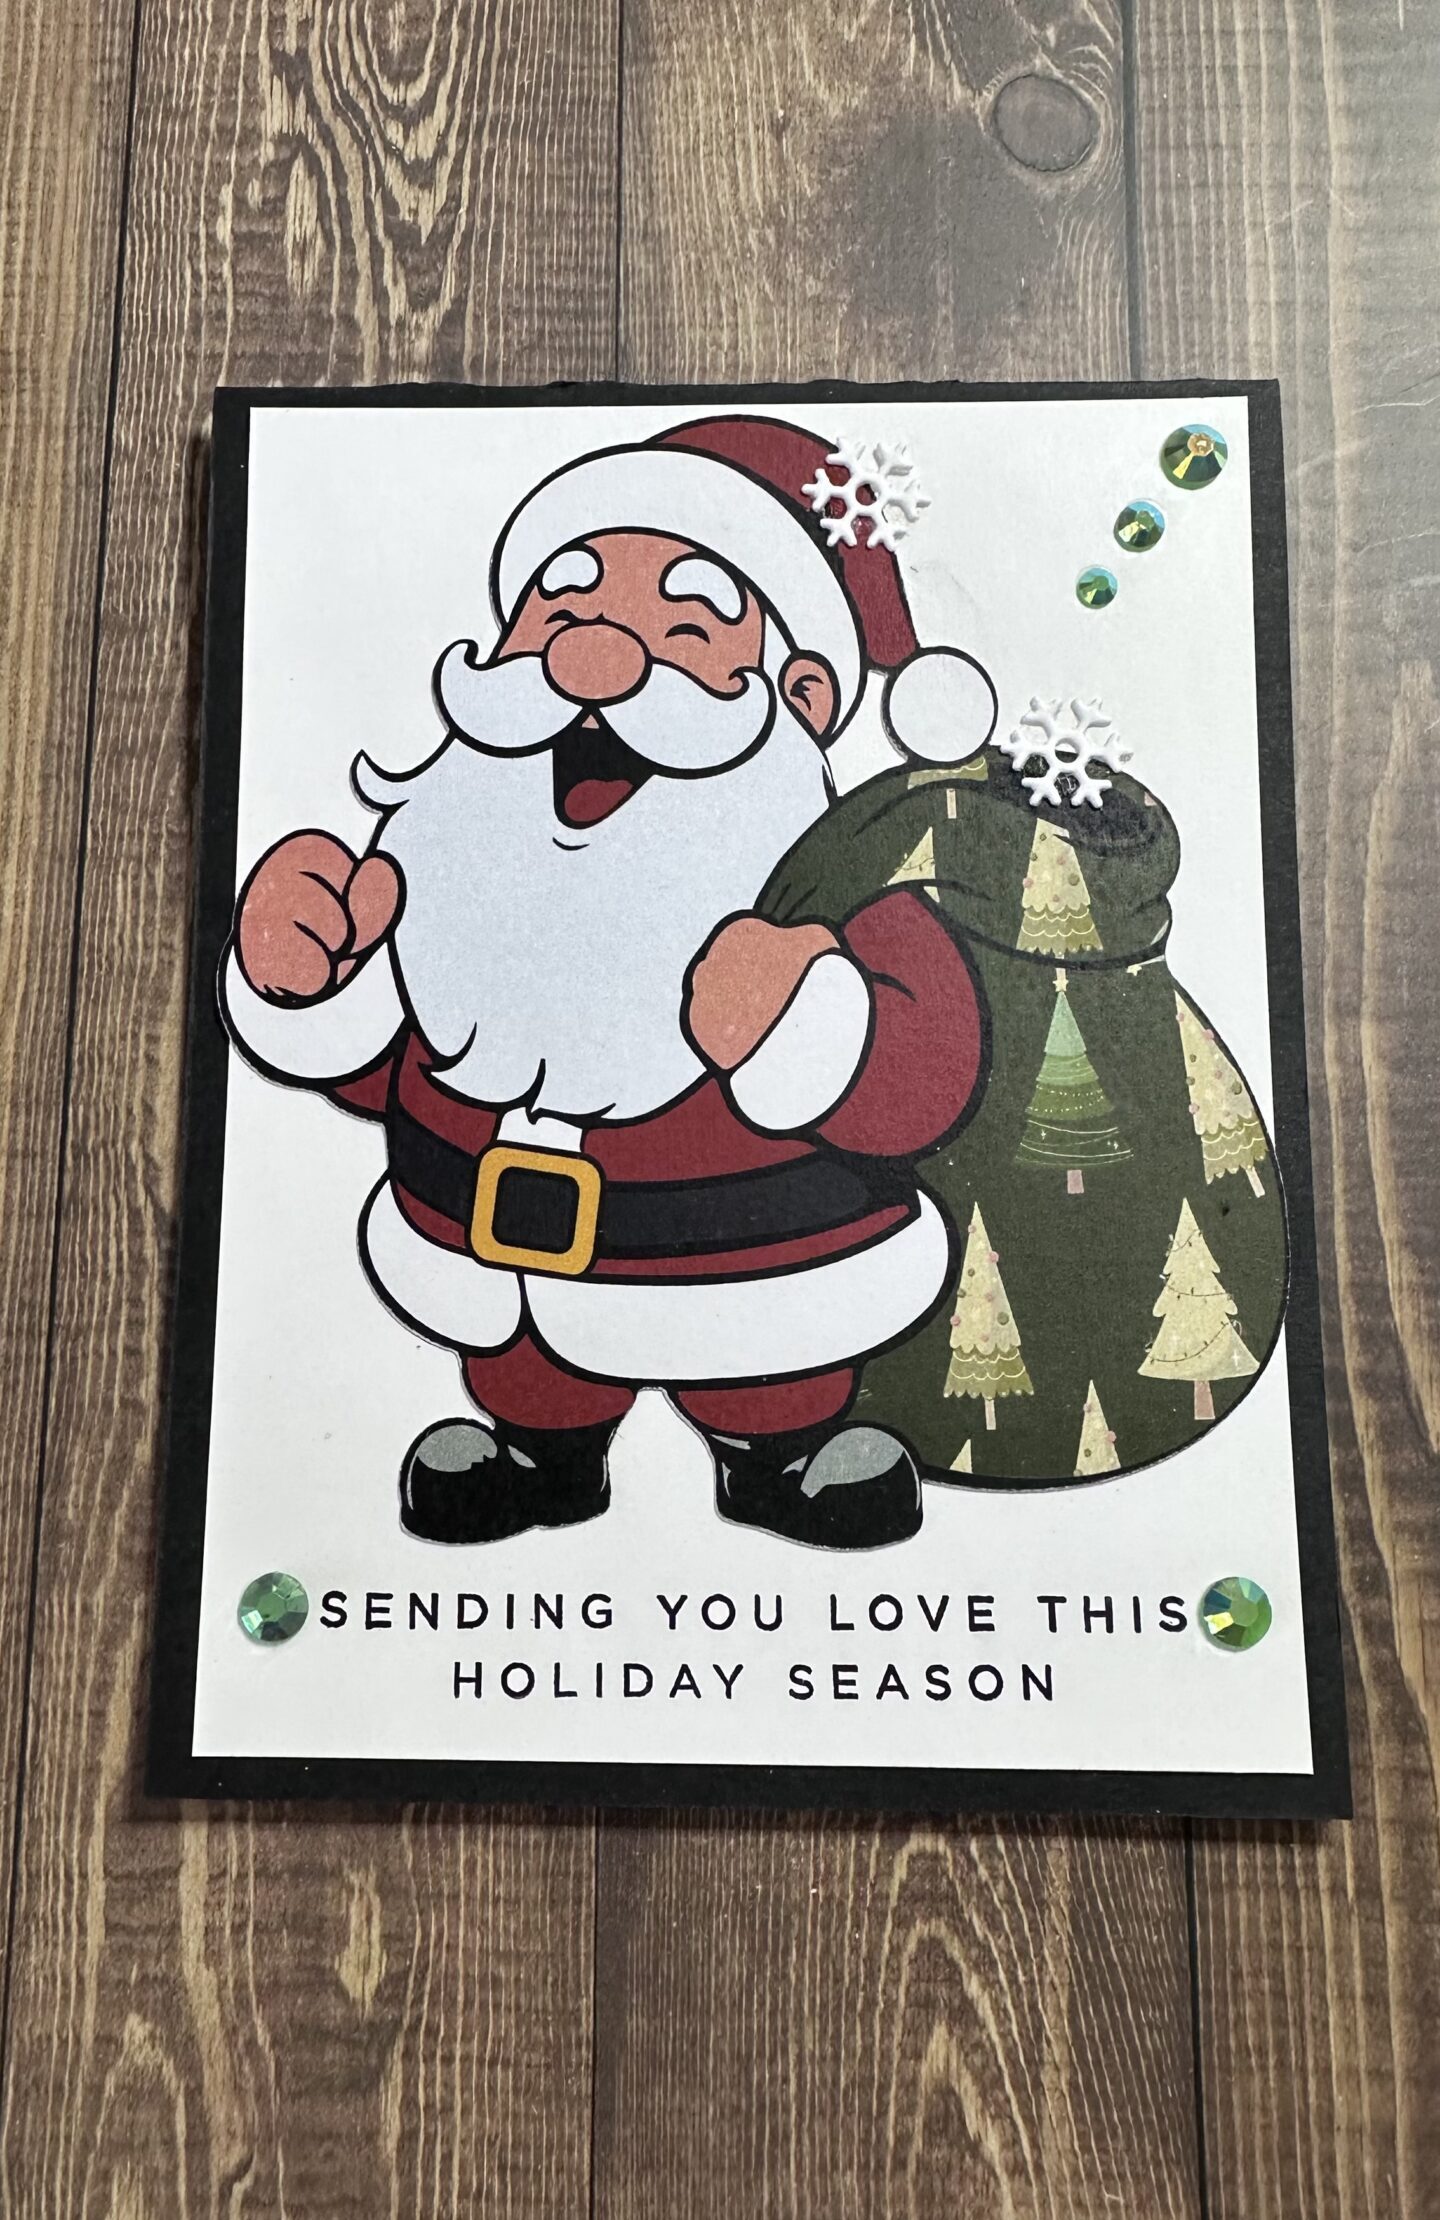
Step 17) Delete the layers that you won’t need & drag your new patterned paper image up to put in place with the Santa! Before you use the “print then cut” feature, make sure to “group” all the layers again & don’t forget to change the “operation” to “print then cut”. Don’t forget to “flatten” first!
Drag patterned paper image up to Santa! So cute!
Note: You can use these same steps in creating shapes, card fronts, etc. with your digital papers!
Conclusion
Wasn’t that so much fun? Using digital papers in Cricut Design Space opens up endless possibilities — from custom backgrounds to unique sticker sheets. Once you get the hang of uploading and flattening, you’ll be mixing and matching designs like a pro!