How to Upload an Image to Cricut Design Space
I hear from people a lot that they don’t know how to upload an image to Cricut Design Space or even to their computer. We’re going to fix that today! I love that there are so many choices of images that you can get from anywhere & upload them to Design Space to cut the files out. You can do this even if you don’t have much experience with computers. You just have to follow some steps until you get used to it & I’ll show you below what those steps are.
Types of Images
To start, let me explain the two different types of images. One is a basic (or Raster) image & that includes jpg, png, bmp & gif files. They upload as one layer. The second type of image is called Vector (or Scalable Vector Graphics) & they include svg & dxf files. These images are ready to cut & when uploaded the layers are automatically separated. Let’s go through the steps to download these files to your computer.
Step-by-Step Directions
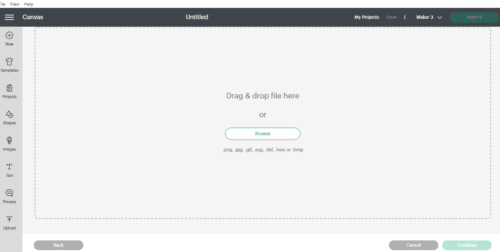
On your blank canvas, you can see on the left panel at the bottom an icon that says “upload” & you’ll click on that. Now you’ll see another button that says “upload image”. That will take you to a screen where you’ll see ‘drag & drop file here or browse’. So browse will take you to your computer files then find your file. I’m picking this simple pink cupcake .png image.
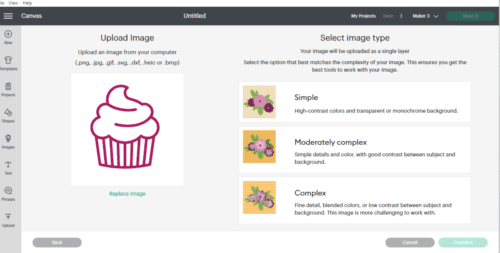
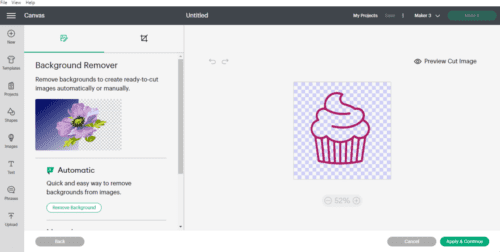
Next, you’re going to pick whether your image is simple, moderately complex, or complex. On my cupcake image, I’m going to pick simple & click ‘continue’. Down below you’ll see where you can ‘remove a background’ or ‘erase’ part of your image you might not want. It might look like I don’t have a background, but I do, it’s just white. I want to erase my background so I click on that. You see the checked pattern behind it that means the background is gone. Then you can click on ‘apply & continue’.
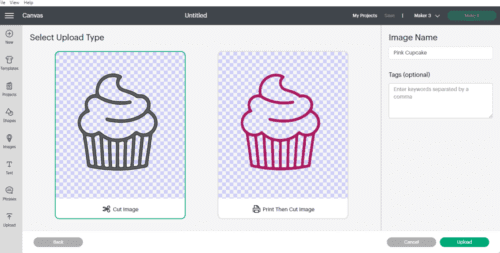
Now that brings you to a screen that has two pics of your image. One on the left for your ‘cut image’ & one on the right for a ‘print then cut’ image. Just click on the one you want it to save by & click ‘upload’.
That’s it! You’ll see your image down below by the ‘recent uploads’. If you’re wanting to use a file, just click on the image & click on ‘add to canvas’. You now know how to upload an image to Cricut Design Space! One thing to note: if you upload an svg image, the layers will automatically be ‘grouped’. The first thing you’ll want to do is ‘ungroup’. Then you can edit what you like. Have a good one! 💕