How to Make Foil Decals With Cricut
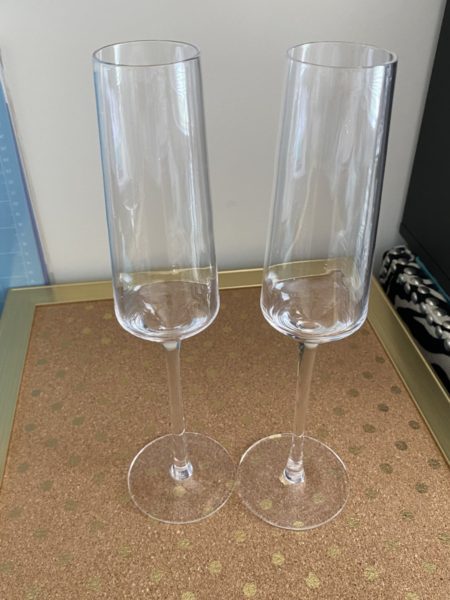
Ever wondered ‘How to Make Foil Decals With Cricut”? Today I’m going to make a couple of decals with adhesive foil to put on champagne glasses & I thought I’d bring you along for the ride. My daughter will be getting married someday (not even engaged yet, but found the right man!) & I’m trying to personalize some things I know she’ll need for her big day. When I first started my crafting journey, I only wanted to use removable vinyl because I was afraid I’d ruin everything. Not anymore! I use it all but this adhesive foil is actually removable so no worries. You can do this on tumblers, coffee mugs, wine glasses, trays anything you want a little extra pizazz! It’s a little temperamental to work with so you just have to be patient & go slow. I only use the Cricut brand of the adhesive foil because I’ve tried other cheaper brands but they didn’t work well. With this foil, you need transfer tape to transfer the decal to the glasses. They have regular & strong grip transfer tape. I’ve used both with adhesive foil, but I tend to like the regular with this & just work with it. You see the transfer tape has to be sticky enough to pick up the decal but then can’t be too sticky so it will release from the tape onto your project. So are you ready to start? Below I’ll give you a list of the materials you need & then step-by-step instructions.
Materials
- Adhesive foil (color of your choice)
- Transfer tape (regular grip)
- Scraper
- Weeder
- Measuring tape
- Coffee filter
- Rubbing alcohol
- Cricut standard grip mat
- Cricut or cutting machine
- Your idea/design
- Blank item
Let’s first go in Cricut Design Space to make your design. Click on your canvas. You need to know the size to make your design. Measure the length you’re going to need for your design. My champagne glasses are flute style so I don’t want my design to be longer than 2 inches.
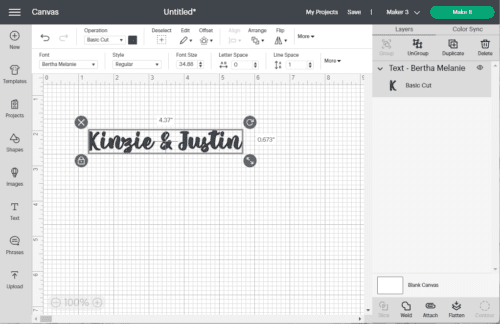
In Design Space, I’m starting out with text. (I only need text & two hearts for my design.) So click on “text” on the left side. Type what you want in your design. I’m using the ‘Bertha Melanie’ font today. At the top you’ll see the ‘font’ area. So pick whatever font you’d like.
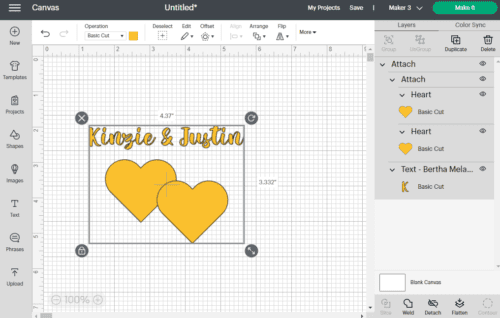
Now I added two hearts from ‘shapes’ on the left. I changed the color of all to gold. I attached the two hearts, then clicked on that box & the text box, then clicked on ‘align’. This way you can make sure they are centered. After that, I attached all of it together. Now you have your design ready.
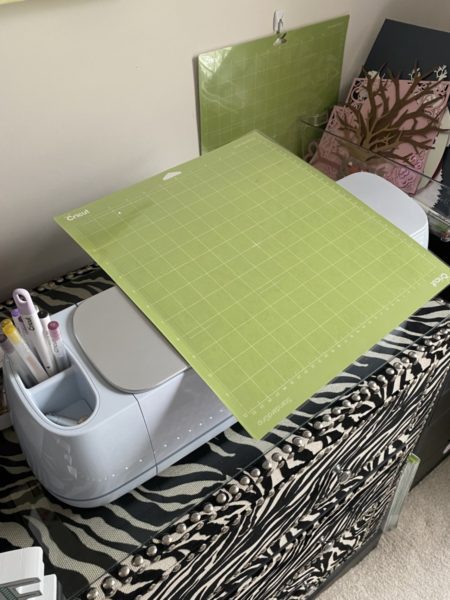
Use your standard grip mat (green) to cut. Then weed your design & you’re ready to apply!
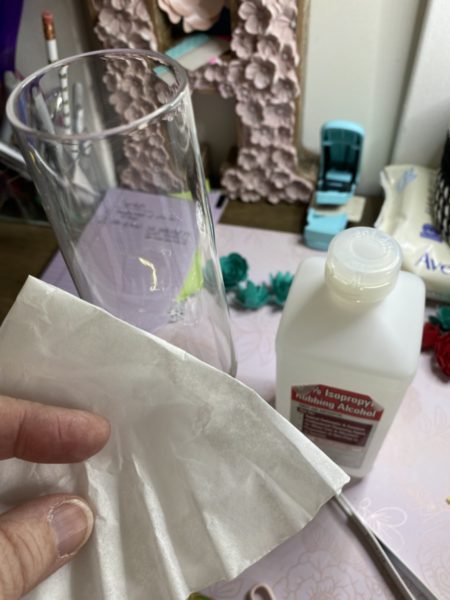
Using rubbing alcohol & a lint free rag (or a coffee filter!) rub the glass where you’re going to put the decal. This helps the decal adhere to your blank or glass in this case. You can prep your glass at any time, before the whole project would probably be best, I just didn’t think like that today! 😁
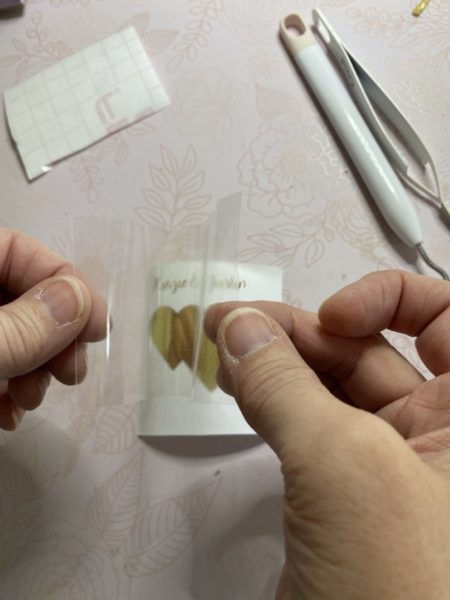
Cut your transfer tape a little bit bigger than your decal size.
Peel the backing off the transfer tape. You’re going to apply the transfer tape to the decal by holding it in a “taco” shape. Lay it in the middle first & go out.
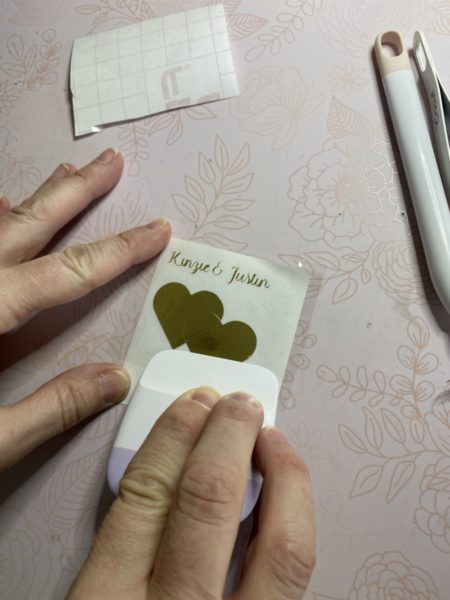
Making sure there are no bubbles, use your scraper starting in the middle & go out to the edges. You’re going to have to scrap a lot if you’re using foil adhesive. Scrap front & back.
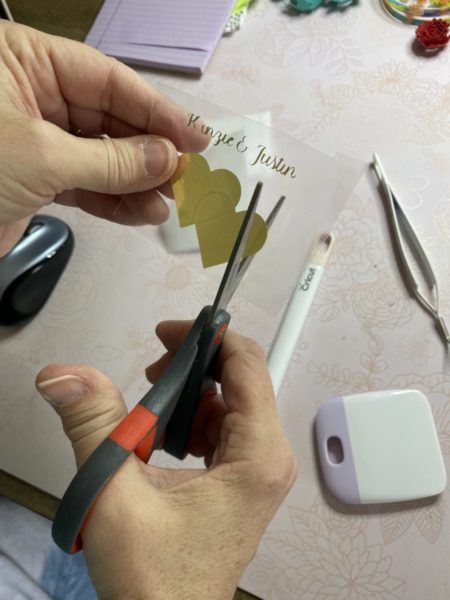
So after scraping the front & back slowly peel the transfer tape off. I say slowly because you have to make sure the decal is sticking to the transfer tape & it doesn’t always do that. If you’re having problems, use your weeder tool to help it along. When you are placing a decal on a blank that is round; a glass, coffee mug, vase, etc. it’s good to make little cuts on the bottom of your decal. This helps it to be straight & not so difficult to apply.
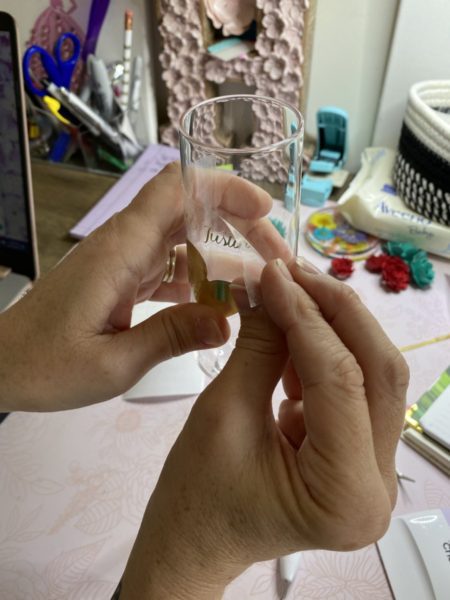
Now is the time to apply it to your glass! So exciting when you get to see it all come together. When you’re lining it up always look at your words or decal & not the transfer tape unless you cut the transfer tape perfectly straight. Once you’ve applied the decal, use your fingers to do your “scraping”. It’s hard to use your scraper when it’s a round glass. If there are any air bubbles push those out. The last step, just slowly peel off the transfer tape from the glass!
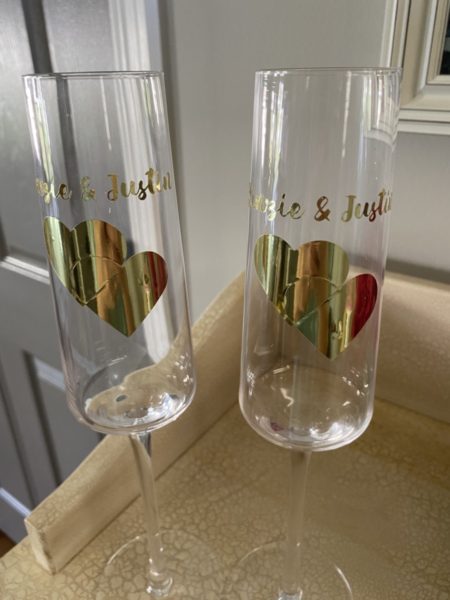
Here is the result of my champagne glasses. I hope your project turned out just as well. Hope y’all have a great day! 💕