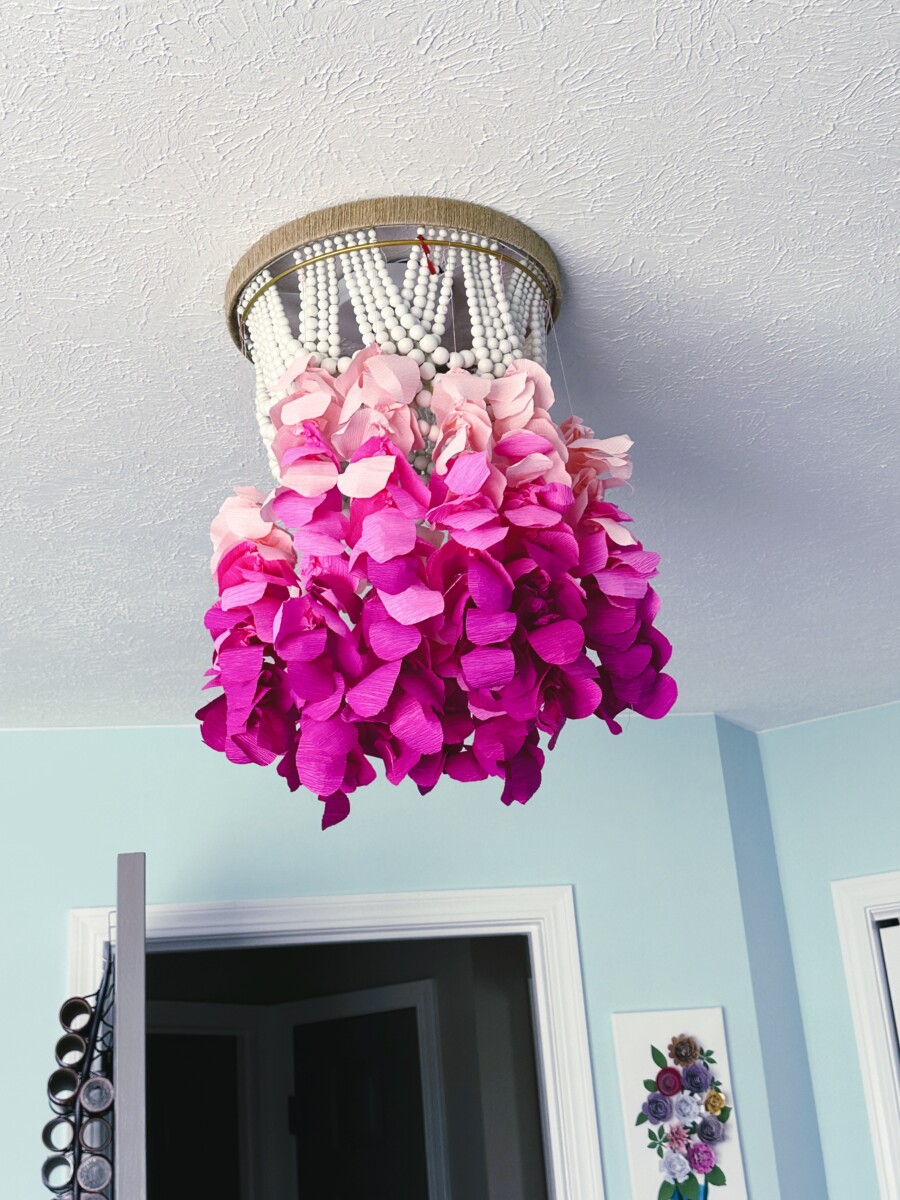
How to Make a Wisteria Light Fixture
Hi there! Guess what? I discovered crepe paper! Not really, but you know what I mean. I have not done any crafts with crepe paper until NOW. Now, I can say I have! I made this cute Wisteria light fixture & I want to show you step-by-step how to make one yourself.
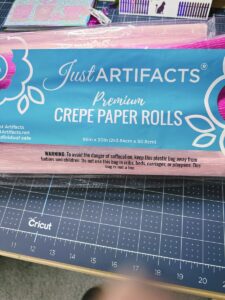
I found out that there are different types of crepe paper. Some are real thin & aren’t the most user friendly. I found some “premium” crepe paper that is thicker compared to most & it was really nice working with it. I would definitely recommend using the one I linked below. So let me show you how to make a wisteria light fixture! I will warn you now, this project takes a while.
Supplies Needed
First, this is the crepe paper I used. I put links to everything I used above. Of course, they have different colors, I just chose pink ones. I used three different pink colors out of it. I wanted to do an ombre’ effect, but you can do what you like.
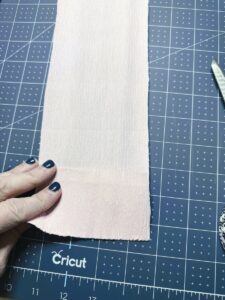
So to start, you need to cut 4″ long strips of the crepe paper (make sure they are rolls & mine were 20″ wide). Keep cutting because one strip makes about seven or eight shapes which isn’t even one row of hanging paper. I’m guessing I cut about 25 strips of each color. If this helps, I used almost a whole roll of crepe paper & they are 96″. You need to do this for each color. I used 3 colors.
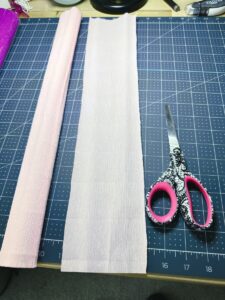
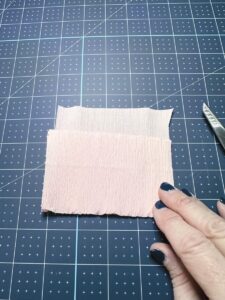
Once that is done, you are going to fold the strips in 2.5″ to 3″ folds all the way to the end.
After you fold a strip, if you get to the end & there is a little left over, just cut that off.
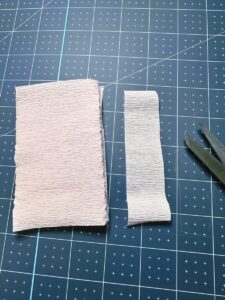
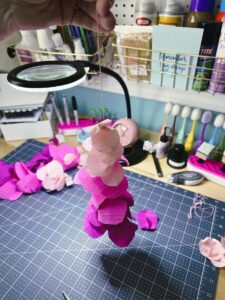
Now that you folded all of your strips (all the colors) you are going to cut out a “hot air balloon” shape. This was the hardest part for me, because I’m NOT an artist, so do the best you can!
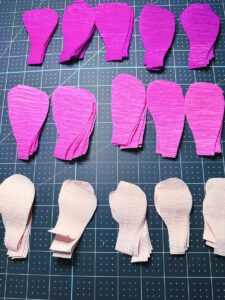
After you have them all cut out into balloon shapes, you are going to take the end at the bottom & twist it two or three times & then turn it to the inside of the rounded shape. A tip for twisting the end & not tearing…smush the end together first & then twist.
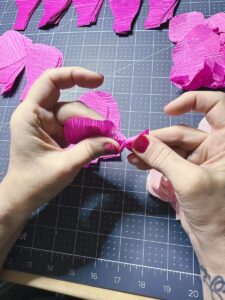
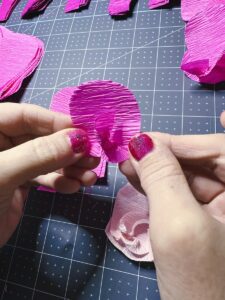
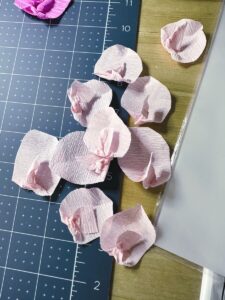
Twist for all colors. Should look something like below picture when done. Then, shape the balloon part to look kind of like a flower petal.
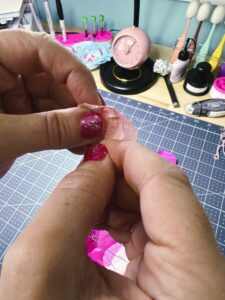
After the twisting is all done, we’re going to take one piece of embroidery floss (if you don’t have embroidery floss, you can use two strands of regular thread) & cut it to 20″ long. (This will be what you’re going to thread through & it will hold them onto the ring so I would try to match the thread to your colors you’ve chosen.) You now want to do a double knot at the end of the floss or thread. In the picture below, after threading my sewing needle, pull the strand down to about half way.

Once you have the needle threaded, take one piece of the crepe paper shape & put the needle through the twisted part (it’s kind of like a ball) & push it all the way down to the bottom making sure the knotted thread holds it. (Note: Use your darkest color first.)
Now, do another piece, but this time when you push it down, turn it to the opposite side of the one you started with. I would do approximately 10-12 of each color. To make it blend a little better, I would do my first 10, then 2 of the next color, go back & do 2 of the previous color, do 10 of that next color & so on. You should have 3 colors to do, unless you did your colors differently.
After all your strings are done, tie them onto the metal wreath ring.
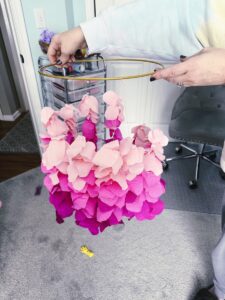
After I did all my strings, I haphazardly put it onto my current light fixture. I didn’t want to take my current light fixture down, but I did want to see what it would look like.

I think it would be beautiful. You could even tie the strings up higher if you didn’t want them to hang so low. I probably would have done that if I was going to hang it for real. Just can’t believe you can make something pretty like this with crepe paper! I hope you enjoyed this project & that you learned how to make a wisteria light fixture! If you want to learn how to make a beautiful hanging flower, click here. If you liked this post, please share it on social media, & I would love it if you followed me while you were there! I would appreciate it so much! 💕