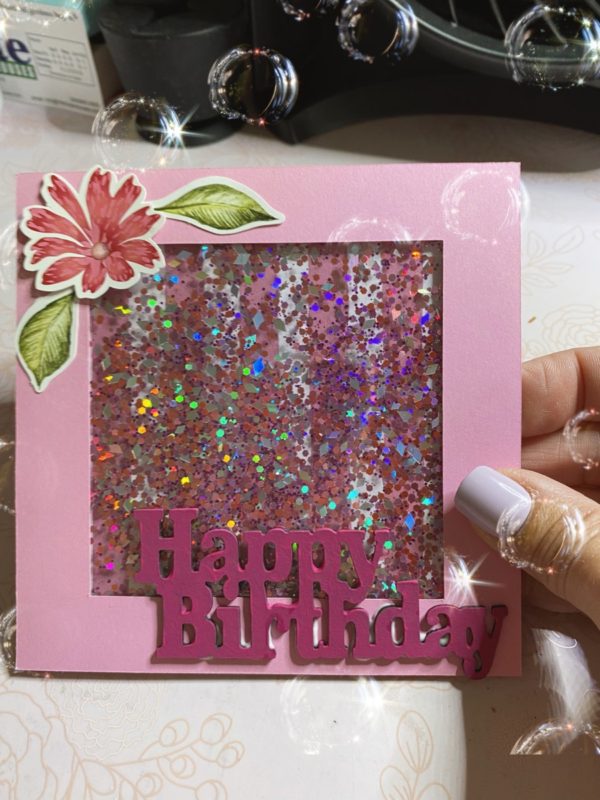
How to Make a Shaker Card
I remember my very first shaker card. I was so excited that I made something that looked like a professional fancy card! So I’m going to show you how to make your very own shaker card! Some of you may ask, “what is a shaker card?”. Well, it’s a card that has a shape cut out on the front & covered in acetate. You then layer in a way that there is a “gap” so you can add your embellishments & when you move the card it gives you a “shaker” effect. Fun, huh!
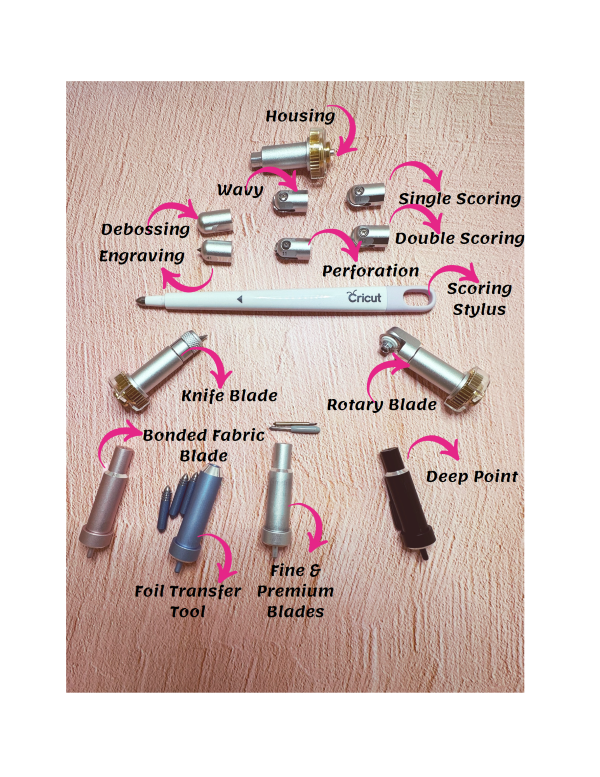
I’ll be using Cricut’s Design Space & using my Cricut Maker 3 to do the cuts. If you don’t own a Cricut, that’s fine, you’ll be able to follow along & cut the dimensions of the shapes with scissors. I will do basic square shapes to make it easier to cut by hand. I’ll give you the list of materials you’ll need & instructions on how to assemble your shaker card. You’ll never have to buy another card from the drugstore again! Let’s get started.
Materials Needed
- Cricut (I use the Maker3 but this is optional)
- Scissors
- Light Grip mat (if using a Cricut)
- Craft knife
- Cardstock
- Decorative paper
- Foam tape
- Tape runner
- Double-sided adhesive
- Acetate
- Sequins/glitter (any embellishment)
Step 1 – Cutting your shaker card
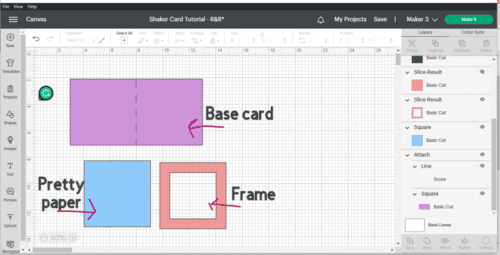
Let’s go to Design Space & the first thing we want to do is go to ‘shapes’ & pick the square. I will change my color to purple (or any color you choose) by clicking the black box in the “operation” drop-down menu. Now change the dimensions of the square at the top to 10″ x 5″. Add a score line (in shapes) & click both the score line & the square then go to ‘align’ & then ‘center’. While both things are still selected, click ‘attach’. This is our base card & when our card is closed the size will be 5″ x 5″.
Next, go into ‘shapes’ again & pick another square just like you did, but this time we want to change the dimensions to 5″ x 5″. That will be for our “background paper” & you can also change this to the color of your choice( each square needs to be a different color). Making sure the 5″x5″ square is selected, duplicate the square by clicking on “duplicate” on the right.
Now, go into ‘shapes’ one last 😉 time & pick another square. Change these dimensions to 3.5″ x 3.5″. Put that inside one of the 5″x5″ squares. (If it goes behind your bigger square, go up to ‘arrange’ & click on “move to front”). Click both layers or both squares & click on ‘align’ at the top then click ‘center’. With both layers still selected, click on ‘slice’. This will cut the smaller square out of the bigger one. Pull the top 2 layers out of the square & put them to the side. One by one, select those 2 squares & click on the little eye in the layers bar. That way when we go to “Make It” those 2 squares won’t cut. We just want the one that looks like a frame.
So your screen should look something like the screenshot below. Check the layers menu at the right also to see if it’s the same. The only thing that should be different is the “text” shouldn’t be on yours! 😁Now just click on “Make it”. Use whatever cardstock & pretty paper you want to use. Just follow the directions that Cricut gives you for the cutting. That’s it for Design Space and/or the Cricut. Like I said earlier, you can very well do this without a Cricut & just use scissors.
Step 2 – Assembling your shaker card
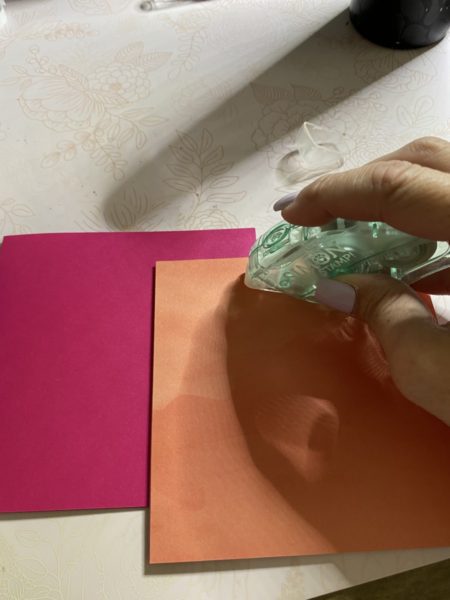
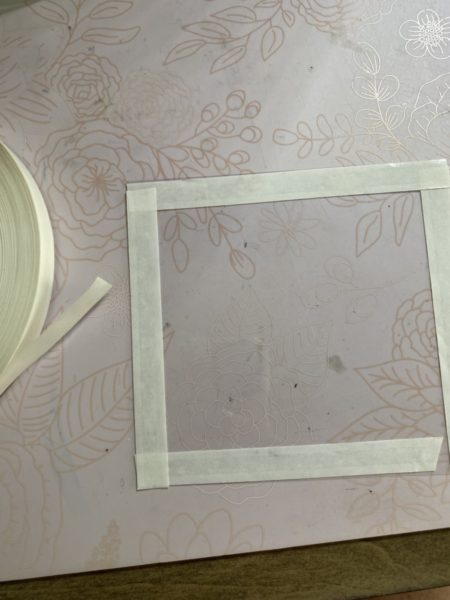
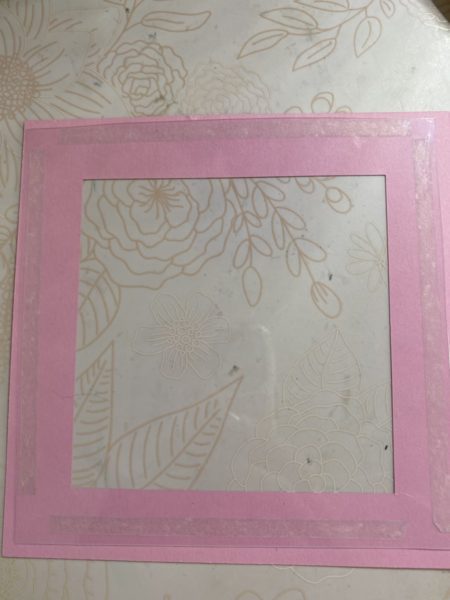
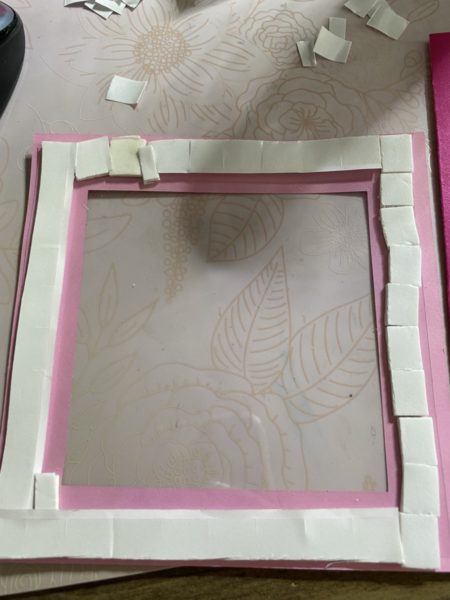
We’re going to take our card base & set it aside. Using your craft knife, cut a sheet of acetate to a little larger than the cut-out in the “frame” square (it doesn’t have to be perfectly straight). Make it as big as you can, but not so big that it’ll show on the outsides of the “frame”. Mine is approx. 1/4″ bigger on all sides. Next, take your double-sided tape & put it around the outside edges of the acetate. Keep in mind when you’re applying, you don’t want to see the tape through the window of the frame. Now flip your “frame” cardstock over & attach the acetate to the back. You want to make sure your acetate is flat against the card. See pics below.
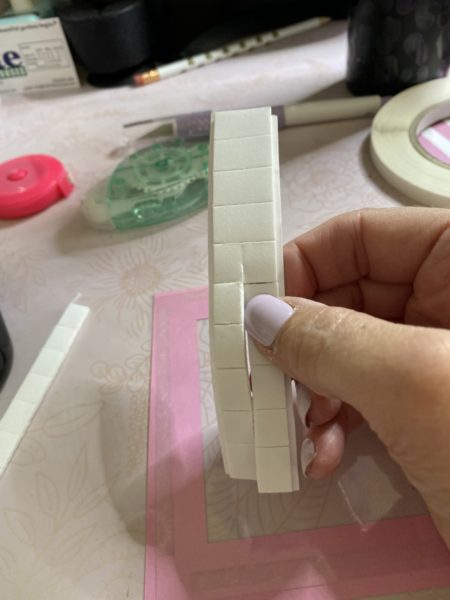
Next, we’re going to use foam tape. Measure how long you need for a side of your “frame” & cut 2 strips. Then you want to cut those 2 strips in half the long way. (See left pic.) Peel off one side of the tape & attach the strips to the middle of each side of the “frame”. Keep in mind, that you don’t want to be able to see the foam tape from the inside where the cut-out is. Also, you have to make sure there are no gaps with your foam tape because your glitter or embellishments will slip through. If you see below, in the pic on the right, I had to add a couple of tiny pieces within because I had tiny gaps.
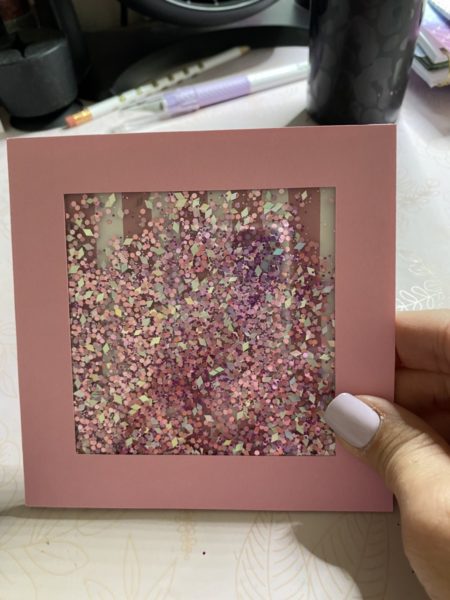
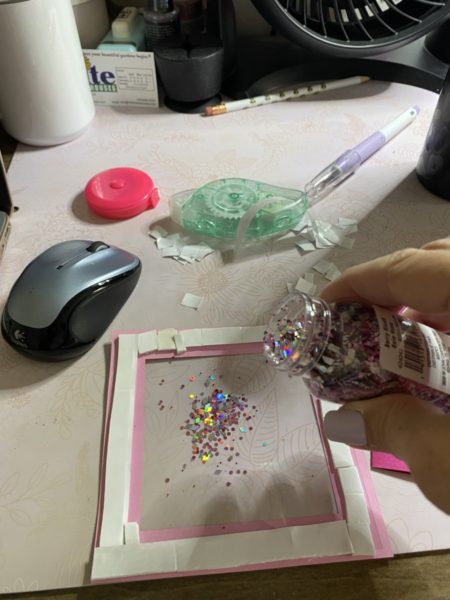
Now is when you add your embellishments, glitter, or whatever you’ve chosen to put in the ‘pocket’. I’m using some of that chunky glitter.
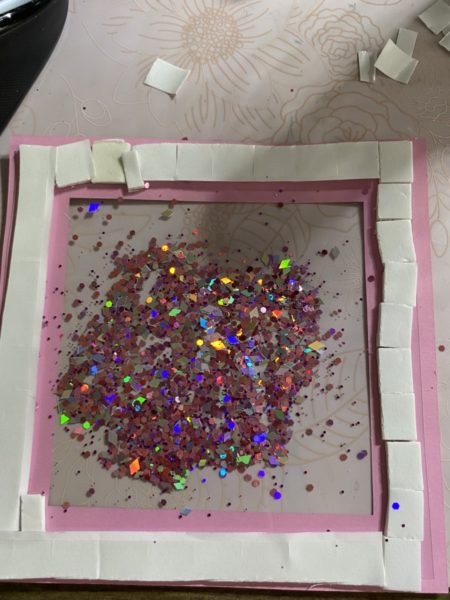
Now you want to take off the top tape from the foam. Once you do that, take your “pretty” cardstock or background paper & apply it right on top. Last thing, using your tape runner, apply the glue to the back of your decorative paper & attach it to your base card. Now you can embellish the front of the card or not. Either way, you HAVE to give it a “shake”! There’s your “shaker card”! 💕