How to Make a Cut-Out Card on Cricut
Today, I will teach you how to make a cut-out card on Cricut. I will show you a very simple & easy way where you’ll be able to make a card in a few minutes. Then I’ll show you how you can make one all your own. I’ve added the materials you’ll need to make two cards below.
MATERIALS NEEDED
- Cutting Machine (I use the Cricut Maker 3)
- Light grip or standard grip mat
- Scoring stylus or scoring tool (depending on your machine or preference)
- Fine Point Blade
- Tape Runner
- Adhesive spray
- Weeding tool
- Tweezers
- Bone Folder
- Cardstock – blue shimmer
- Cardstock – silver glitter
- Cardstock – rose gold glitter
- Snowflake paper (for envelope)
- Cardstock – red
- Cardstock – white glitter
First Cut-Out Card
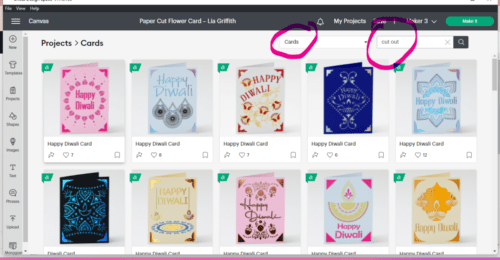
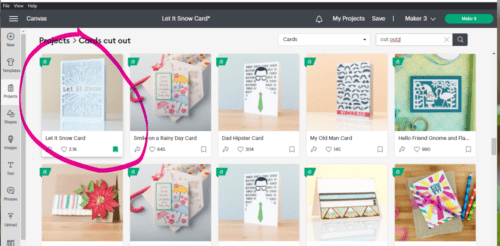
First, we want to go to Design Space & get on our canvas. Once you’re there, go to ‘projects’. At the top search bar drop-down menu, arrow down to “cards”, then type in “cut-out” on the right search box. This will bring up cards already designed for you that you can print out & customize to your liking or make as is.
Now scroll down until you see the below card, “Let It Snow”. Click on it then click on “customize”.
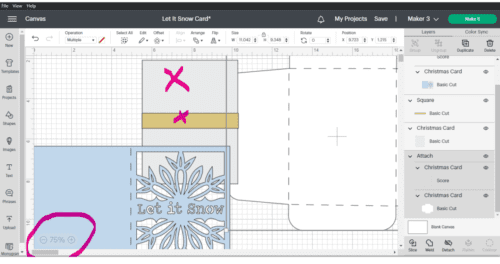
Your next screen will look a little like the image below. At first, your card will look like it’s in a stack. I always turn my magnification down (lower left corner) to 75% so I can see most everything on my screen. Then I want you to pull your stack apart so you can see what’s all there. Drag your envelope over & then pull your card down. There’s more there than what you thought, right? You don’t need to do anything with this card but send it to your Cricut after you figure out your corresponding cardstock choices. So click ‘make it’ & then you’ll follow the instructions from your Cricut over there.
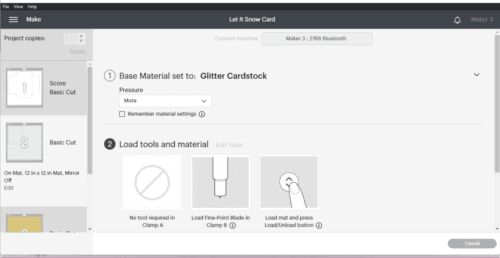
My first cardstock is glitter, so I’ve picked glitter cardstock for my materials & then this is a tip; for the ‘pressure’, I always put ‘more’. It makes a nice clean cut. I do that for everything, even if I’m cutting vinyl, infusible ink sheets, whatever it is. Another tip….when you take your cardstock off your mat, turn it upside down & peel the mat away from your cardstock. Then the cardstock won’t curl.
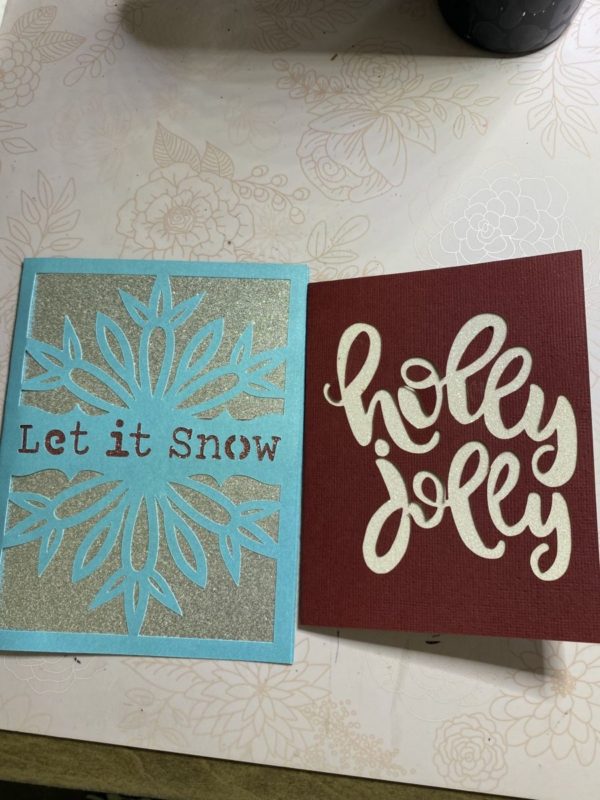
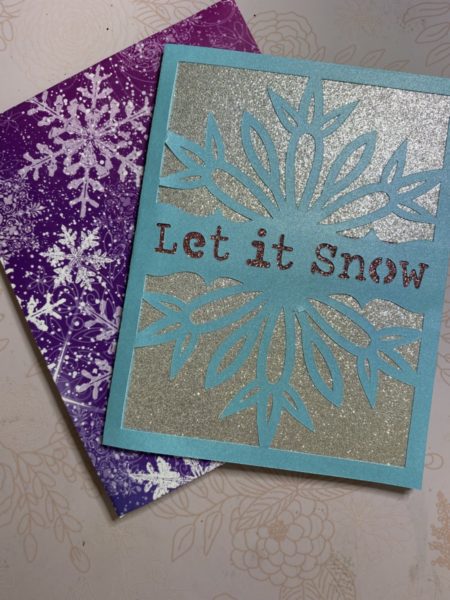
After everything is cut out just put your pieces together with your tape runner. For cards & envelopes, I like using the ‘bone folder’ tool. It’s makes an incredible difference. Also, for my envelopes, I use double sided adhesive tape to close my envelope when the card is ready. Don’t tape it (like I used to do!)! I don’t like that taste of the glue from regular envelopes so I always taped! I just didn’t realize the “look” until I started making my own cards. So below is how my card turned out. I didn’t even put anything else on it & it’s a beautiful card.
Second Cut Out Card
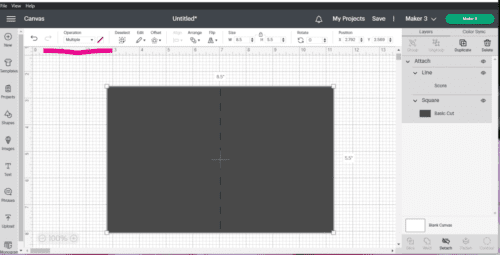
This cut-out card we’re going to make with the Cricut will be a little more work. We’re going to start with ‘shapes’. So on your canvas, go to ‘shapes’ on the left menu & get the square. Resize the square at the top to 8.5″ x 5.5″. This will end up being a 4.25″ x 5.5″ card. Now go back into ‘shapes’ & grab the ‘score line’. Put that in the square & resize the length from top to bottom (the little boxes attached to the line go up to the square’s line – so they stay on the inside). Now select the square & the ‘score line’ & click ‘align’ at the top. Then click ‘center’ & while both are still selected, click ‘attach’ at the bottom right.
I like to change my card color to something besides black so I’m going to make it pink. So at the top you’ll see the ‘operation’ says “multiple” in the box. Click on that drop down arrow & click ‘basic’ & then it will bring up the black color again & you can then change it to whatever color you like.
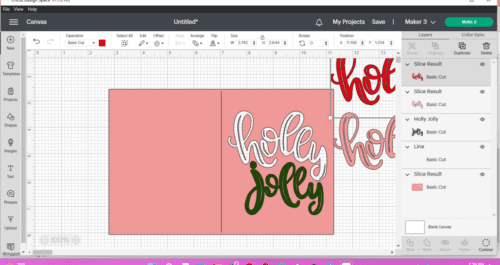
Next, I’d like you to go to ‘images’ on the left menu. There will be lists of options & on the far right, click on ‘holidays’. Now, scroll down to find the “holly jolly” image you see below. We want to use the ‘slice’ tool here, but you cannot slice with more than two layers. In this image, it has two layers of its own. So on the right, in the layers menu, click only the ‘holly’ layer & only the ‘square’ layer, then you can ‘slice’ them. (You might have to ‘ungroup’ if you can’t select the ‘holly’ layer on its own.)

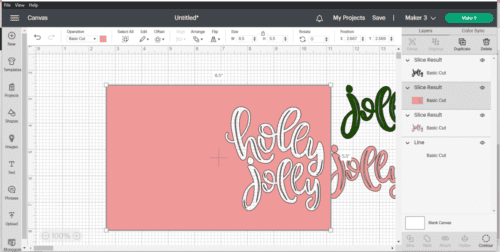
Now look at the pic below; I want you to pull out the red ‘holly’ & then the pink ‘holly’ & delete them one by one. Then you might notice the ‘jolly’ disappeared. Click on the square & select ‘arrange’ at the top & ‘send to back’. This should bring it forward again like the picture.
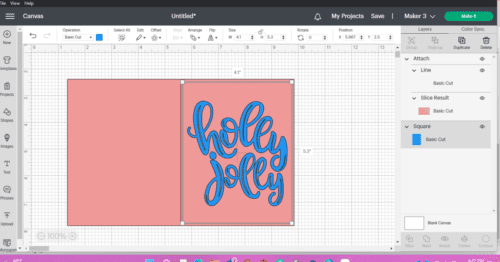
Now select only ‘jolly’ & only the ‘square’ & then ‘slice’ again. Pull those two layers out & delete. You will probably notice your score line is gone. It’s behind the square, so click the square & go to ‘arrange’ at the top & ‘send to back’. Now the score line should be there. So, to be safe, I would make sure it’s still centered & then you can click ‘attach’ again.
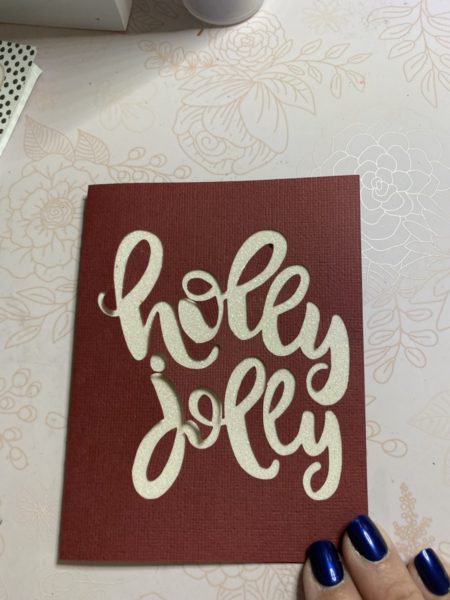
Let’s go back into ‘shapes’ & grab another square. We need to resize that square to 4.1″ W x 5.3″ H & change it to the color of your choice. We’re going to put it behind the “holly jolly” side of the card by selecting the new square & clicking on ‘arrange’ at the top & ‘send it back’.
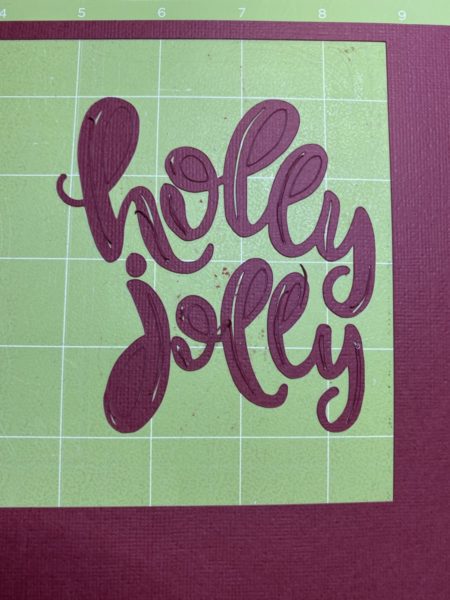
Well, there you go! You’ve made your very own cut-out card! After I cut this out, I made two discoveries. One is that even though this would obviously be a Christmas card, thus the “holly jolly”, I made the colors pink & blue. Thank goodness I had my head on straight when I picked out the colors to ‘make it’ with the Cricut! The second thing, when I started to take the card off the mat, I realized there would be some large holes in the card unless I didn’t keep those big pieces in the center of the letters. So don’t scrape your mat yet. Pull off the card, & then using your weeding tool, carefully pick out those big pieces in the centers. See below what I mean.
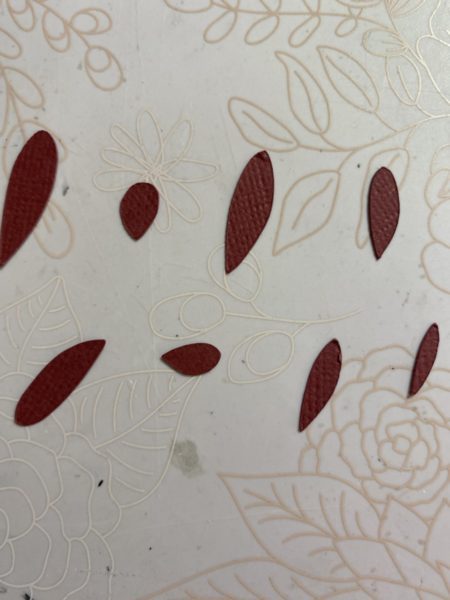
Now, we can glue those onto the square we’re putting inside the card. 😁
I hope this post has helped you learn how to make a cut-out card on Cricut in different ways! Pretty fun, huh?! Interested in crafting a ‘shaker’ card? Click here. If you found this post helpful, please share on social media! If you have any questions, please feel free to ask me through our contact form & I will get back to you.💕