How to Download PNG Files to Your Computer
Well, hello there! Today, I wanted to show you how to download PNG files to your computer. I’ll also go over how to upload them to Cricut Design Space if that is what you intend to do. Either way, you’ll know how to do both things.
How to Download a PNG File to Your Computer
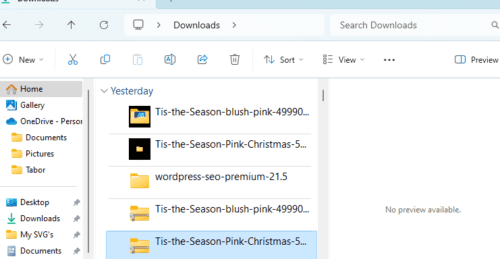
First, let’s start with downloading a PNG (or JPG) file. I’m getting my PNG file from Creative `Fabrica because that’s where I get the majority of my files for free since I have a subscription. Below you’ll see the file I’m using so here I’m going to click on “download”.

It will bring up the window below. You’ll want to make sure at the top that you’re saving it to the place you want it to go on your computer (you’ll need to remember where you saved it). Then you can keep the file name it comes with or you can change the name. Now click “save”.
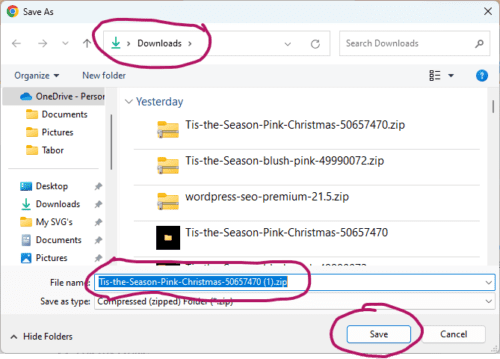
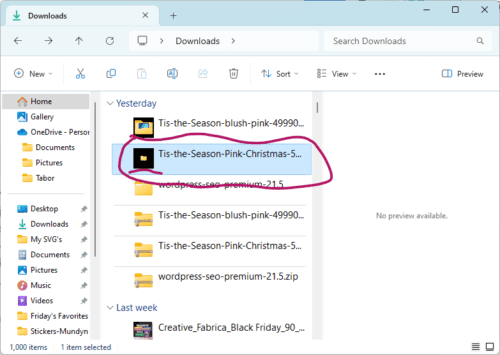
The file you just saved is called a “zip” file. Inside this file you will find your PNG file, but we have to “unzip” it first. With the file selected, right click & click on “extract all”.
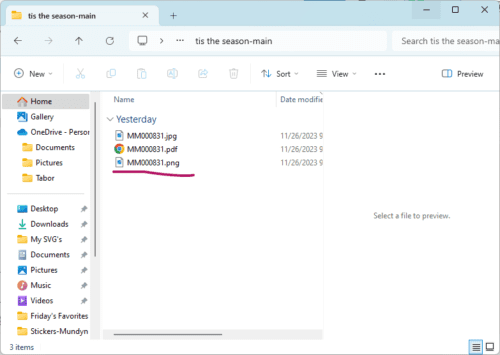
This will give you a file folder with almost the same name, but the icon will look like a file folder without the zip part. See below. Double click on this file.
Here you will see the PNG file. You have now downloaded your PNG file onto your computer! Yay!
How to Upload a PNG file to Cricut Design Space
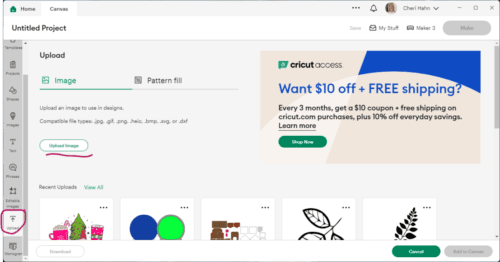
With Design Space open & on your Canvas, click on “Upload” on the left side & then “Upload Image” at the top.
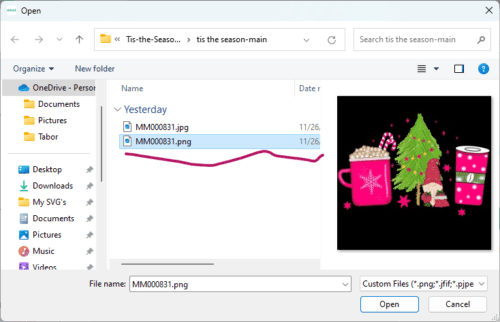
The next screen just hit “browse”. Now find your file wherever you saved it. Click “open”.
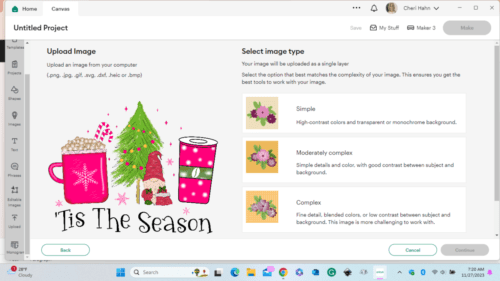
This is the screen that will come up after you click on “open”. Here you will click on the “image type”. I usually click on “complex”, but you can click on the one you think is most like your PNG file then click “continue”.
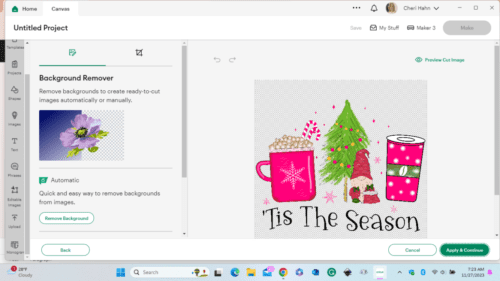
Below is the next screen that comes up. If you want to remove your background of the PNG image then do so here by clicking on “remove background”. Then click “apply & continue”.
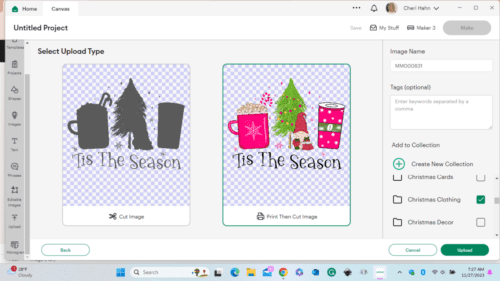
Below you will click on “print then cut” image. You can change the name, add tags & add it to your collection of files. Then click “upload”.
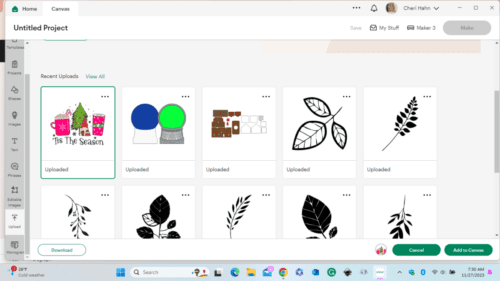
Last thing, here you can see it’s been uploaded. If you want the PNG image on your canvas to work with, click on the image then click “add to canvas”. There you go!
SUMMARY
You have downloaded a PNG file to your computer & uploaded a PNG file to Cricut Design Space! Now you can go to town with images! If you are interested in “How to Download Free Fonts to Cricut Design Space”, see that post here. If you liked this post, please share on social media & I would love it if you followed me while you were there! I would appreciate it so much! Thank you!💕