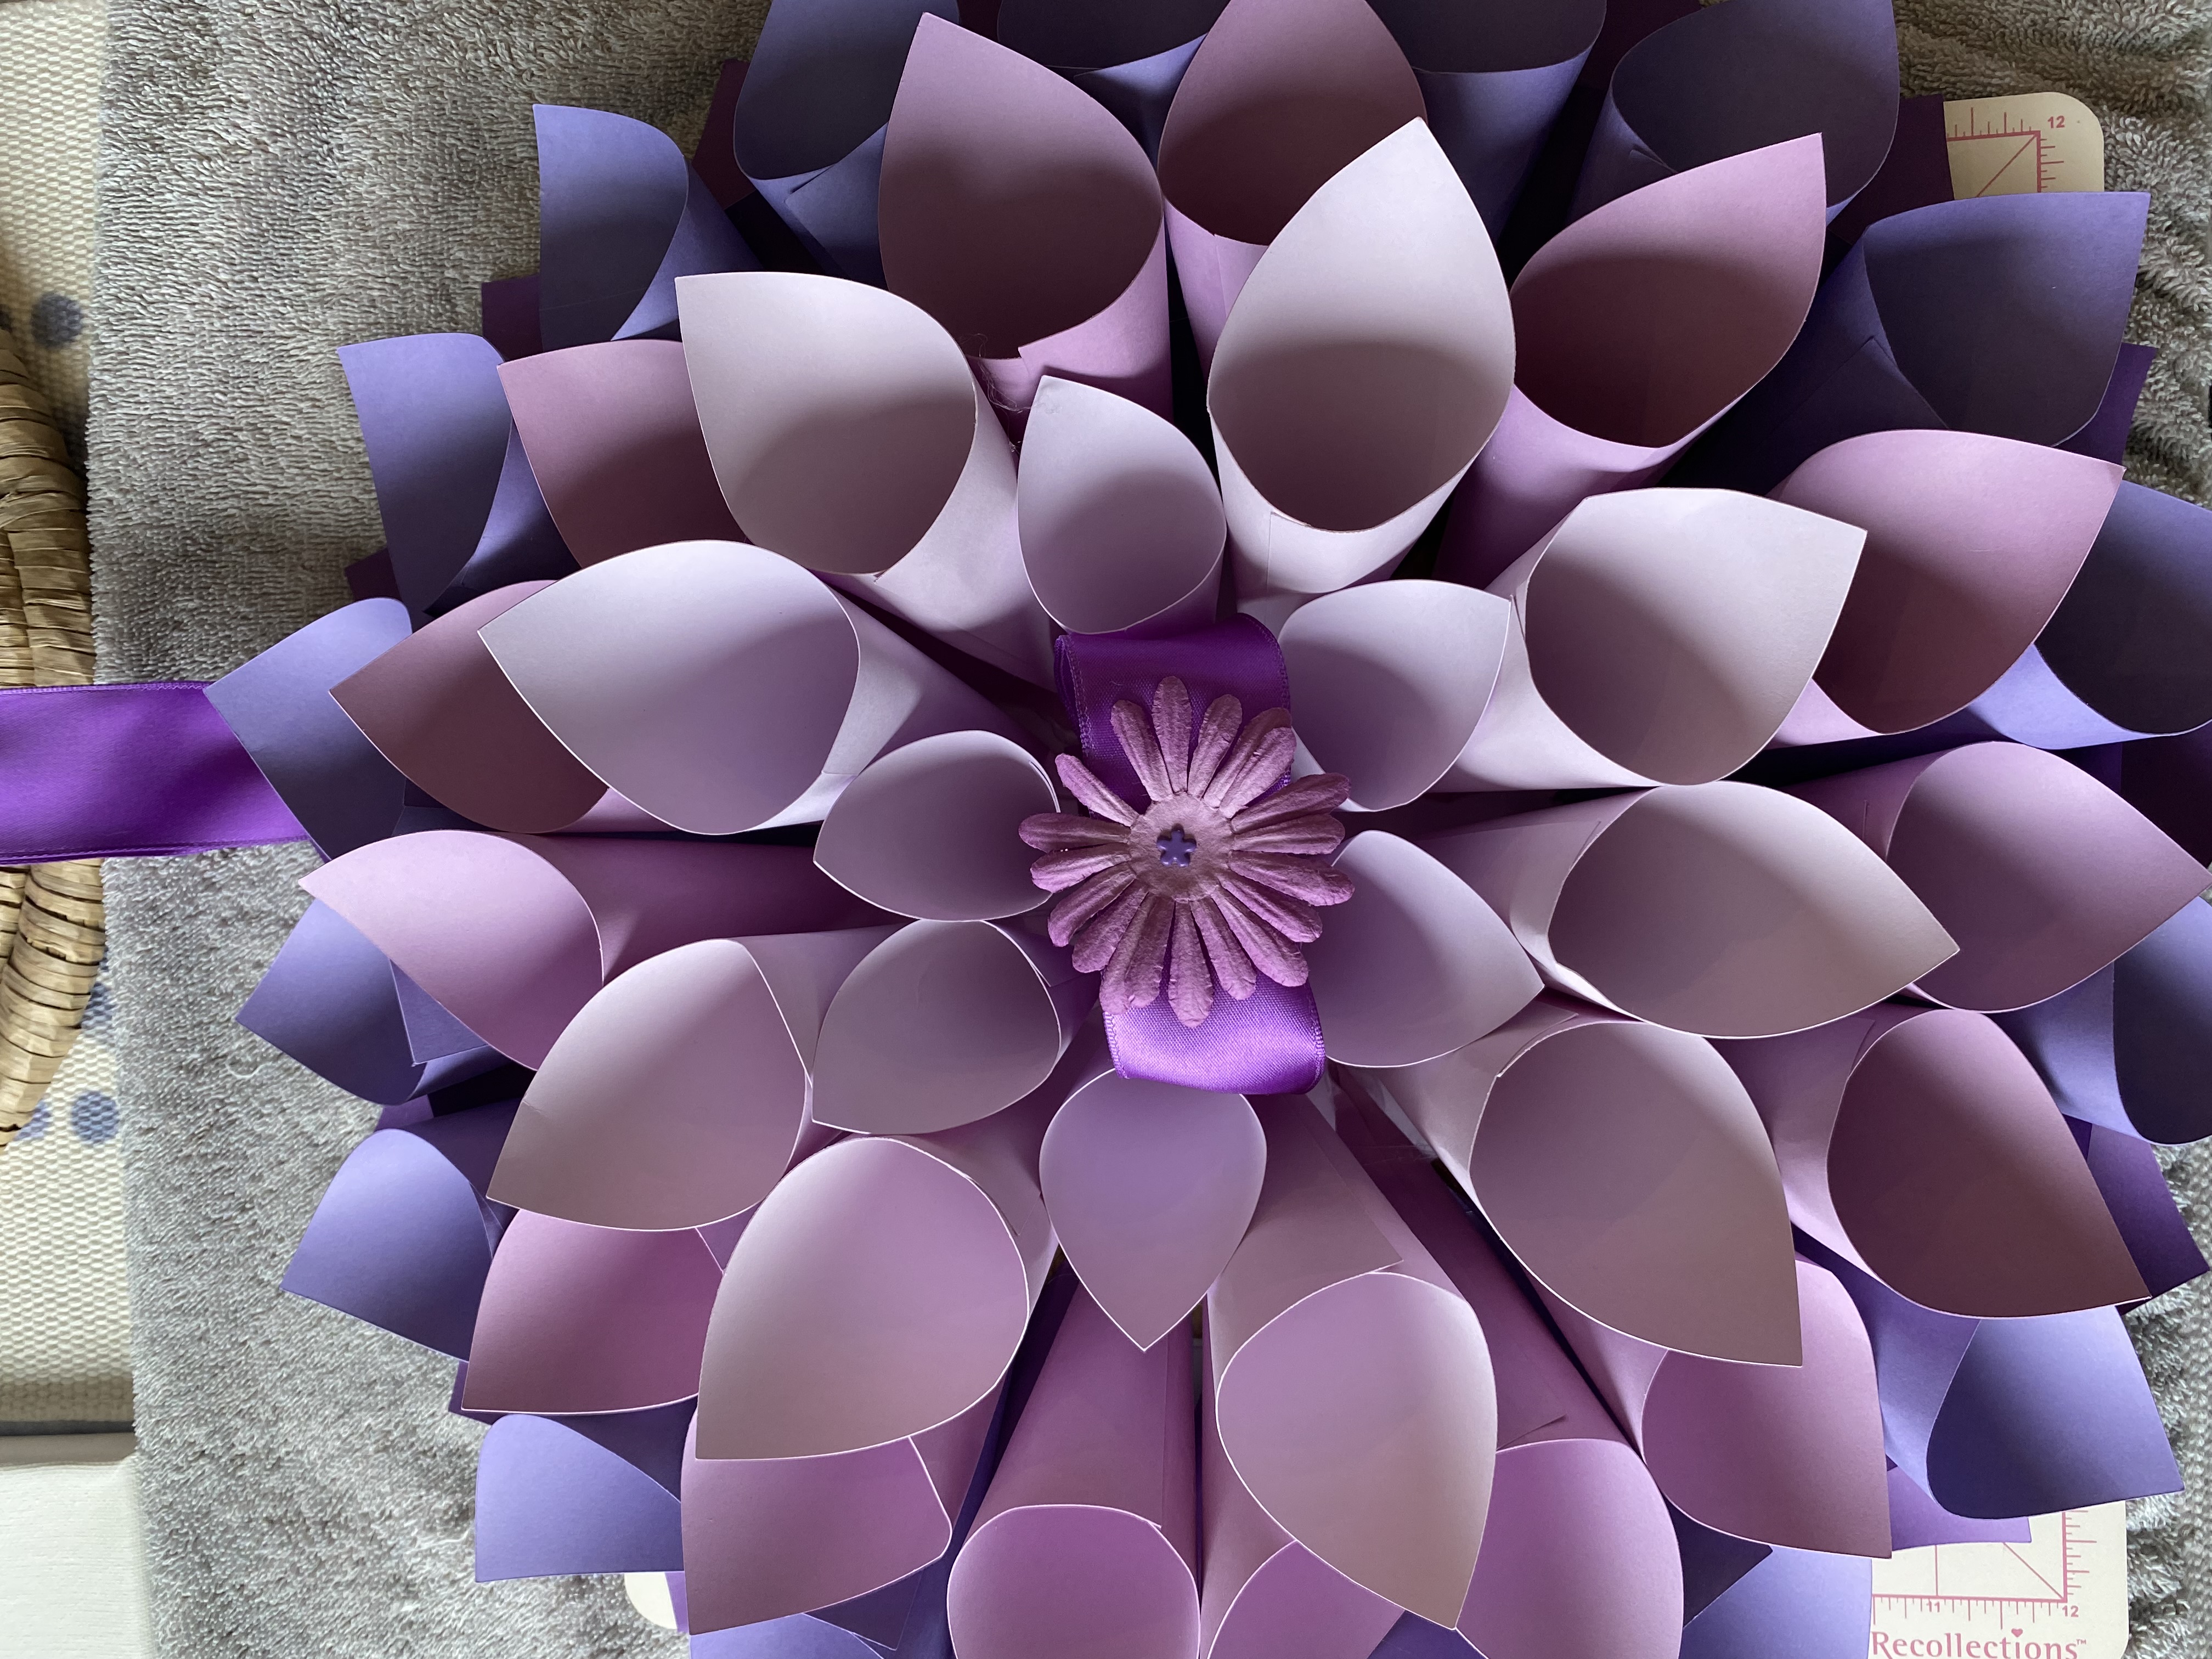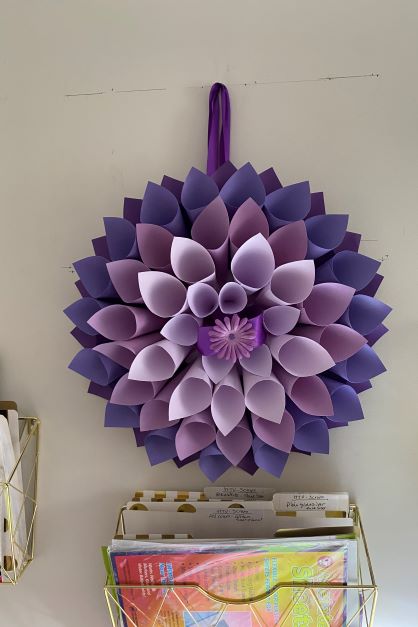
Hanging Paper Flower (Large) Project
Hi there everyone! I made this hanging flower & loved it so much I wanted to share it with you. It’s similar to a project that was on the Michaels site, but I put my spin on it (well, more like I screwed up so I HAD to put my spin on it!)! 😊😉 I’ll show you the ‘right’ way & ‘my’ way so you can do what you’d like. First, I’ll give you a list of the supplies you need for this project. Then I’ll give you the step-by-step process with some pictures to hopefully clarify. I used purple paper, but if you’d like to change colors that’s perfectly fine. So let’s get started!
Supplies needed:
- Paper cutter or your Cricut machine (Maker 3 – the one I use)
- Purple Passion pack of 8.5 x 11 cardstock from Recollections (or whichever color pack you’d like)
- 8″ circle cake board (1)
- Glue gun
- Glue sticks
- 1.5″ satin wired ribbon (whichever color matches your paper)
Instructions
Step 1: Use a paper cutter or your Cricut machine to cut squares of cardstock in the following sizes: (We will be assembling them from darkest to lightest.)
- Darkest purple – (18) 4″ squares
- Lighter purple than above – (18) 4″ squares
- Lighter purple than above – (15) 4″ squares
- Lightest purple – (9) 4″ squares & (6) 3″ squares
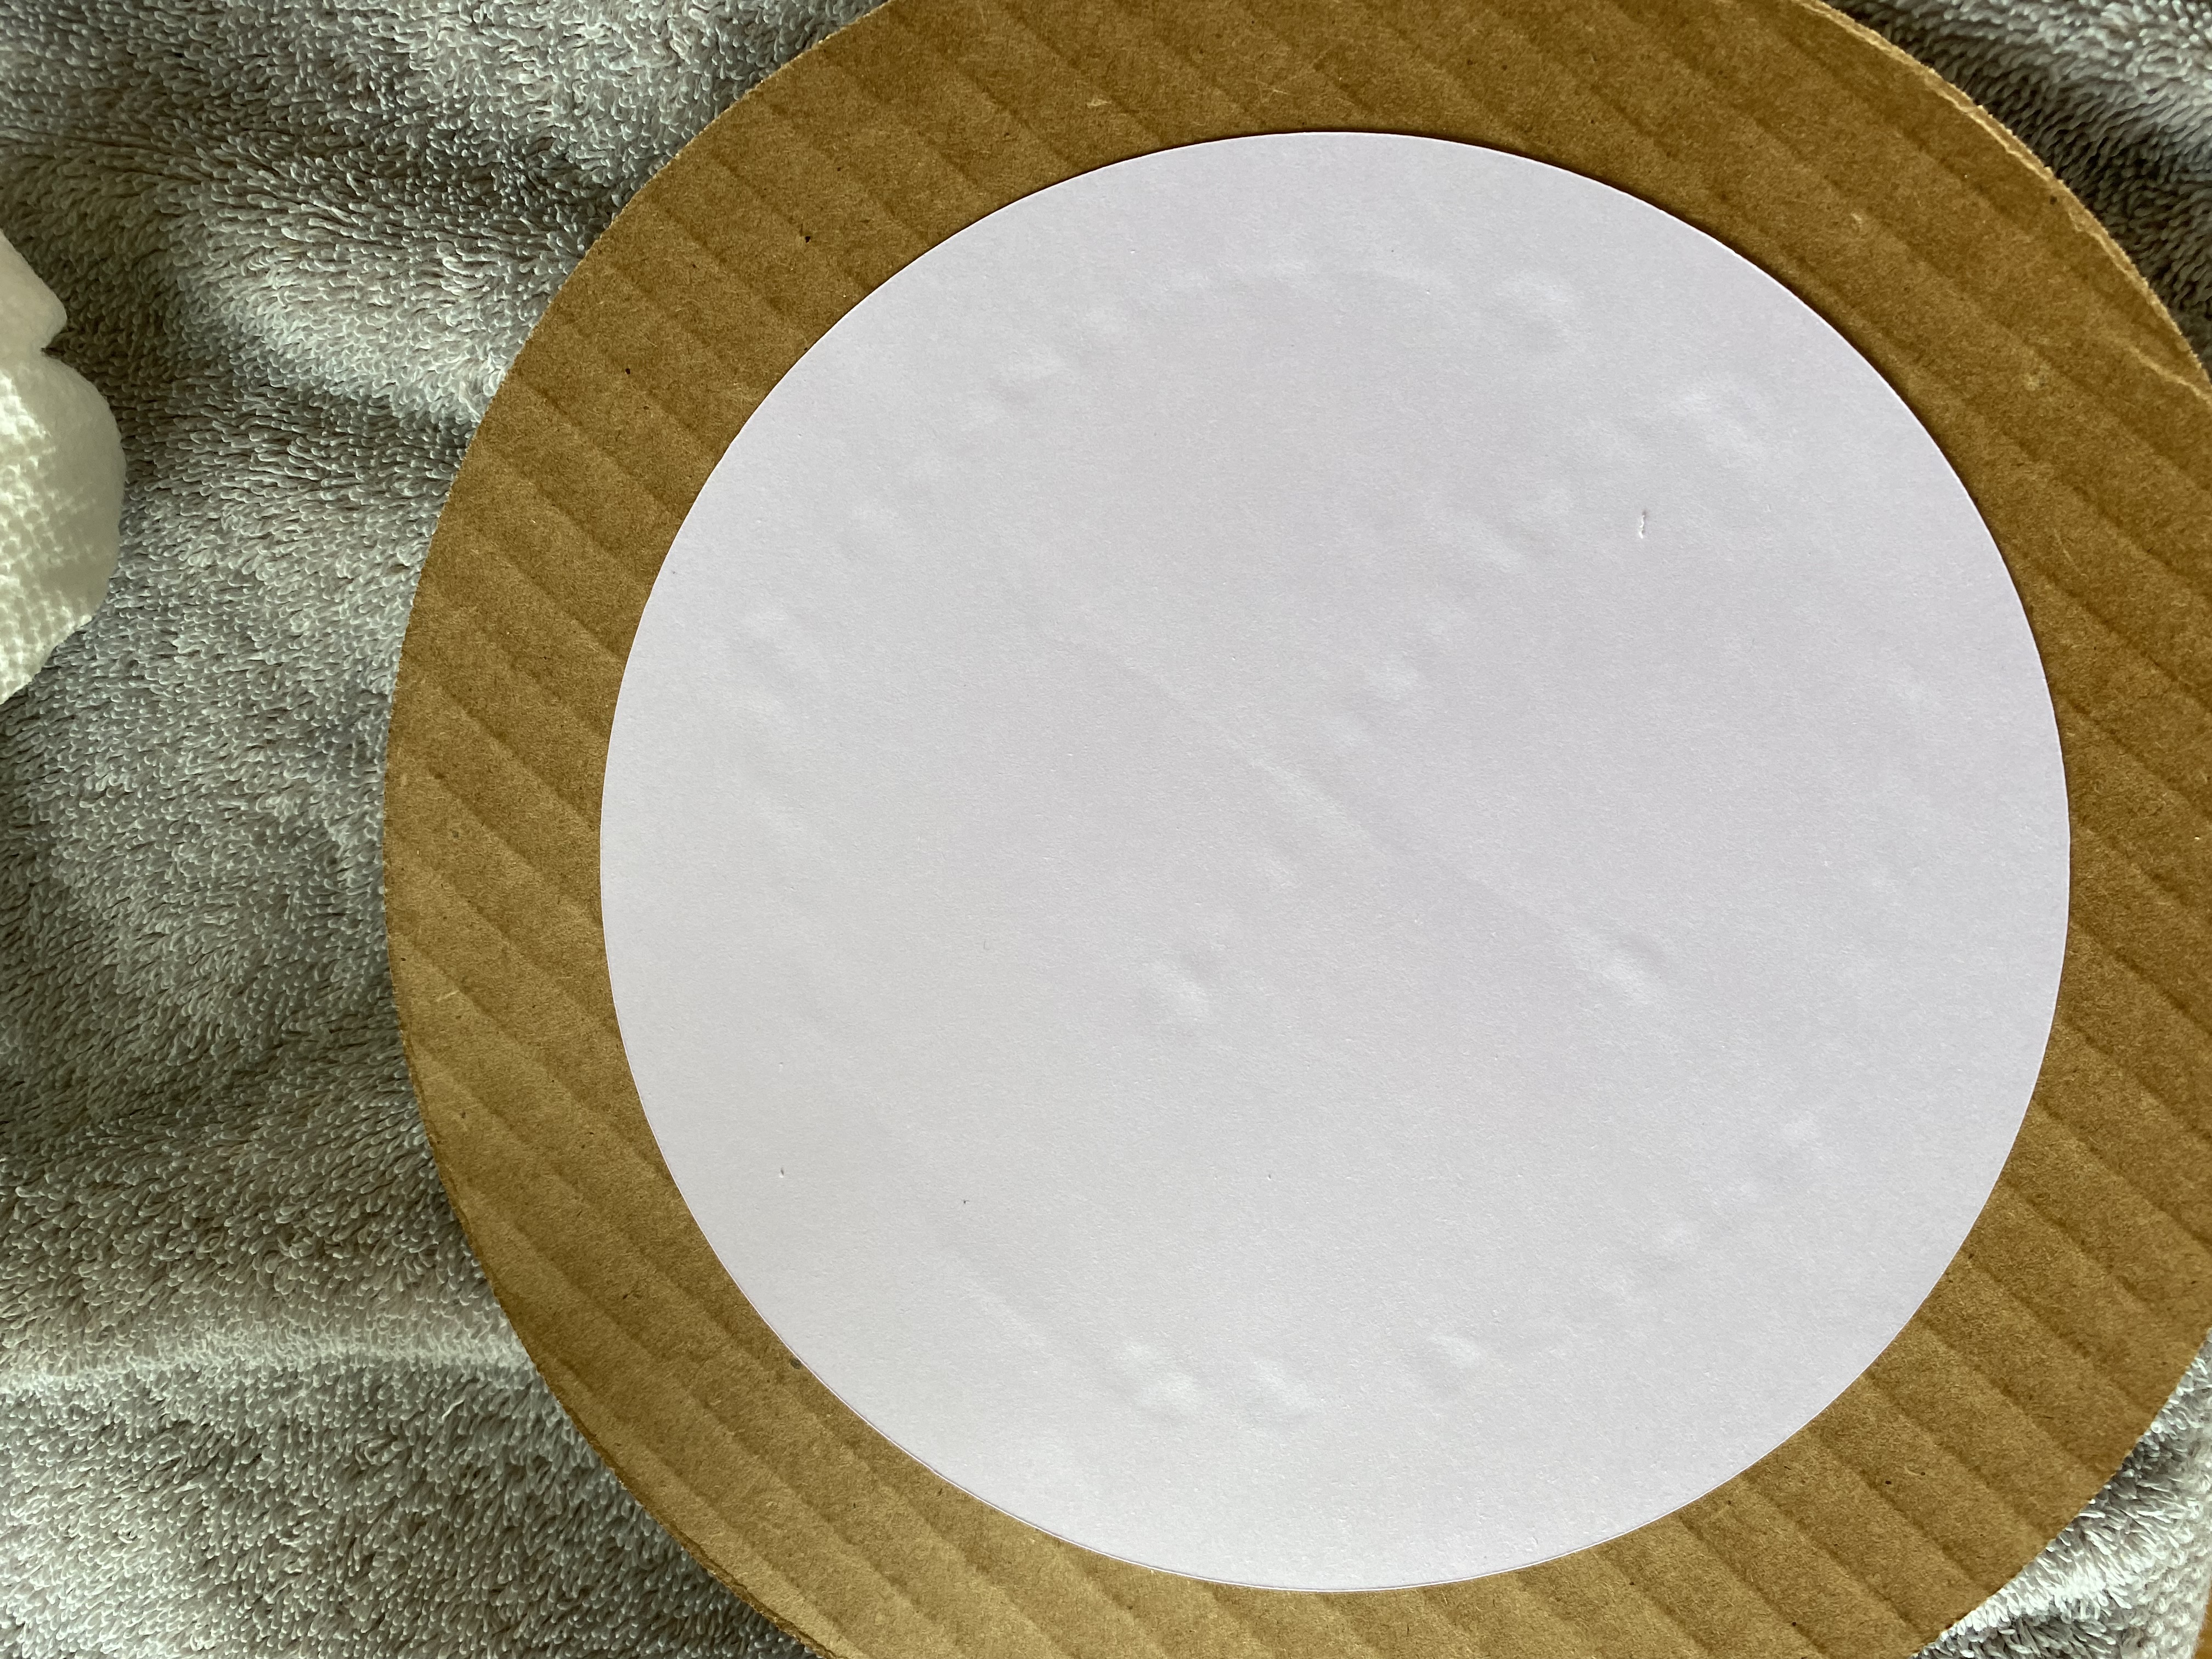
- Whichever color you choose – (1) 6″ circle
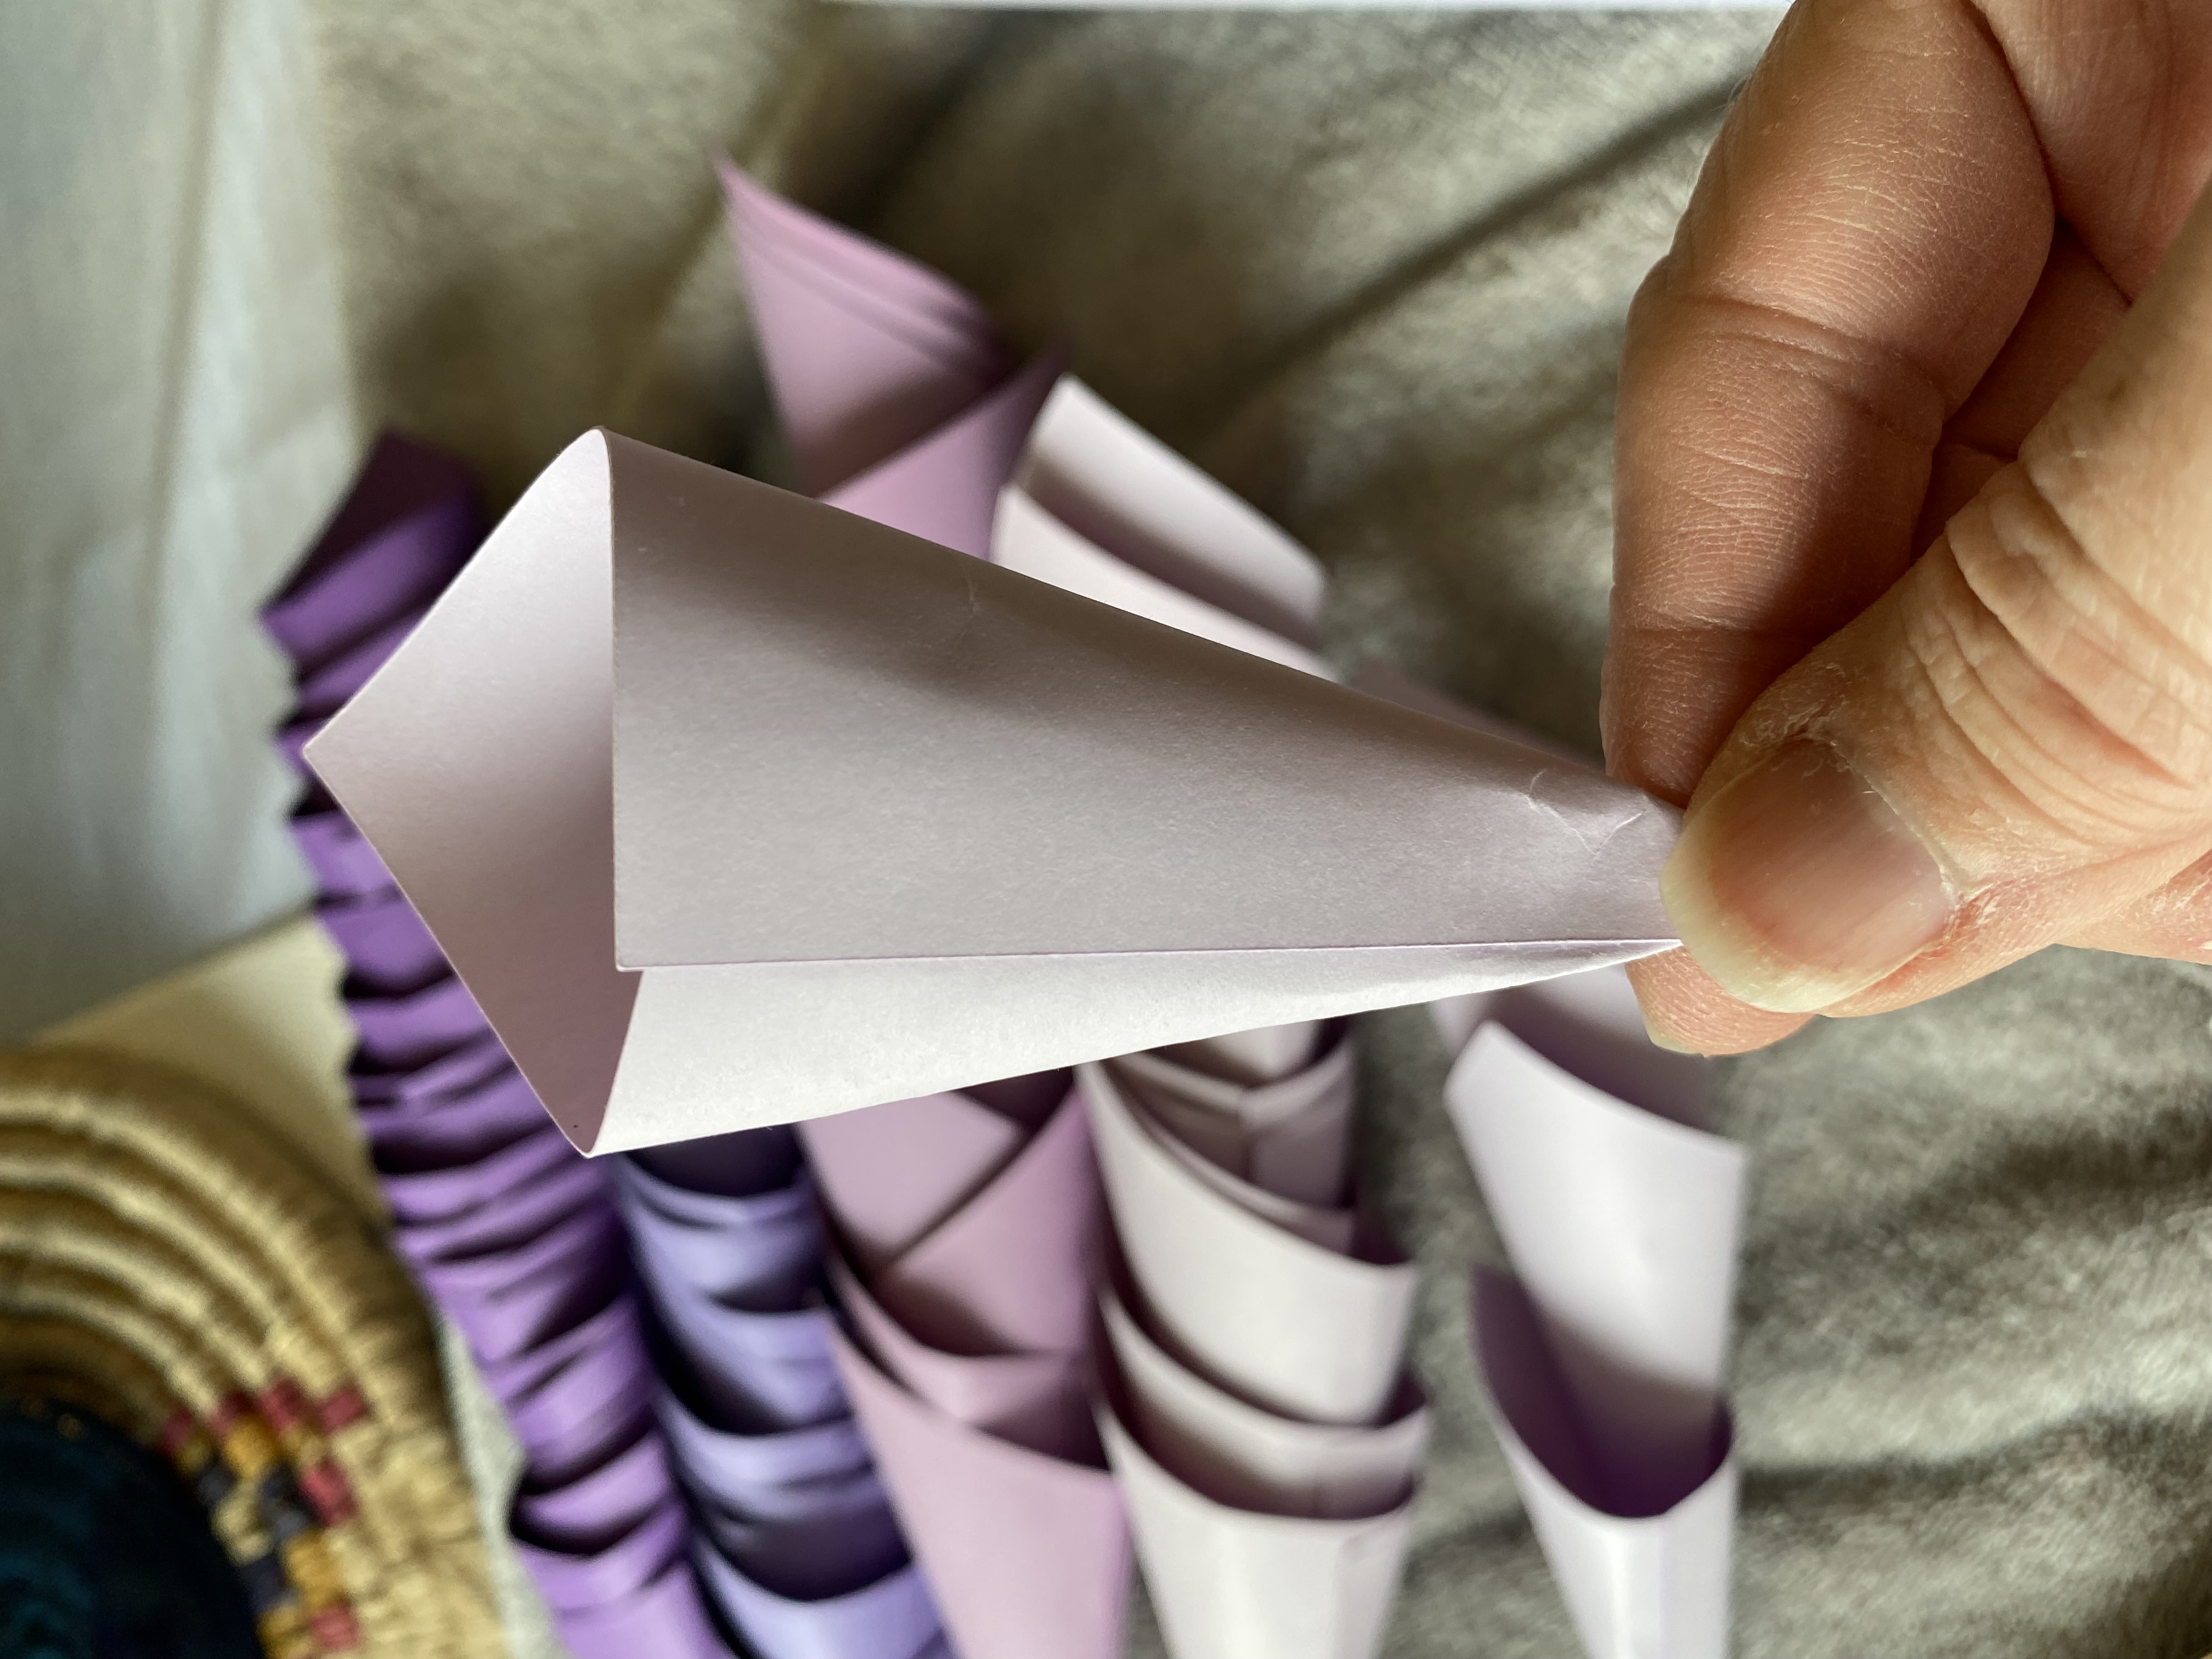
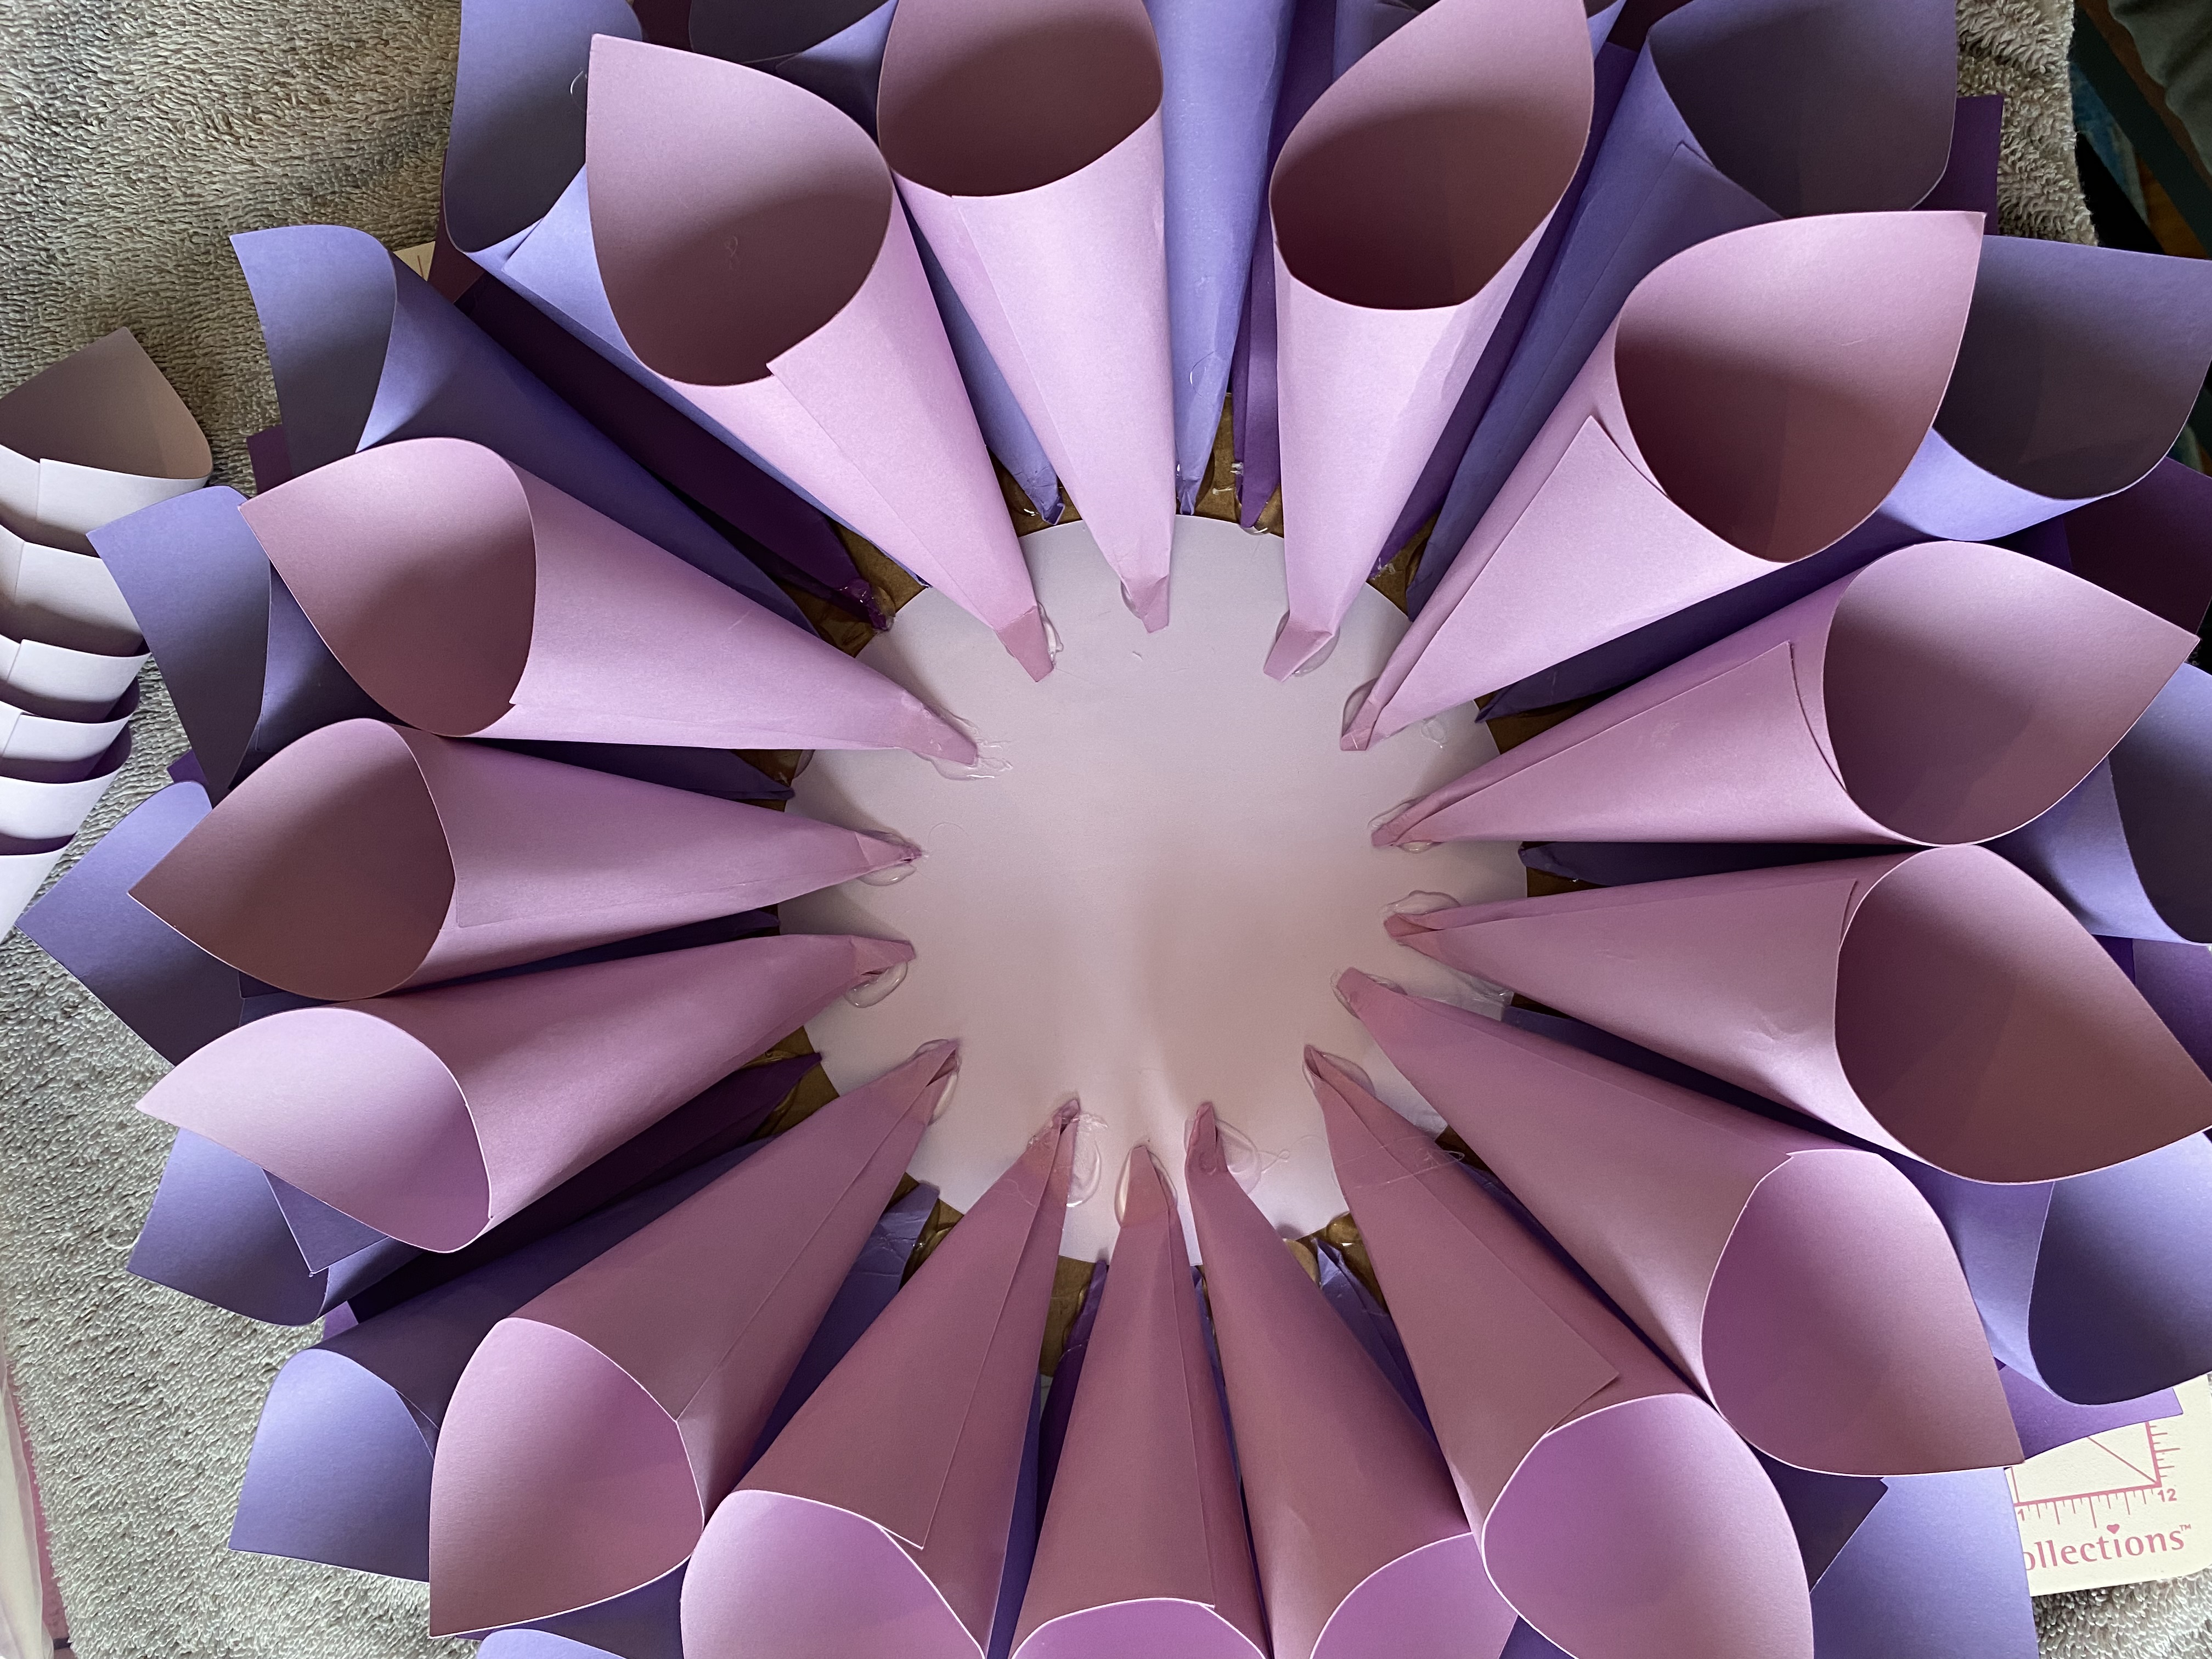
Step 2: Like I said above, we’re going to assemble them from the darkest color to lightest color. First, we need to roll each square piece into a cone shape. (This took me quite awhile to get down. Maybe it’s just me, but keep trying if you’re having problems.) Make sure one end of the cone is open & one is closed. You’re going to glue under the seam & press down to complete the cone shape.
Step 3: Once the cones are all done, we’re going to assemble. You want the cake circle & the 6″ cardstock circle. Glue the cardstock circle into the center of the cake circle. Along the edge of the cardstock circle is where you want to start lining up your cones. So take the darkest color of cones & pinch the bottom so you can glue the end & press down into the circle. Do this all the way around the circle, with all 18 pieces, leaving about a fingers width in between.
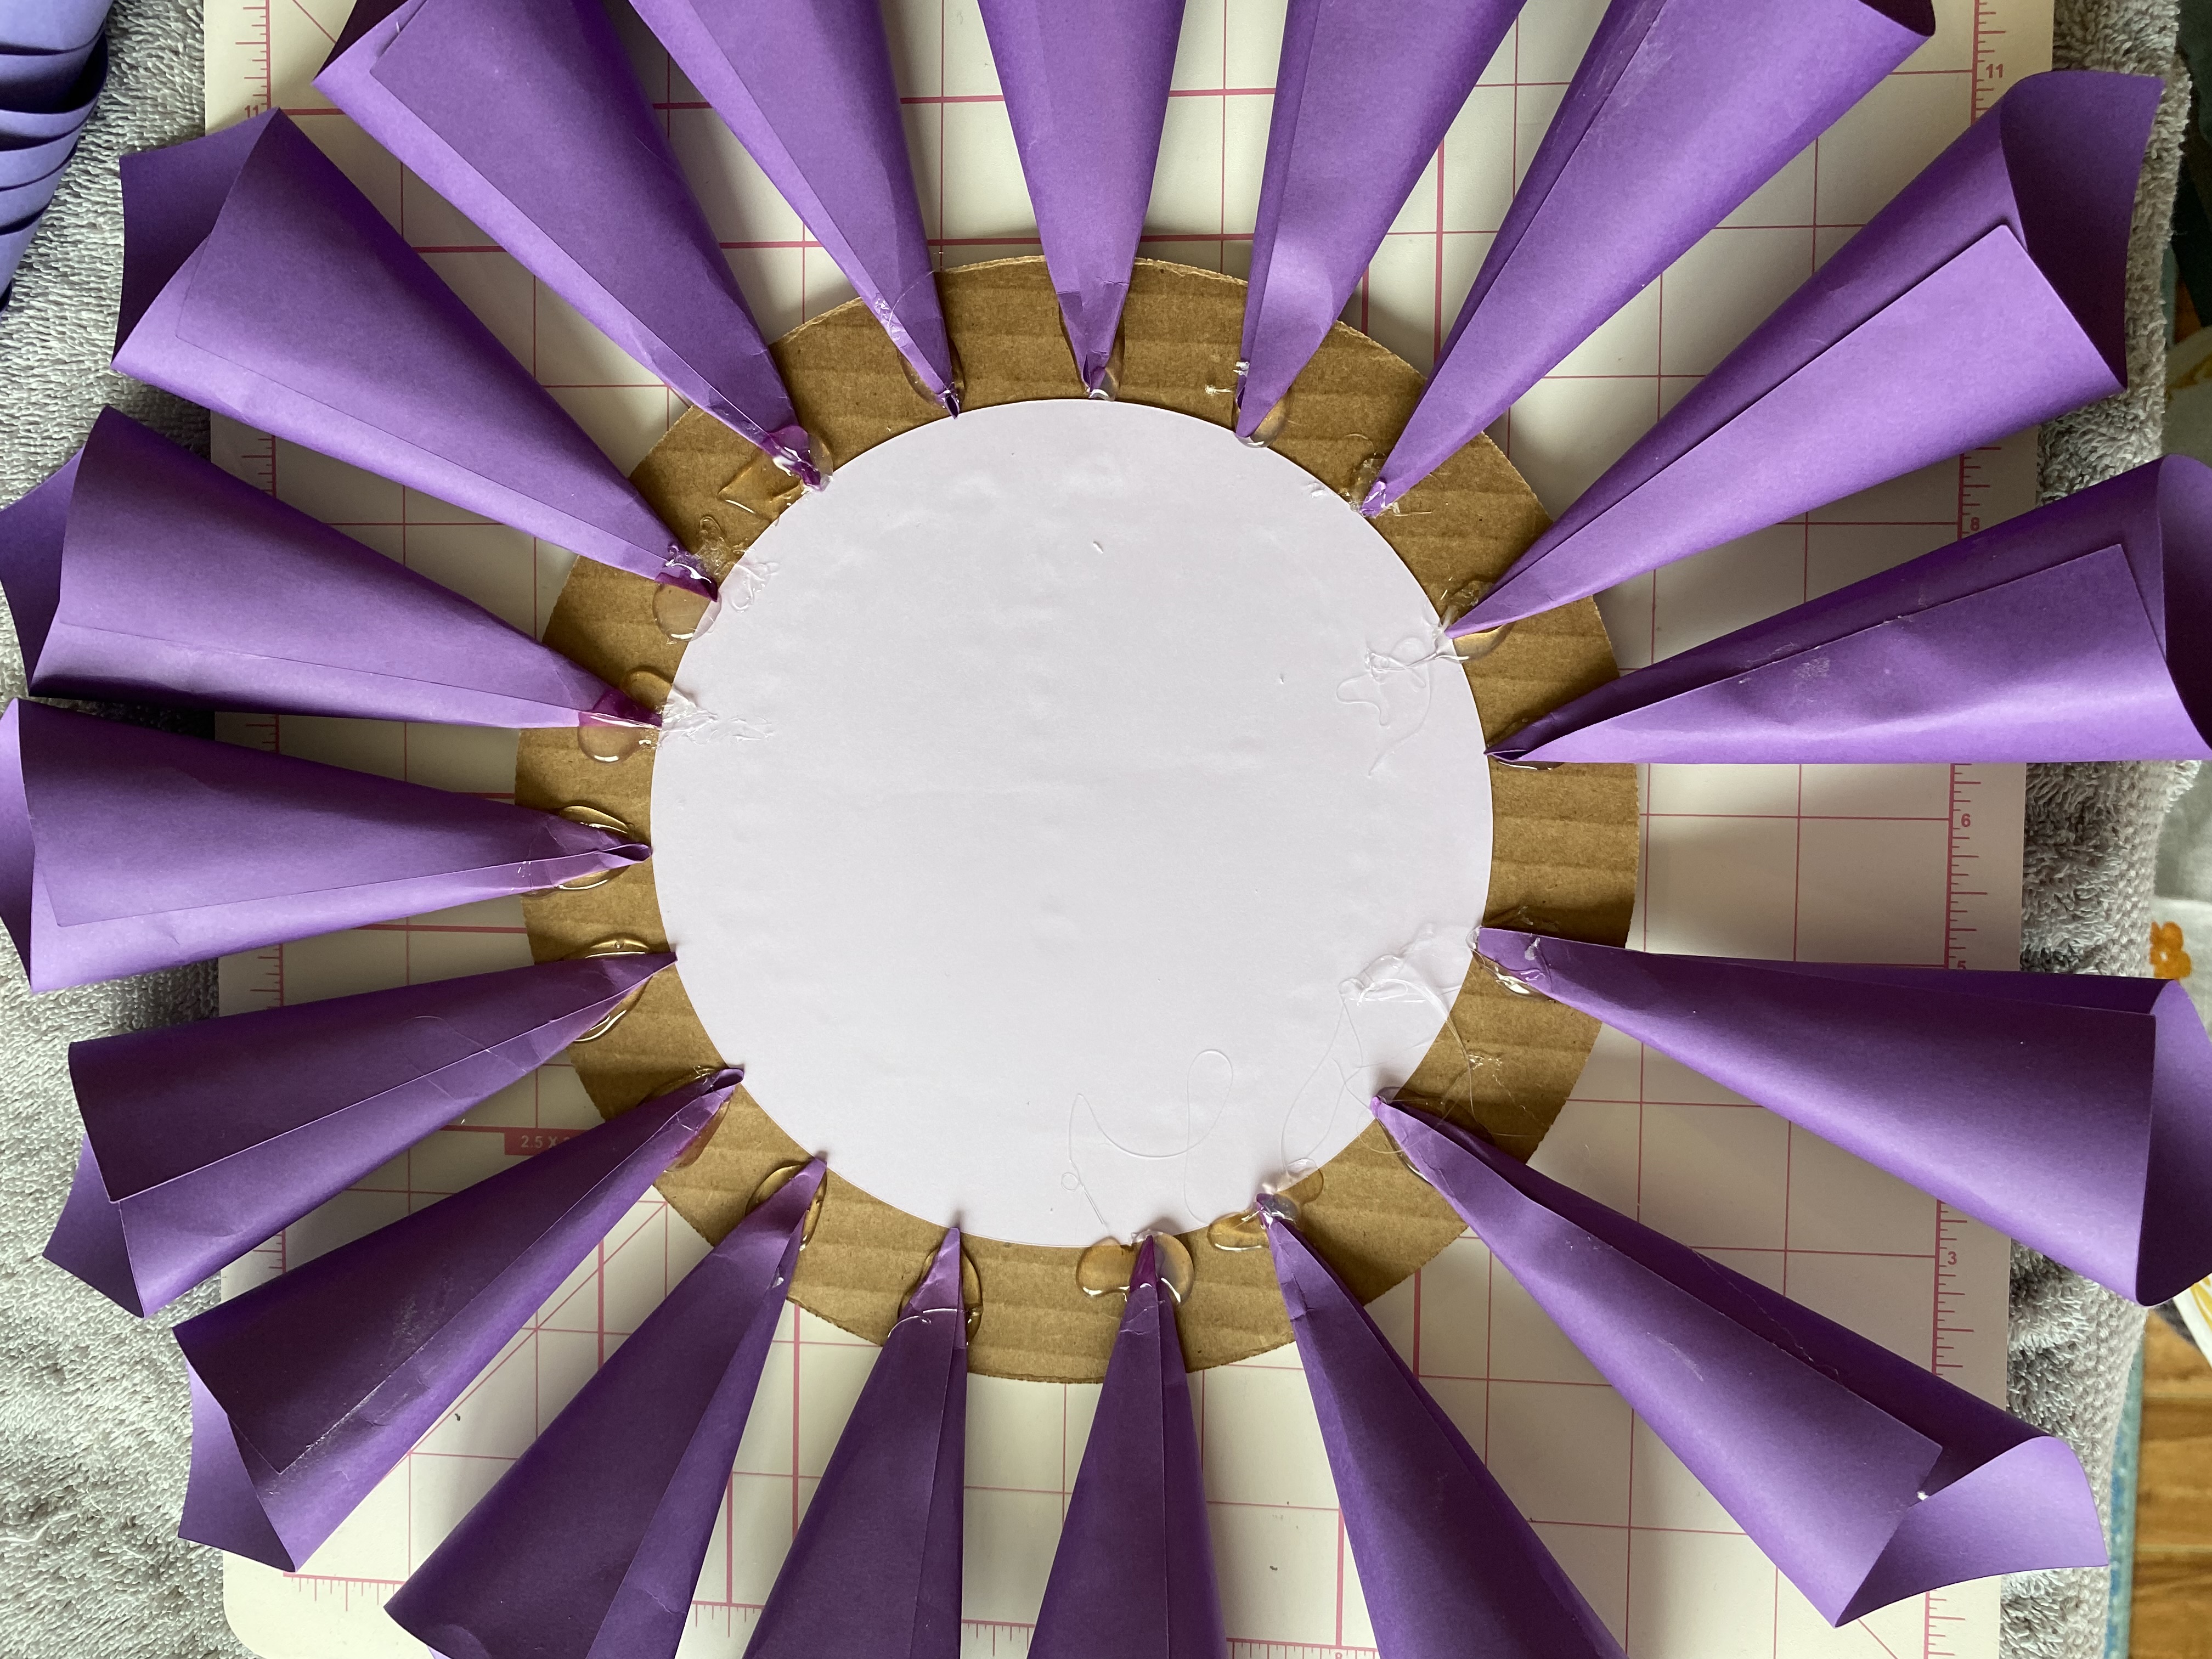
Step 4: For the second row, put the next lightest color cones in the spaces between the first row of cones. But here is where I messed up: Start the row IN about an inch from the first row so you’re in the actual cardstock circle. (I lined them up right in between the first row & even with them.) See pic below:
WRONG! Line up about 1″ in towards the center!
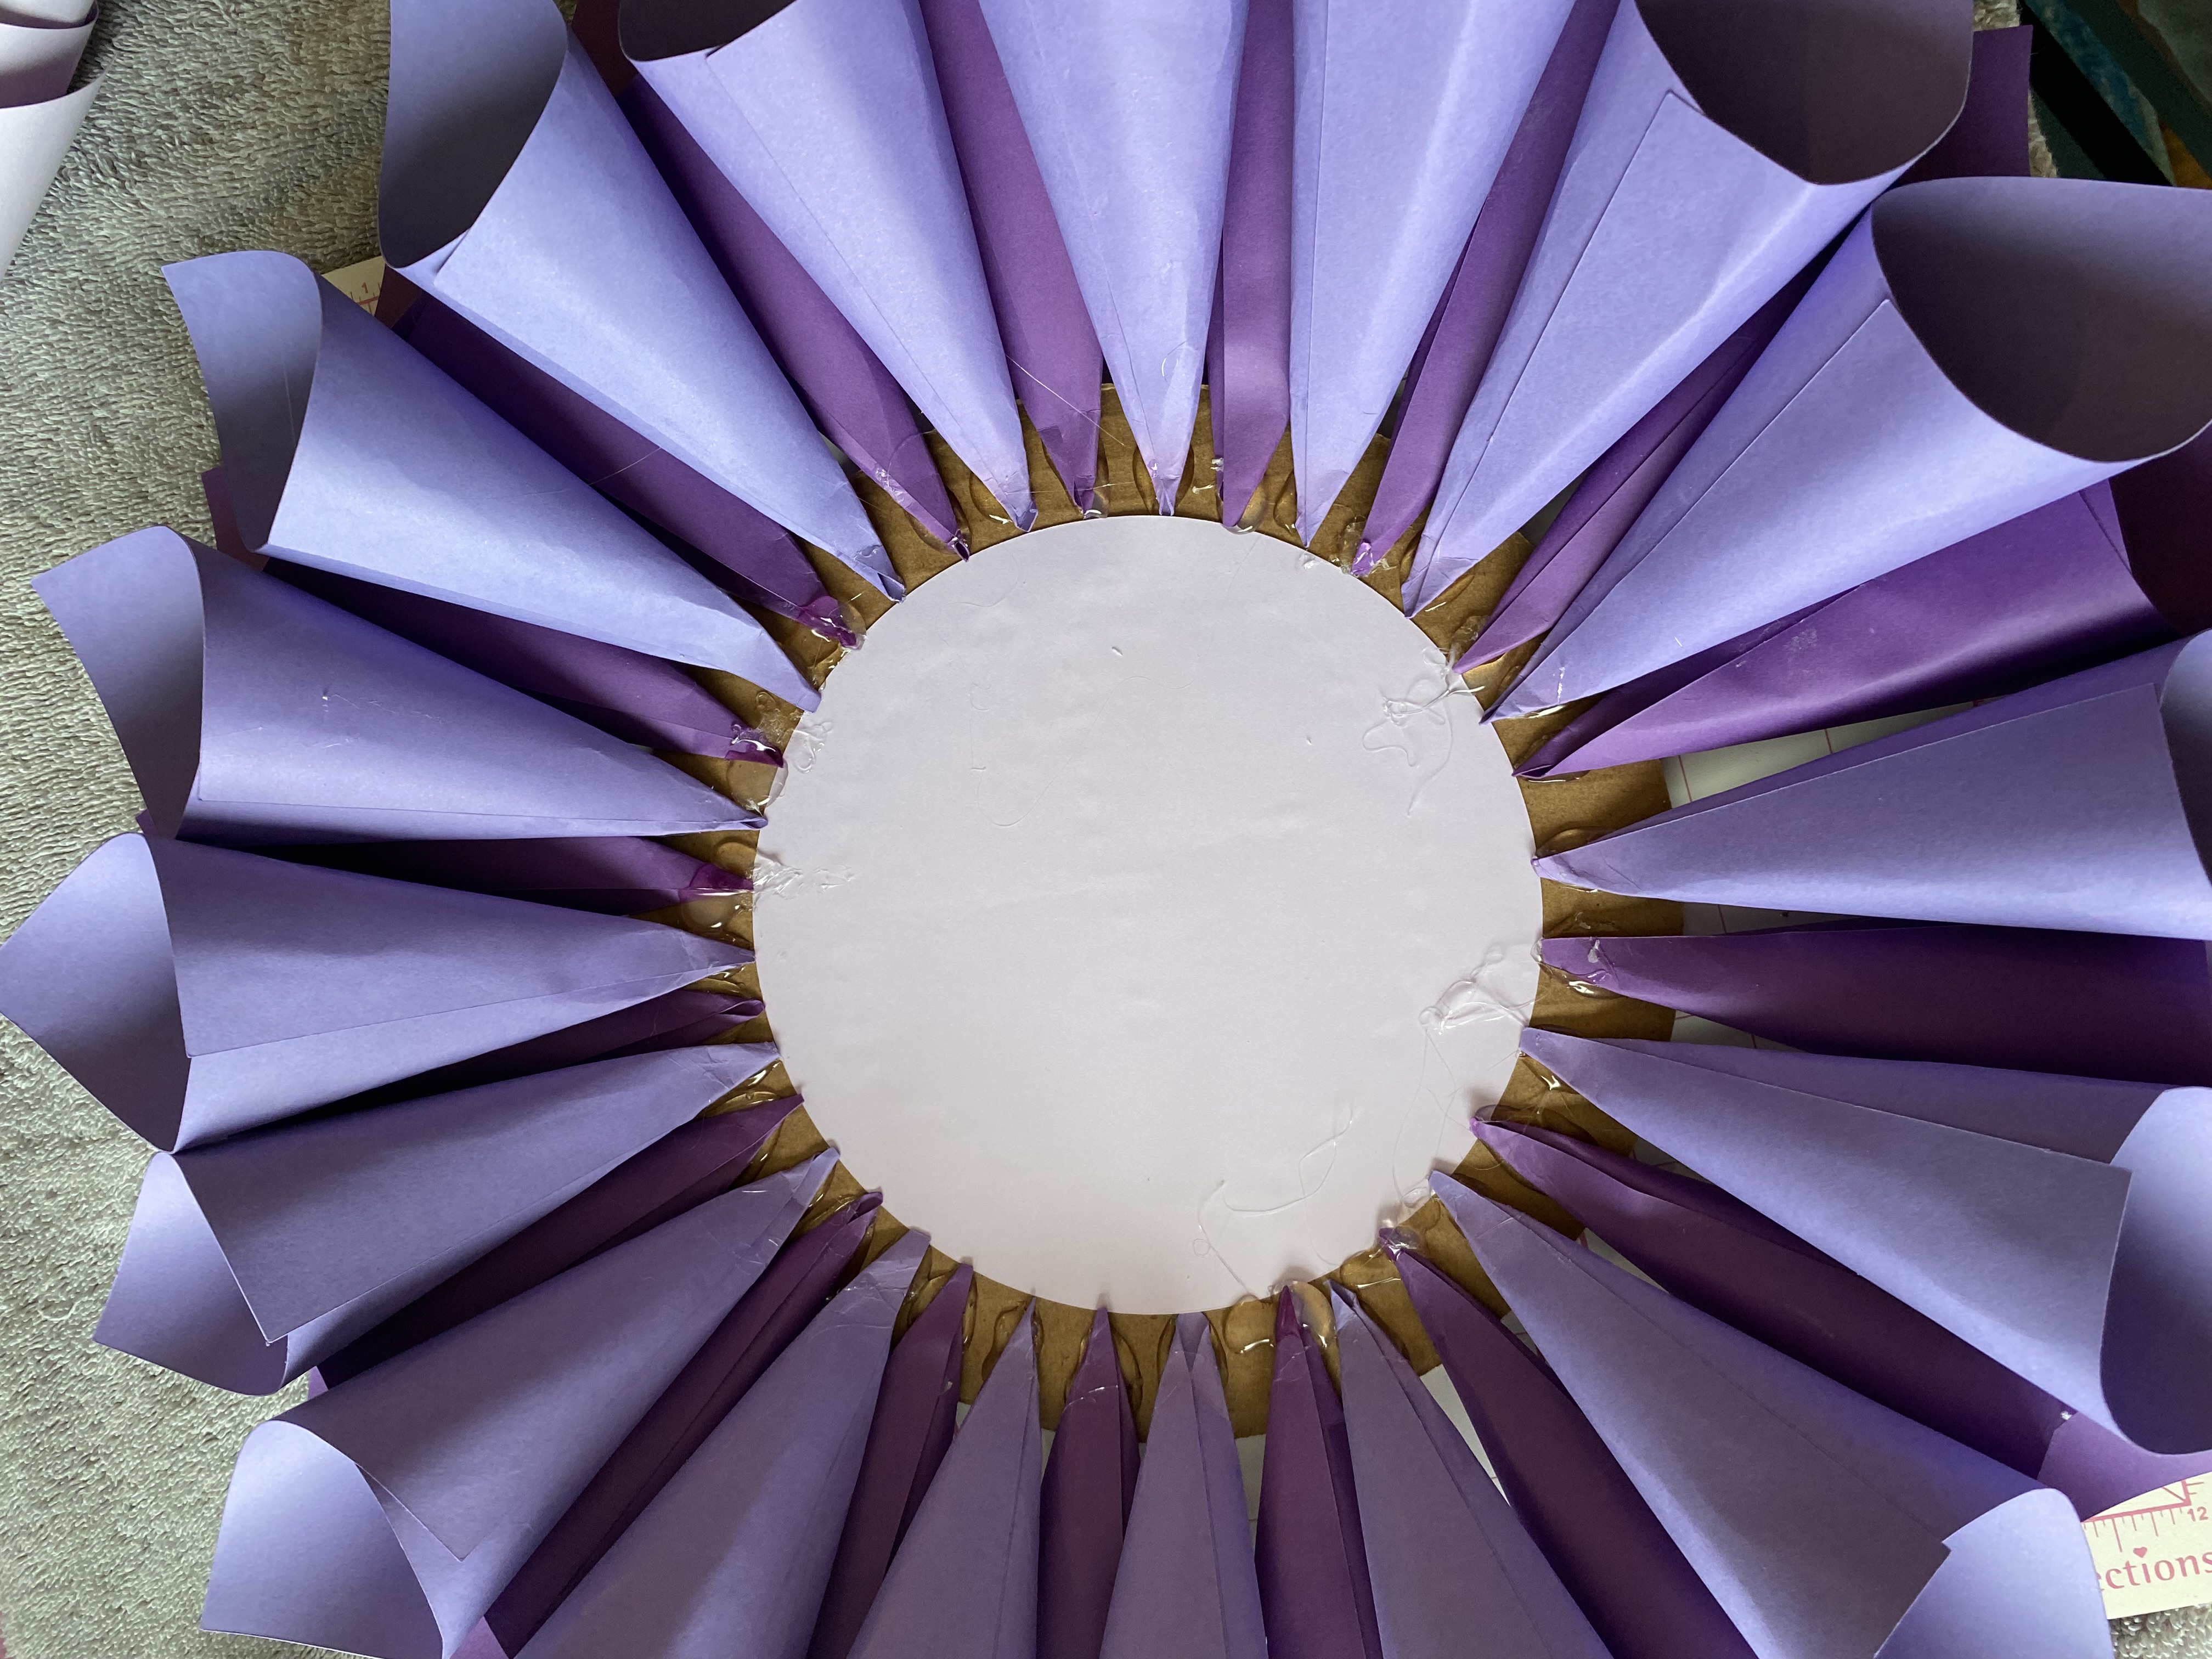
Step 5: For the third row, put the next lightest color cones in the spaces in between the cones, but go up 1″ towards center. We’re trying to create a layered effect.
Step 6: For the fourth row, put the next lightest color cones in the spaces in between the cones, but go up 1″ towards center – all 9 of them.
Step 7: This step is where you can do your own thing for the center. You can either: take 5 of the 6 – 3″ cones & glue them around inside the center & then take the last cone & glue in center of whole flower. Or you can: take 3 of the cones (Mine is different because I screwed up in the beginning.) & glue them around inside the center then take about 10″ of the ribbon, make a loop & glue ends together, then glue bottom to the center of the whole flower. Then you can embellish the ribbon however you wish. I put a flower in the center of mine. The last thing to do is turn flower over & glue some ribbon to the back, leaving a loop to hang!