3 Ways to Make a Mug With the Cricut Mug Press
Guess what guys! I just purchased the Cricut Mug Press & I’m so excited! It’s been over a year since it came out, you say? I wasn’t sure that I would make enough mugs for it to be worth the money. Since I’m addicted to everything else “Cricut”, I thought I’d give it a try . I’m so glad I did! I’ve been making the cutest mugs & I can’t wait to show you. It is so simple to use! Let me show you 3 ways to make a mug with the Cricut mug press. You do need a Cricut cutting machine to work with the Cricut mug press.
About the Cricut Mug Press
First let me tell you a little bit about the Cricut mug press. It’s a mug shaped version of a heat press. It wraps around the mug & heats up the Infusible Ink designs. You can use the Infusible ink sheets or Infusible ink markers. Your mugs need to have the special polyurethane-coat on them (just like sublimation mugs). Remember, Infusible ink will never peel or flake off as it becomes one with the mug. They are microwave & dishwasher safe, yay!
Step-by-Step Instructions
Let’s look at Design Space & I’ll show you the first way you can make a design for your Cricut mug press. I’ll go through the process step-by-step for the first way & then I’ll show you a couple other ways to get your design.
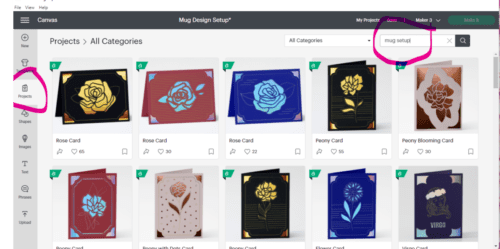
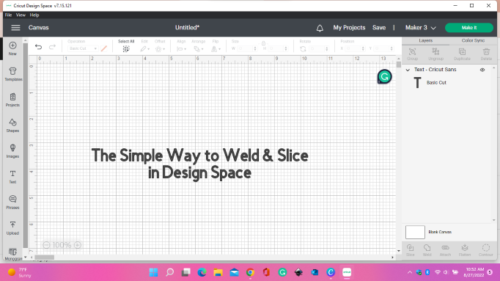
First, let’s go into Design Space. Just like in the above pic, go to ‘Projects’ on the left side of your screen. Then, at the top type in the search area “mug setup”.
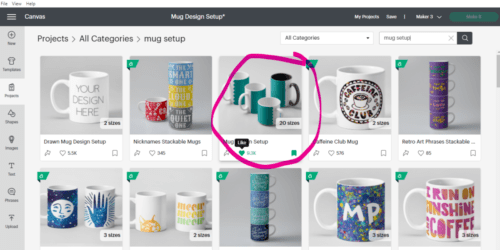
It brings you to this page. Click on the image I’ve got circled there. It says “Mug Design Setup”.
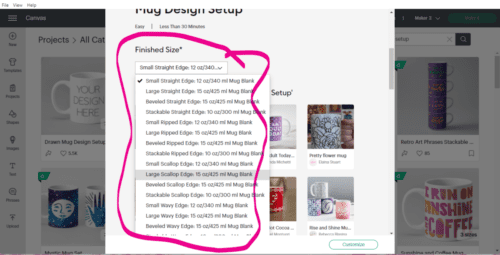
That brings you to this page. Now look for this dropdown menu here. Pick whichever size cup you have, the 12 oz. size mug or the 15 oz., & the other thing to look for is if you want your edge to be wavy, ripped, scalloped, etc. or regular is the straight edge.
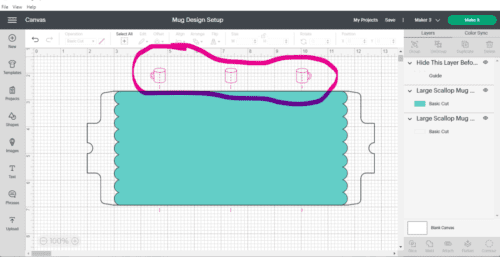
After you select your size & edge, it brings you to the canvas where it gives you the outline & the edge of what your mug will cut out as. You’ll also see the guide which I’ve circled. It helps you to put your design in the center on each side. Before you go to cut your design you will hide this guide by tapping on the eye symbol at the right.
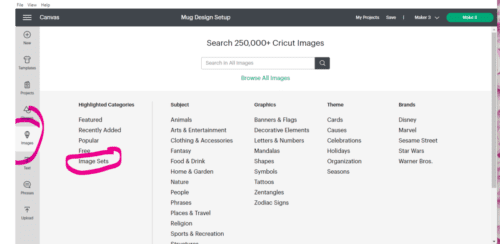
To find a design, go to ‘images’ on the left & when this screen comes up, click on ‘image sets’.
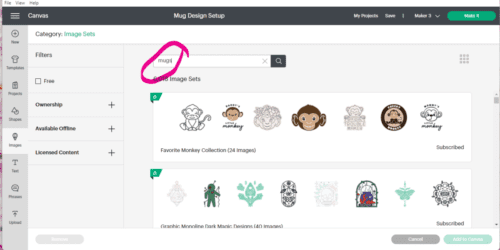
After clicking on ‘image sets’ you’ll see this screen. At the top, in the search area, type in “mugs”.
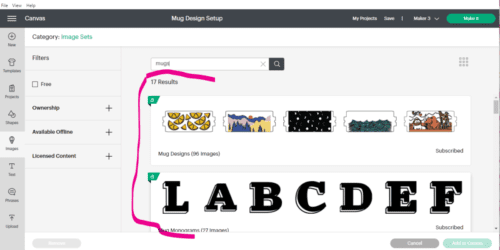
You will then see these options. The first way we’re doing this is by picking an image. I’m making my mug for my mom & her first initial is “C” so I’m going to scroll down until I find a monogram I like.
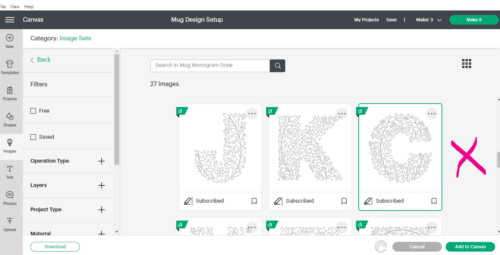
I found this cute one with the vines running through it. So I’m choosing this.
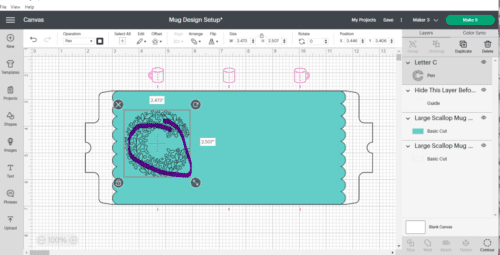
After I chose the “C”, it brings you back to the canvas. Here is when you need to make it the size you want & then center it horizontally. When you center it vertically, you have the guide to help you. Once you get it to where you like it, duplicate your image.
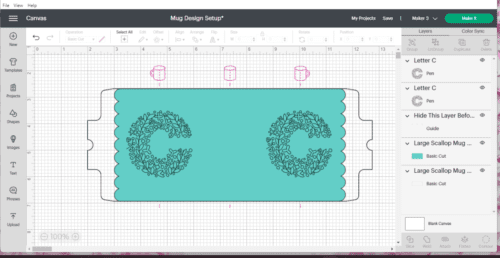
Center that one vertically with your guide. Now to center horizontally & to make sure the images are aligned with each other, click on the first image & holding down your shift button click on the other. Go up to align & center at the “align at bottom”.
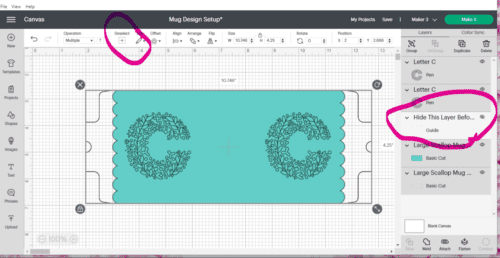
If everything looks like you want it, this is where you ‘hide’ that guide. Then click on “select all” & then “attach”. You are ready to “make it”!
Application of Infusible Ink
You want to cut a 4.5″ x 12″ piece of infusible ink sheet in your choice of color. (Cricut does make some sheets now that are the exact size you need for the mugs.) Put your infusible sheet ink-side up on your Cricut standard (green) mat. Make sure to MIRROR your image also. After cutting, weed your design.
Now you’re ready to put the sheet on the mug! Don’t worry if you have to undo & restick a few times to get it centered, but you’ll get the hang of it quickly. Just remember a couple things (known from my own mistakes!) the inked side goes in so the ink touches the mug. When you go to apply you must have it face up! I did it upside down! The other thing, before you apply to a mug, make sure you mirrored the design. Again, I didn’t do that either! My first 2 mugs were not cool & it’s not like the mugs are cheap! So….
Process of the Mug Press
To warm up the heat press push the button on the top 1 time. It takes a few minutes to warm up, but it’ll beep & the light will turn green when it’s ready. Slowly & carefully put the mug into the heating area (make sure the lever is up). Before pushing the lever down, make sure both edges of the design are covered within the heating area. Sometimes just putting the handle in the middle doesn’t always work. Another mistake I made! Geez! When you’re ready just push the lever down. It takes a few minutes & the lights on the top will show you the progress it’s making. After a few minutes, it will beep 3 separate times then it will beep 3 times in a row when the mug is complete. Take the mug out very carefully because it’s so hot. Set it on a Cricut heat press mat or something that’s heat resistance. Once it’s cool in about 15-20 mins. unwrap the infusible ink sheet & see the beautiful creation you made!!
Now that we’ve gone thru the step-by-step process let me show you two more ways you can make your mugs.
Second Way to do a Mug
A lot of this is the same as above so I’ll shorten my words here, but if you forget what I’m talking about just go back up top & look at instructions & pics.
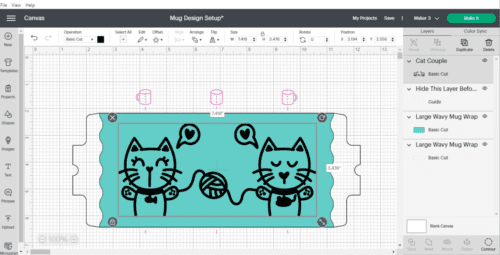
In the beginning, find the “mug setup” & choose your mug size. It takes you to the canvas with your outline & guide. Go to ‘images’ & then ‘images sets’ & type in “mugs” in search area. Scroll down a little till you see “Mug Favorite Things”. Find the cats with the yarn (you can choose a different one if you don’t have a cat lover😁) & add to the canvas. Make sure you pick the design in size small or large to match your mug size. Notice that everything is already made for you in this set of images. This is the easiest way to make a quick mug! They’ve done the placement & all you have to do is center it then ‘attach’. Remember to ‘hide the guide’ before you click “make it”. So you cut it out, weed & apply just like I’ve shown you above.
Third Way to do a Mug
The third way I want to show you is with infusible ink sheets & infusible ink pens/markers. Yes! You can do a double press!
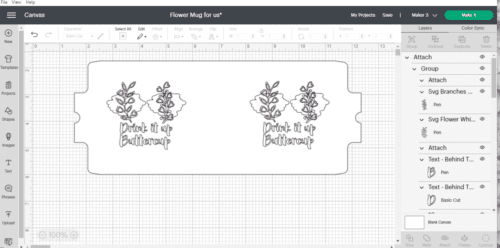
Here I have my design all ready. I did some text & a flower image with a couple of swatches behind the flowers. I’m going to use the infusible ink sheet for the background behind the flowers & the “Drink it up Buttercup”. Then I’m going to use the infusible ink pens to draw my flowers. I’m also going to try putting my logo/name on the bottom of the mug. I haven’t tried this yet so we’ll see how it goes.
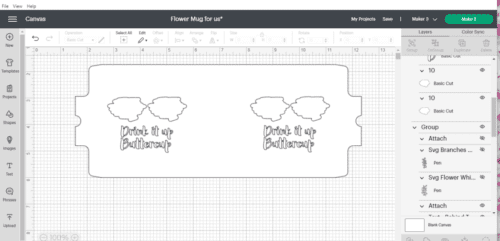
Here I hid the flowers so I can do the first press. I completed the first press & now I’m prepping for the second press.
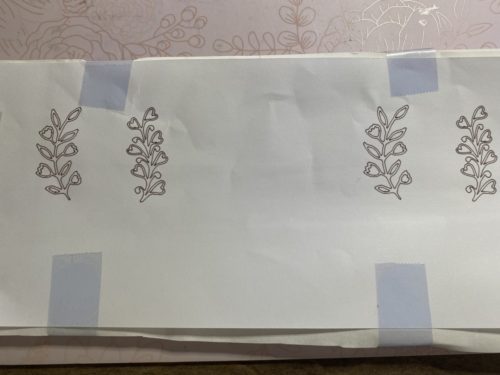
Here I had my Cricut use the Infusible ink pens to draw the flowers on laser copy paper. Now I’ve secured it with heat resistant tape to 3 pieces of butcher paper (comes with your Infusible ink sheets) I cut just slightly bigger than the design. I did the exact same thing with my logo/name for the bottom.
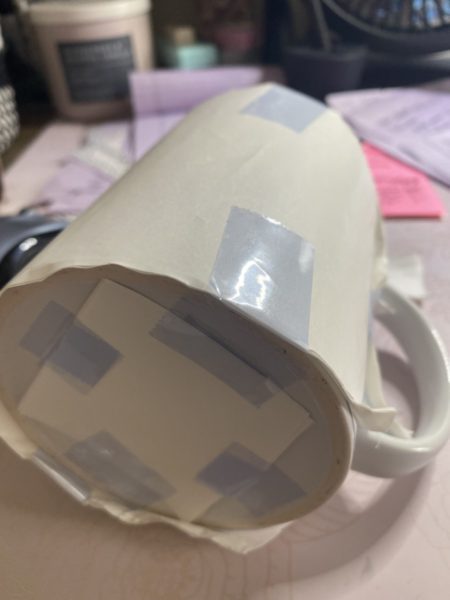
I’ve carefully lined up my design & taped this onto the mug with heat resistant tape & also did my logo/name onto the bottom.
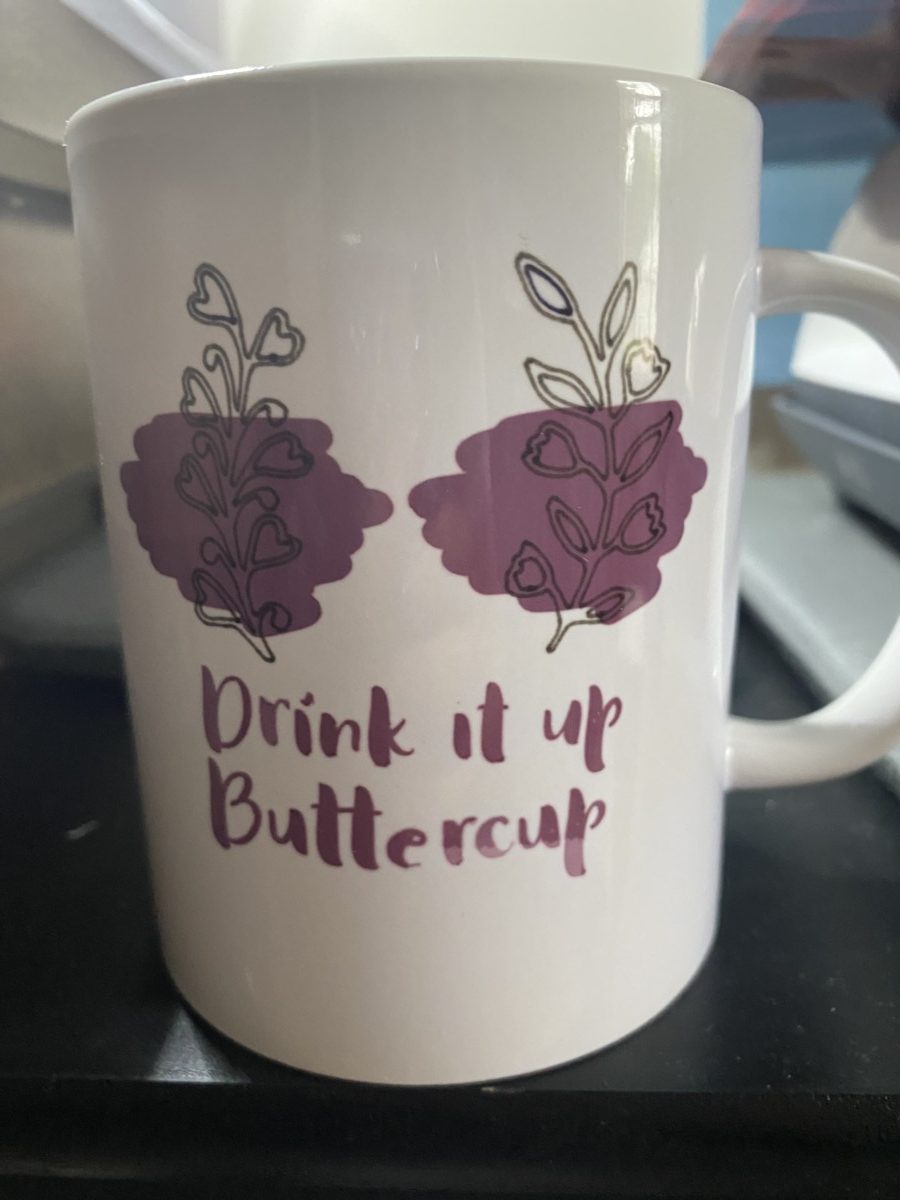
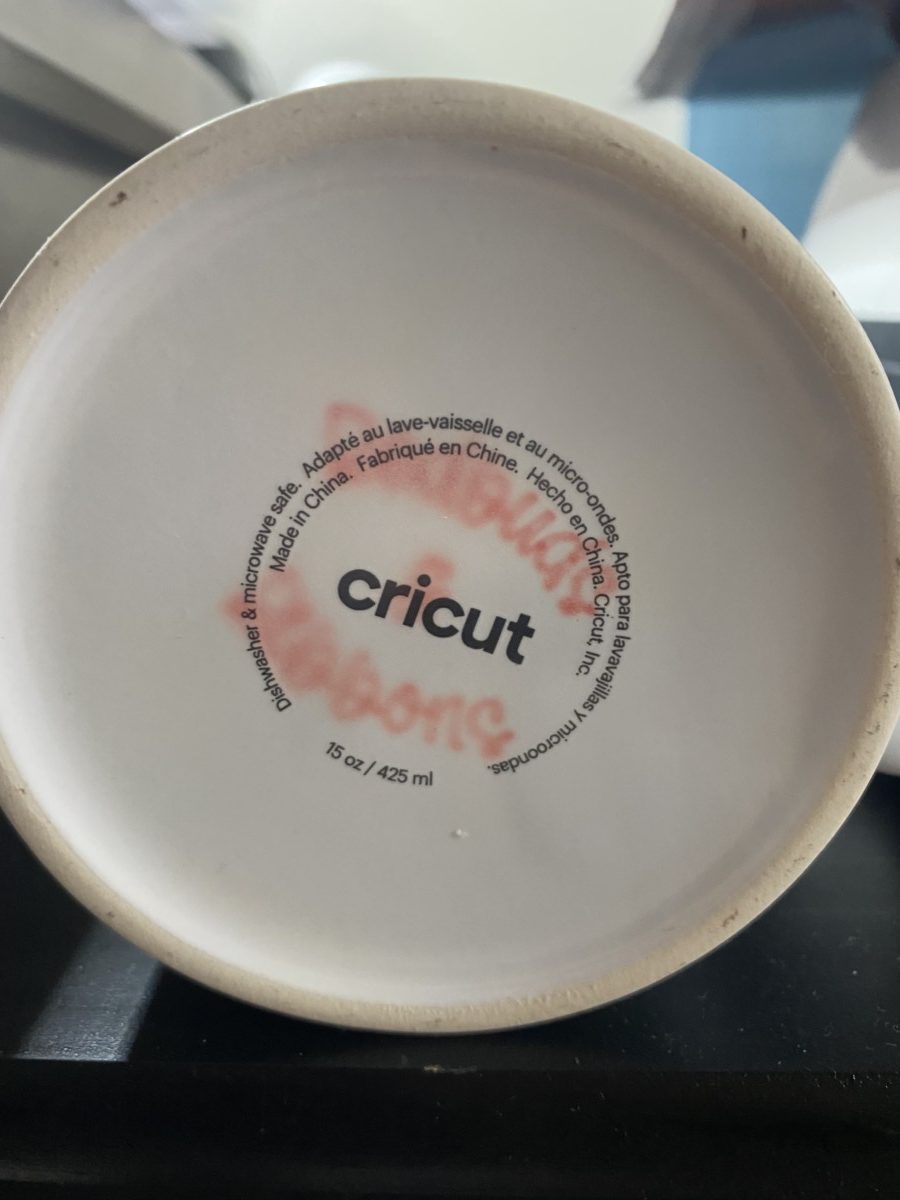
Well I believe my mug turned out beautifully & just the way I wanted it. My logo/name on the other hand did not. It looks like it started, but didn’t transfer all the way. Now that I’m thinking about it, there isn’t any pressure from the top to hold it down tightly so it can do a transfer. It’s ok though, I tried. At least we all know that doesn’t work.
I really hope this tutorial helped you get started doing a couple mugs with your new mug press. At the very least, if you weren’t sure about buying a new Cricut mug press you are sure now! Click here if you want to buy a new Cricut mug press or here if you want to buy a bundle with a Cricut mug press. 💕